A beloved hat needs a good hat rack. The hat enthusiasts won’t be satisfied with ready-to use hat racks. They need something that represent their taste and, if necessary, show their mastery of building an awesome rack in a DIY hat rack project.
Hats have become part of our culture. Almost all people around the world has their own hats, each in their own styles. Hats, from the reason, often lead us into stereotyping: French hats, cook hats, cowboy hats, and soon.
And hats are not just hats. For then you meet Beret, Fedora, Gatsby, Panama, Bowler, and several other names for hats. The more modern people have golf hat and baseball hat. We use hats to shade our head and eyes from the sun. But some other love hats so much that they start collection them.
For you who want to build your own hat rack, here we’ve compiled 25++ easy DIY hat rack plans. Let’s check them out.
1. DIY Cowboy Hat Rack
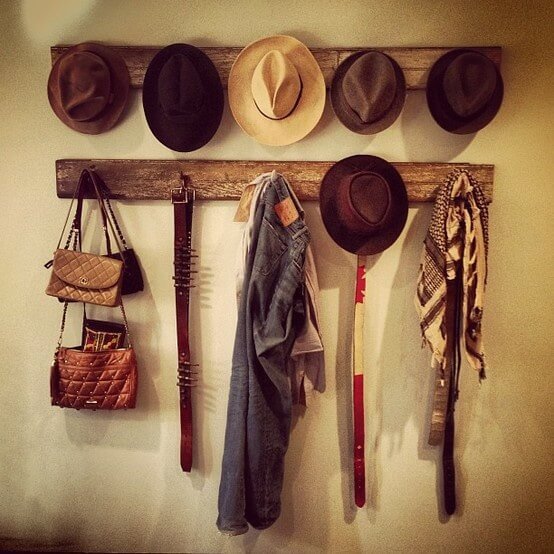
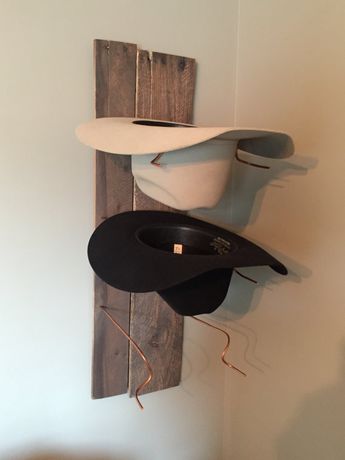 As part of a pride, a cowboy hat should has its proper place when not in use. A proper cowboy hat rack. It should easy enough for the hat to rest, and it won’t make any wrinkles or dents to the hat. If necessary, you can make it at home in a DIY project, with available materials.
Need a handy hat rack? Here’re the materials you need:
- A piece of wood plank. Reclaimed wood or even wood pallet will do.
- A length of rigid wire, find the type you often see as a pail handle.
- Several nails
Tools:
- A hammer
- Wood saw
- Driller
How to make:
- Cut the planks according to your need.
- Drill the plank side by side for the wires. See the picture.
- Insert the wire into the wall, so each of them makes U construction, with the bottom of the U at the back of the wood.
- Set the plank on the wall, vertically, and nail it onto it.
- Your cowboy hat rack is ready.
2. DIY Hat Rack for Baseball Fans
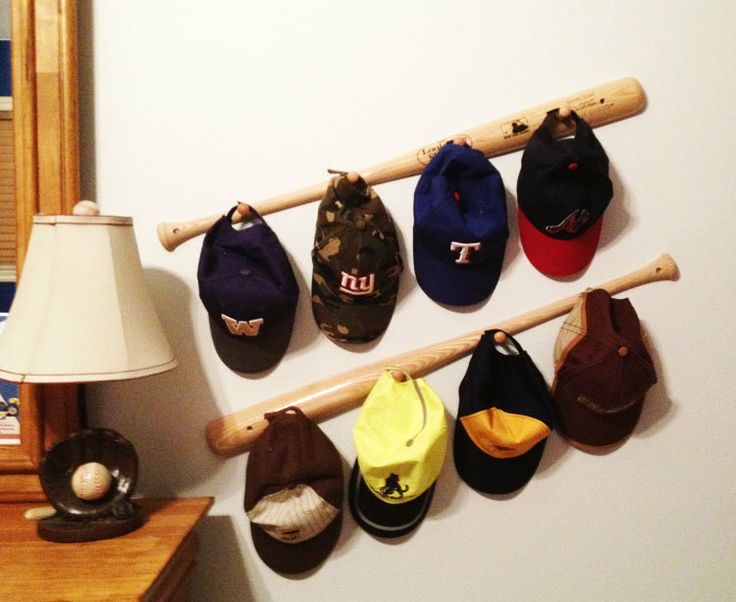 A collection of baseball hats from the favorite teams are treasure. For them, give them the right personalized hat rack. Don’t have clues for the right hat racks?
Here’s one of the awesome example, baseball hat rack with baseball bats as its main materials. See? It’s so easy to build. All you need is two baseball bats and several small sticks for the hanger parts (using drumstick tips will save your time). Drill holes along the baseball body and insert the hangers. That’s it, you have the cool baseball hat rack.
3. Minimalist Wall Wood Hat Rack
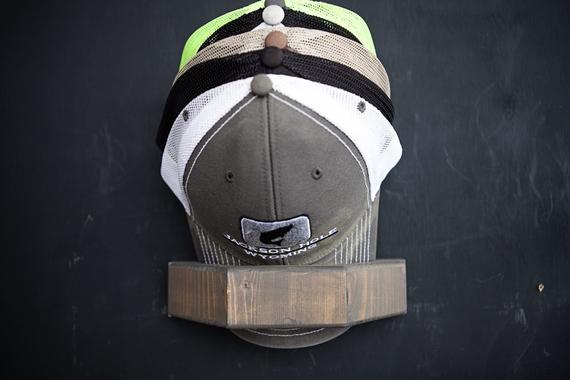 This DIY wood hat rack don’t even make you find any nails or hammers. All you need is a saw, wood glue, and a strong wall double table. The materials itself is a piece of wood planks or plywood.
If you remember then basic math form of octagonal, you’re to make a third of it, just like the picture. Once the pieces done, glue together with wood glue. Now that the rack completed, fix it on a flat wall with the wall double tape. Insert the tip of your hat onto the cavity between the rack and wall. You have your minimalist hat rack.
4. Easy Hat Rack with a Rope and Copper Pipe
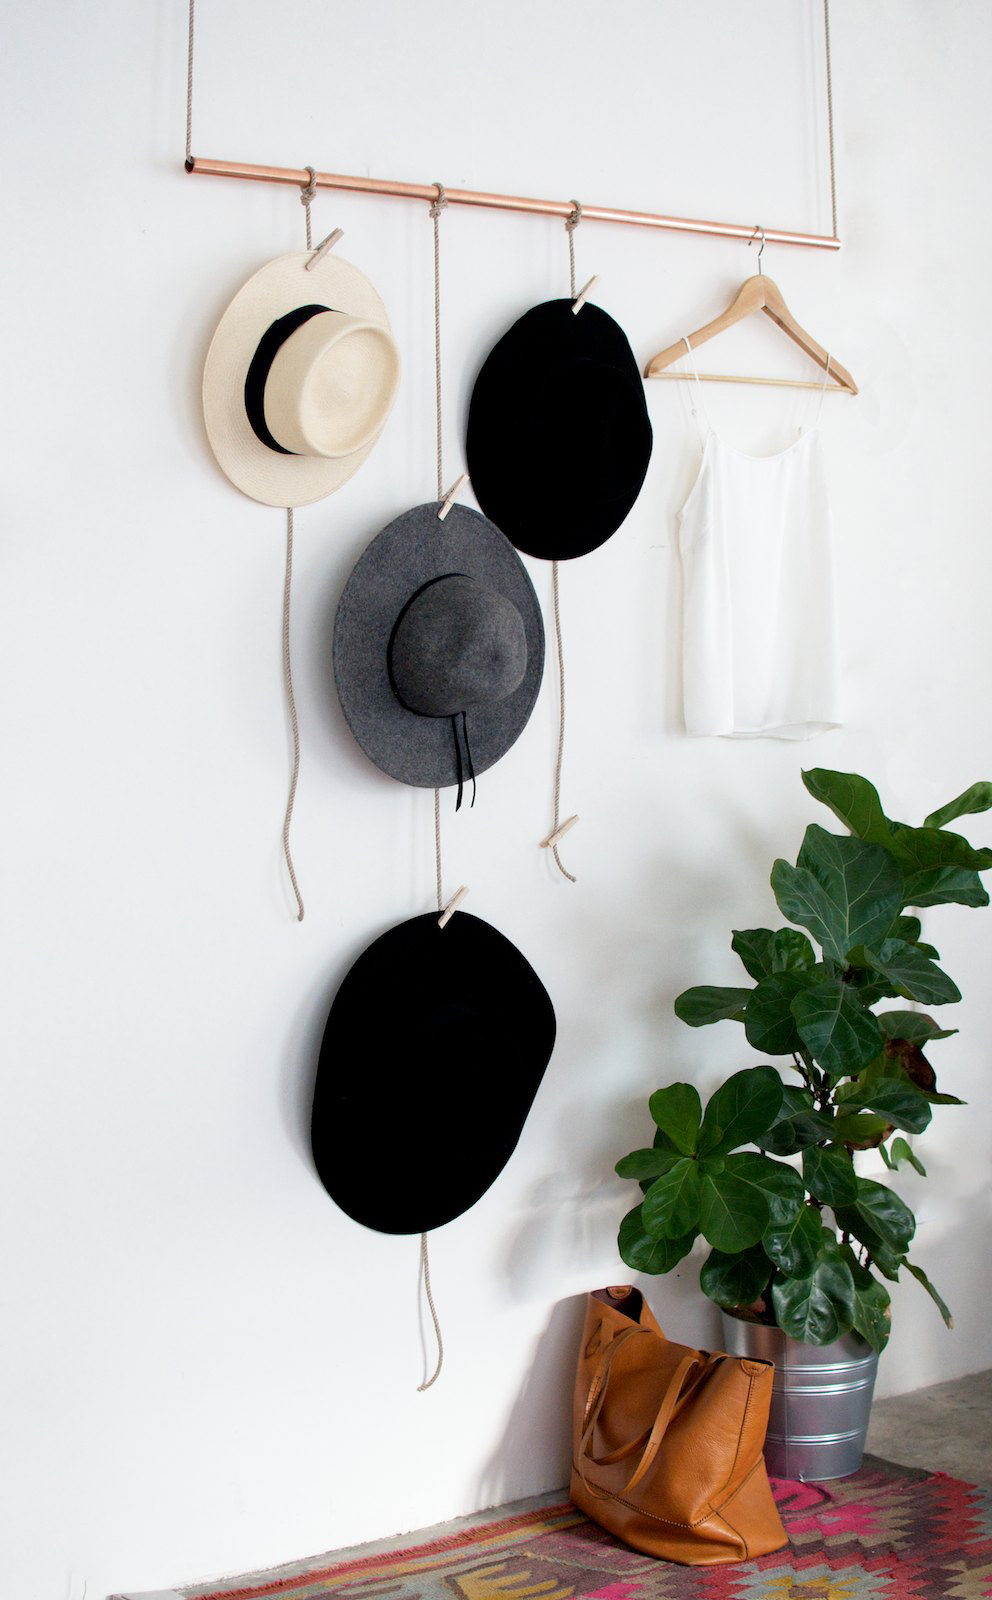 Need a contemporary hat rack for the new apartment? Here we offer you one which should bring you joy and pride, and which will not bring you tears nor sweat as you can always make it yourself and success. You don’t even need some instructibles style of steps to do it.
Just see the picture. What you need are a length of shiny copper pipes, ropes, and some pegs. The pipes is the support structure of the rack. Ropes will be the hangers. And the pegs clip the hat on the hanger. Simple. Right?
5. Chain and Hooks as a Cheap Chic Hat Rack
 Don’t want to do any carpentry jobs for the DIY hat rack? Still in line with the previous inspiration, this hat rack plan also won’t let you sweat. All you need is chain and hooks. Nail one ends of the chain on a wall, set the other ends on the opposite wall. Hang the hooks along the chain. Now your hat rack is ready.
6. Wood-Railroad Spikes Hat Rack
 Now it’s time for a little sweating and sawing. For now you want to make a multipurpose rack where, not only for hats, you can hang jackets or other outfits. As you don’t want something ordinary for the rack, we offer you a rack with railroad spikes.
As you see here, you have a simple design. It consist of inverted L-shaped woods with the mean spikes serving as the hangers. Like to make it yourself? We sure you can do that.
7. Vertical Tree Trunk DIY Hat Rack
 Help Mother Nature, recycle all the stuff that she left for us. For the first step, make use of the abandoned tree trunk on the yard, turn it into a hat rack. Need an inspiration? See the following picture.
This vertical hat rack use a tree trunk as the main structure. It sits on a square base, you can make it from concrete for the overall rack stability. Provided you have the raw materials, it practically cost you a thing to build this beauty.
8. Pegboard Multipurpose Wooden Hat Rack
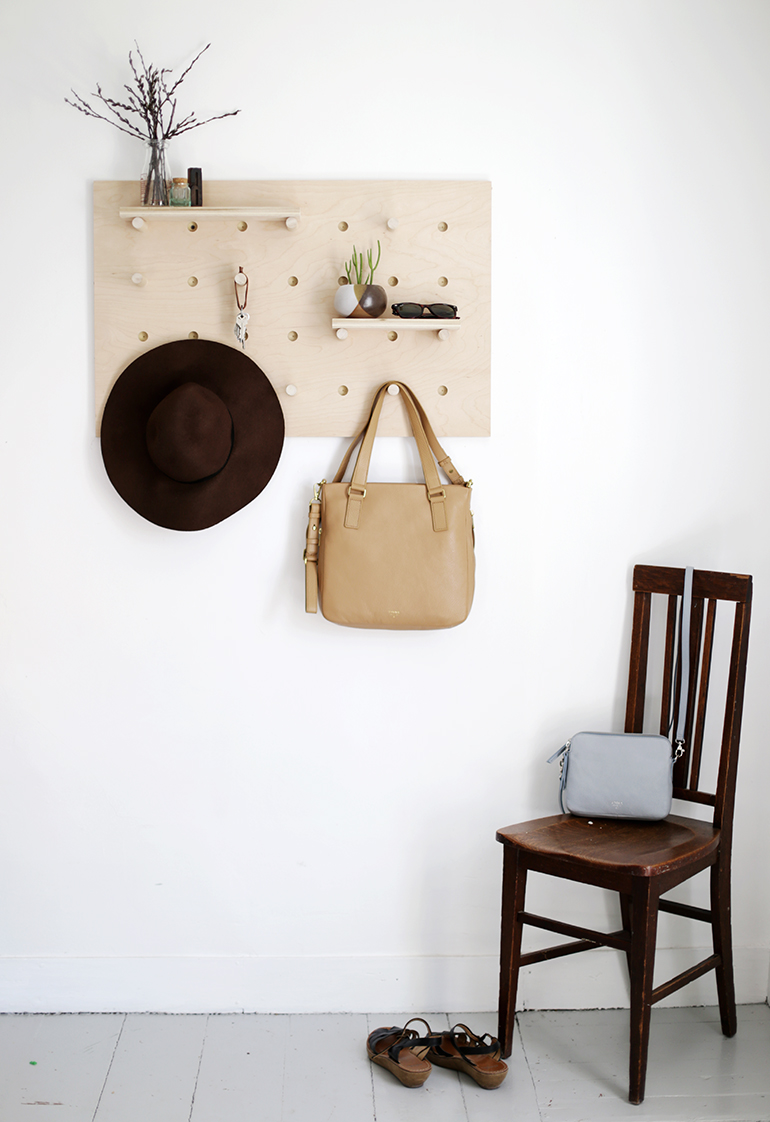 All DIY enthusiast know that Pegboards won’t let them down in any of their projects. The boards are so versatile that they are almost used in any home-related DIY projects.
And if now you want to have a quick and easy DIY hat rack project, a pegboard can solve your problem. All you need is a ready-for-use pegboard. Hang it on the right spot on the wall, and you have the hat rack. You even can improvise with the pegboard, by adding shelves on it –making it a multipurpose hat rack.
9. A Three branch for Rustic Hat Rack
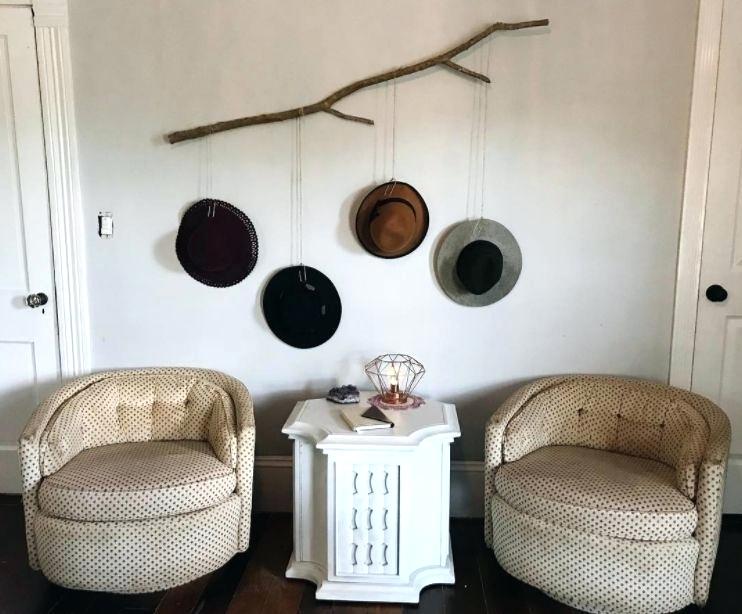 You have a tree trunk hat rack project previously. Now, along with the trunk, you can use the branch as a hat rack as well. Just like several other DIY hat rack in this list, you won’t have to use any advanced carpentry tools.
For this project, find the right branch from the garden. Find one from solid woods and has dried out completely. Trim the ends, and put in on the wall, like the one pictured here. Along the branch, fix nails for the rope to hang. At the ends of each rope, you have clips or pegs. Those are for the hats.
10. Trunks and branches 3D Hat Rack Project
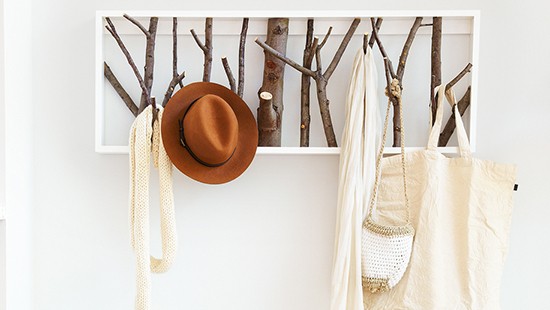 The picture here looks like you have hung the fedora and bags on tree branches. The trees are outside, with the branches lunge into the living room. But that’s not the case. All the tree wooden stuff are indoor, they enclosed in a window-like frame. Those elements combines into a kind of a 3D hat rack. It’s cool and awesome.
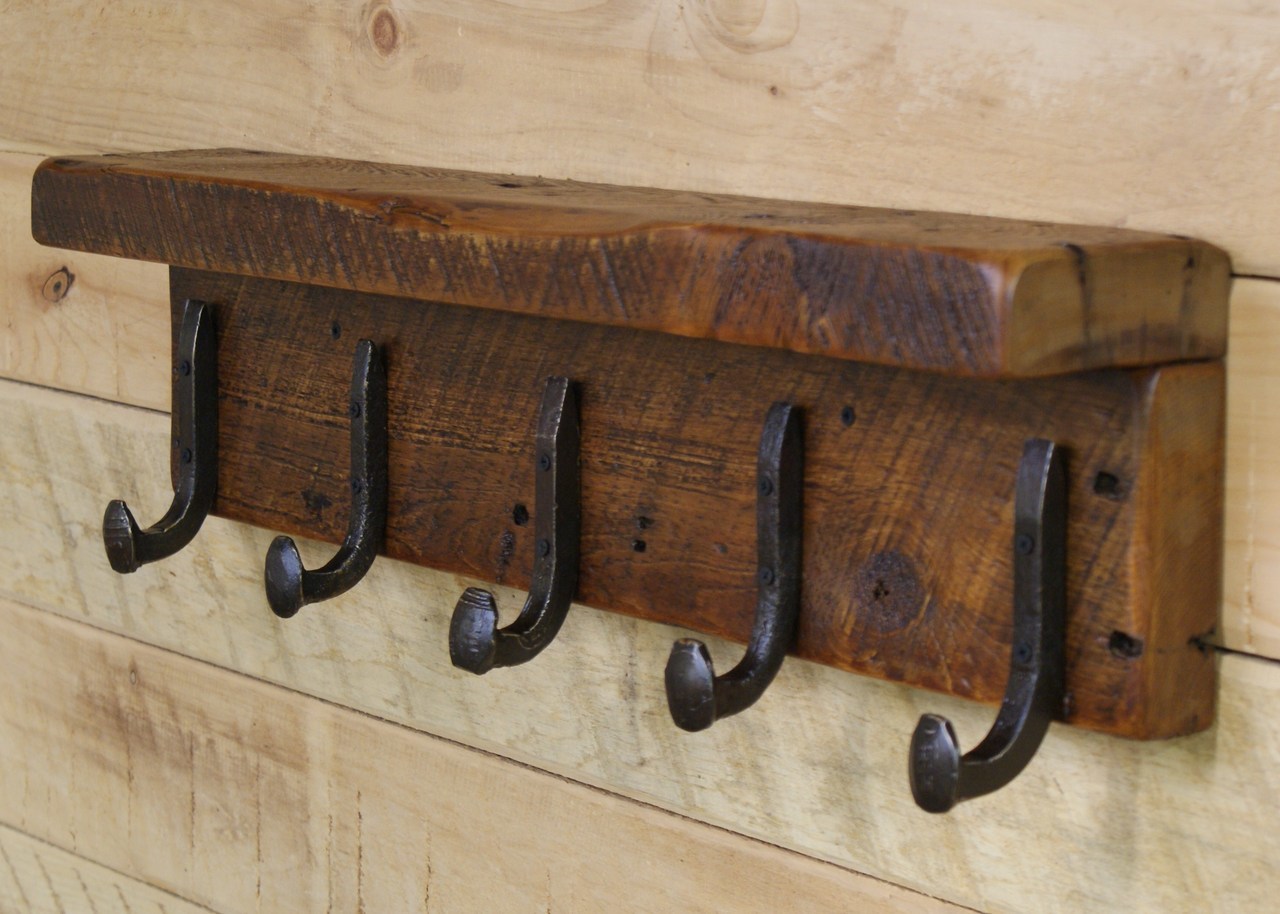
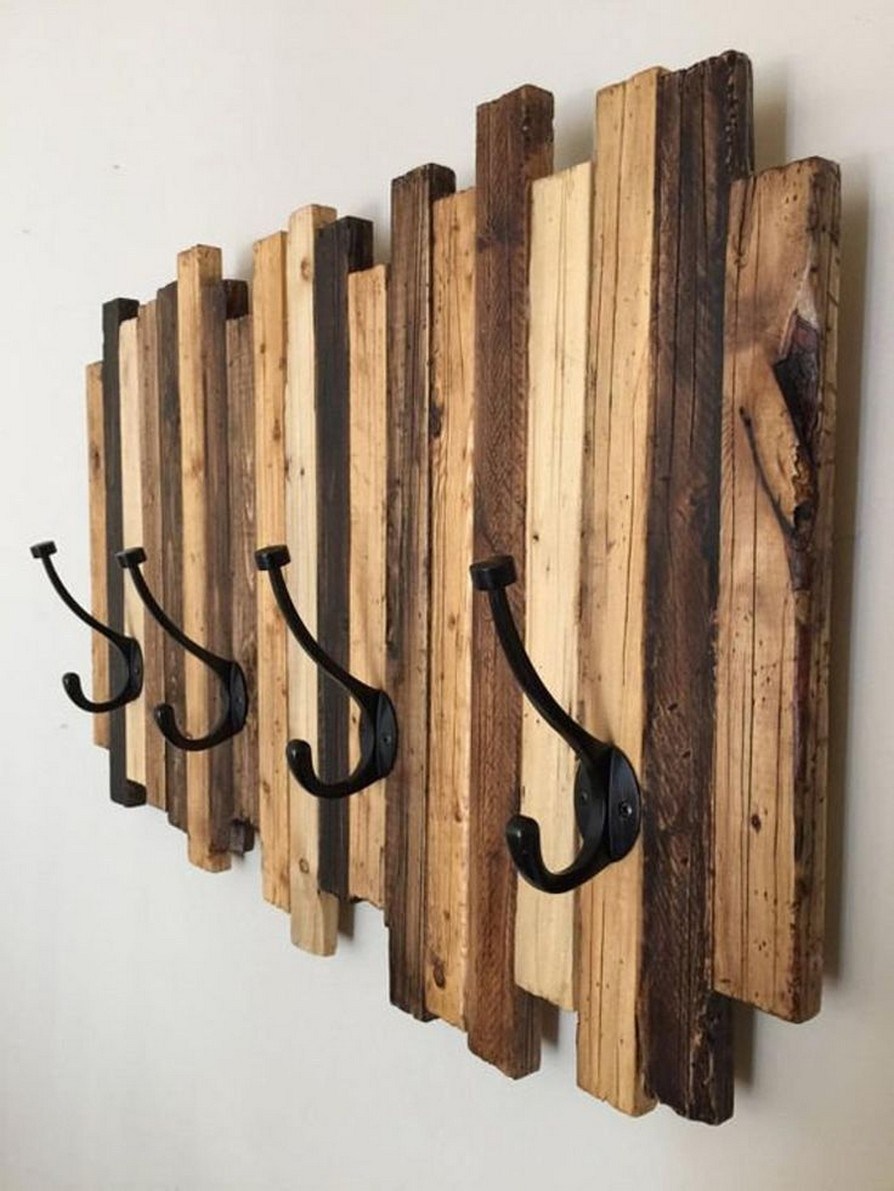
11. Rustic Hat Rack from Reclaimed Wood
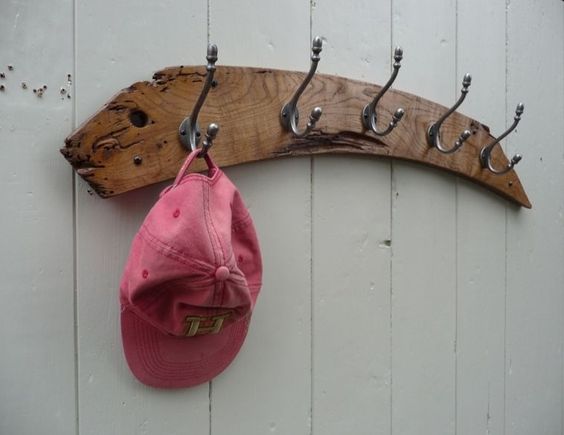 All things around us has their own beauties. You even can find it in some abandoned or unused stuff, like this piece of reclaimed wood. It’s your duty to reveal the characters. As about the piece of abandoned wood, you can turn it into a rustic hat rack.
You don’t need to paint or smooth the unevenness of its structure. Just let the wood as it is, it’s thicken the rustic effects. As its hooks, find the classic types, like the example. Your rustic hat rack is ready for your hats and for the rustic vibes on your bed room wall.
12. Multi Purpose Acrylic Hat Rack
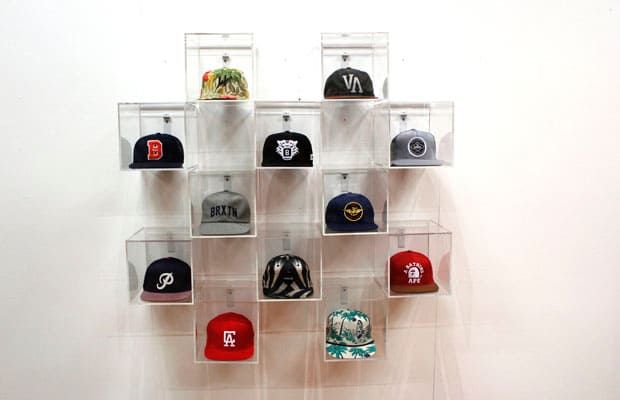 We’ve covered the regular hat rack in this list. Now we present you another DIY hat rack for your next project, a multipurpose acrylic hat rack. That’s it, you have a hat rack with storage, where you store the hats and other stuff here.
You have an open shelf rack type here. It’s made of acrylic. If you want to do it yourselves, all you need is sheets of acrylic, a saw, and multipurpose glue. From the design, we sure you can replicate the style well. It consist of several acrylic boxes sit next each other.
13. Small Industrial Hat Rack with a Shelf
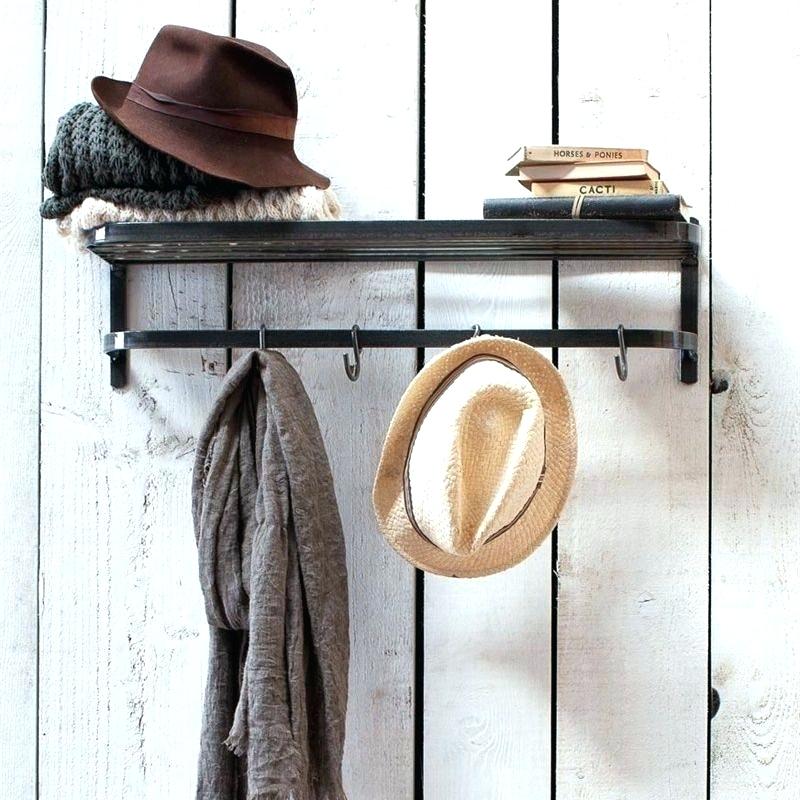 As now Industrial style is getting popular, it might be good to offer you one simple industrial hat rack to you. It’s robust and efficient. If you have the basic knowledge of metal bending and welding, this will be simple DIY project for you.
The rack can blend well with any style of your rooms, from the rustic barn styles to the contemporary Scandinavian styles. Just put it on the wall and your rooms stand out.
14. Cheap Wooden Hat Rack
 Again, you meet simple DIY hat rack. Salvaged wood structures of you old couches or headboards suit well for this project. You even only need two planks of the woods. These wall mount hat racks also almost won’t need any of carpentry skills, provided you know how to hammer nails, a little wood sawing, and fixing the wood hanger onto the wood planks.
15. Classic Metal Hat Rack with Victoria Black Finish
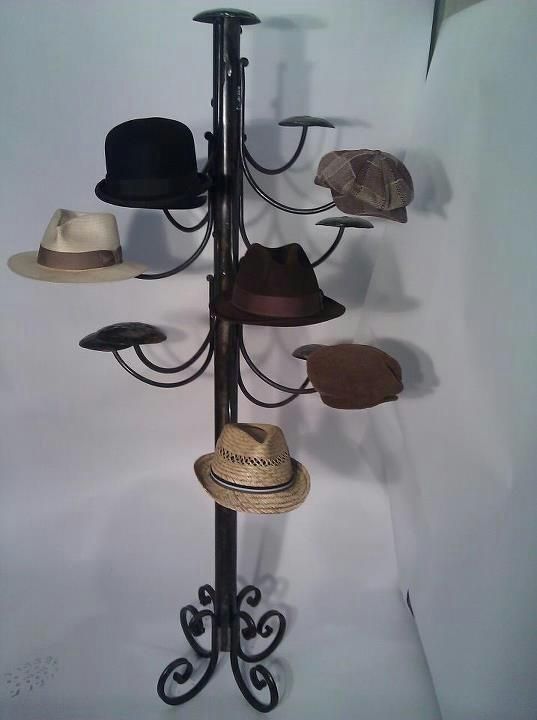 Whether you call this hat rack a classic or steampunk, you need to have one for the living room. This vertical standalone hat rack add classic characters into it. If you have one or even made one, finish the rack with tar black color, for the more classic Victorian vibes.
16. Letters Hat Rack for Contemporary Home
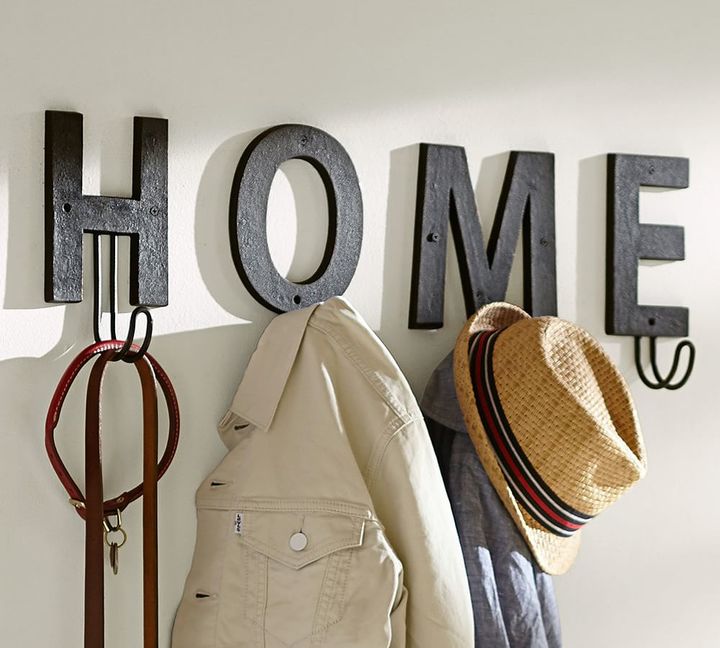 A contemporary home needs a contemporary hat rack. And you should try this letters hat rack. Whether you buy the big letters or making it yourselves, it’s up to you. Light woods or metals are good for the materials (if you want to make this rack in a DIY project).
Once completed, put hooks on each letter. Set the letters on the wall, and your contemporary hat rack is ready.
17. Ski Boards DIY Hat Racks
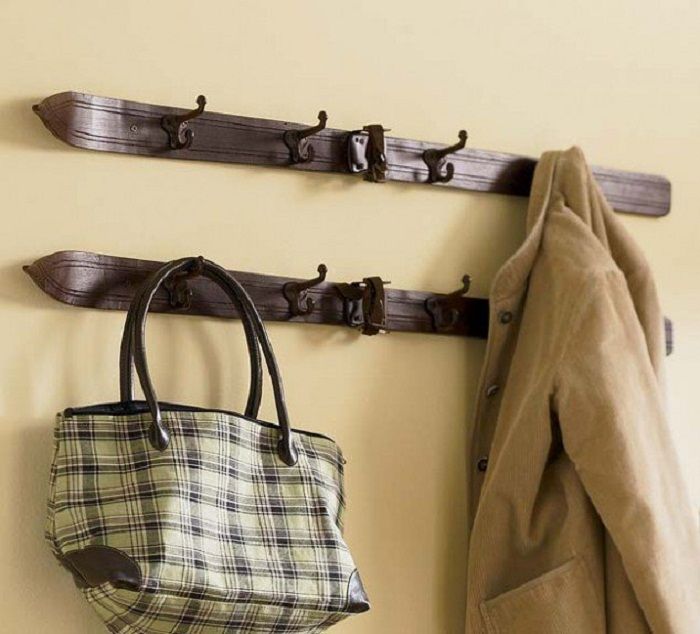 You should not let the old ski boards lie moldy in the attic. The strong and sturdy structures are too good to be let alone. Turn the boards into this vintage looking hat racks.
Once you’ve cleaned the boards, all you have to do is finding the right vintage hat holders. Antique stores provides the right holders, like the one pictured here. Now that the materials completed, do the easiest part: Assembling the materials into hat racks. It’s easy, right?
18. Simple Wire Hat Rack, Nordic Style
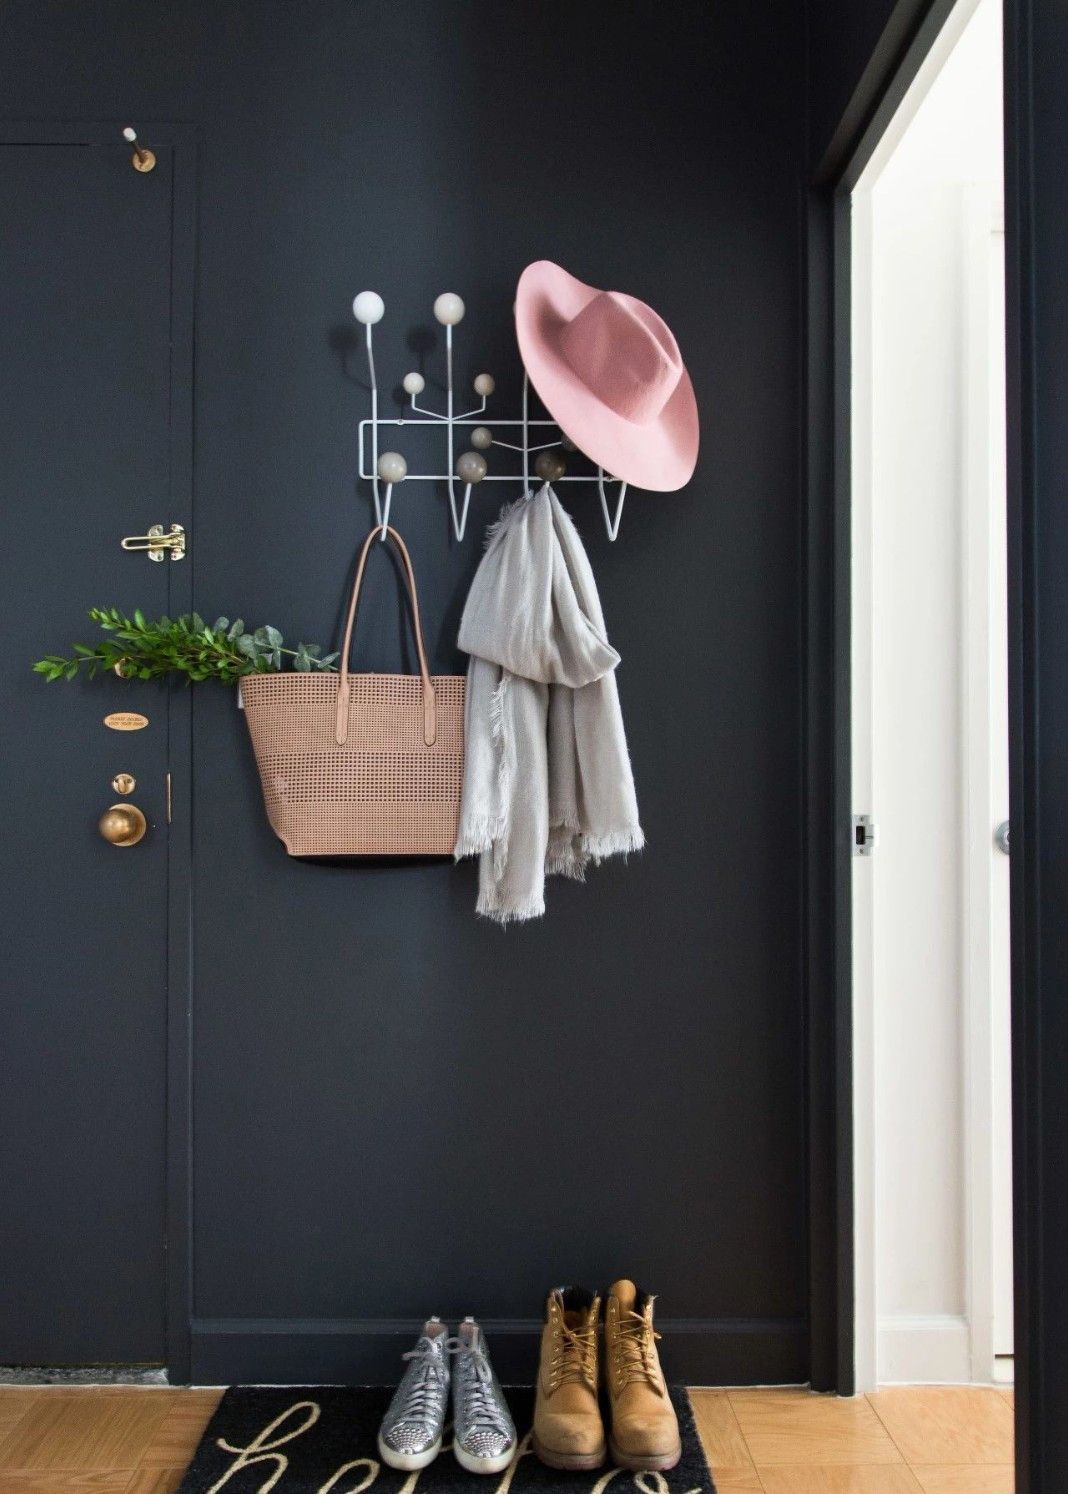 The minimalist enthusiasts know well about simple beauty. Rip all the elaborative stuff out of a thing, and you still have its naked beauty. The consideration applies well to this simple chic wire hat rack. Love to have one? If you’ve already had a Nordic living room, make it stands out with this hat rack design.
19. Shabby Chic Mirror Frame Hat Rack
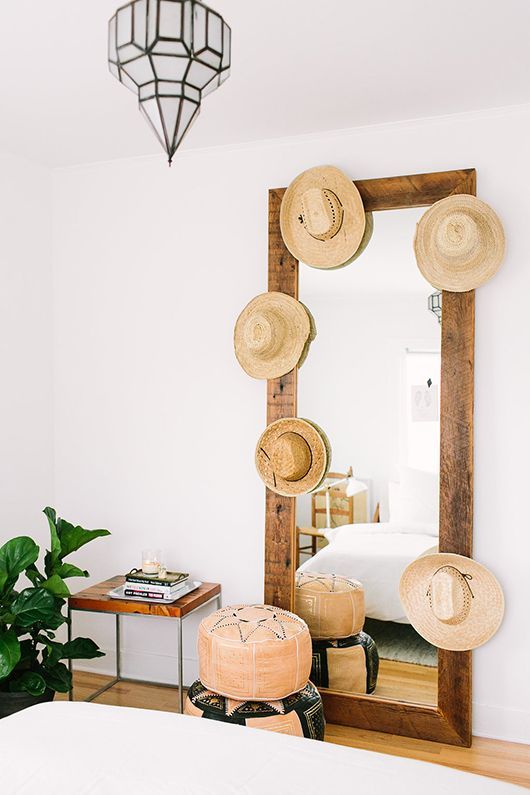 Leaning mirror is a thing in contemporary interior design. You have a gallery-like atmosphere with the setup. To add the charm, add some pegs on the frame. Yes, you can hack the frame into an easy shabby chic hat rack like this one.
20. Easy Teepee Style Vertical Hat Rack with
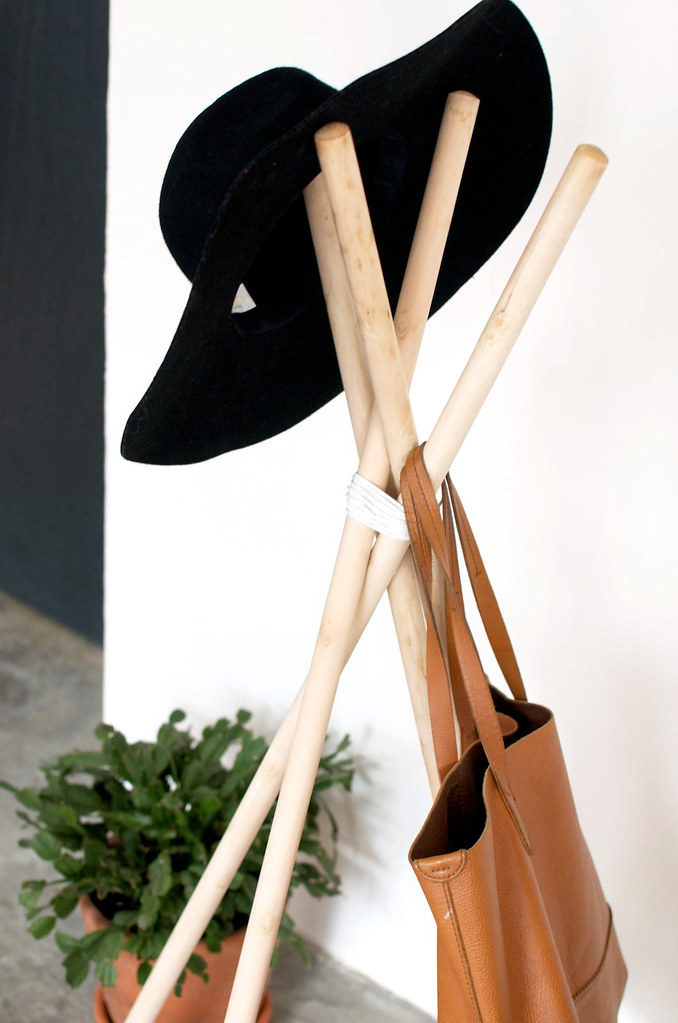 For a cool hat rack, try find some dowel rods and ropes. This will be your another tool-less DIY hat rack project.
For detail, here’s what you need:
- 5 rod dowels. If you don’t have the dowels, you can use broom handles as the substitute.
- A rope, a length of white rope. If you want the stylish version, try leather cor.
Tool:
- Scissors
Steps:
- Grab the dowels, build it into a teepee tent structure. Prop the structure on the floor.
- On its meeting points, see the picture, tie the dowels. Now your hat racks have a steady footing on the floor.
- And your hat rack is ready.
21. An Awesome Deer Antler Hat Rack
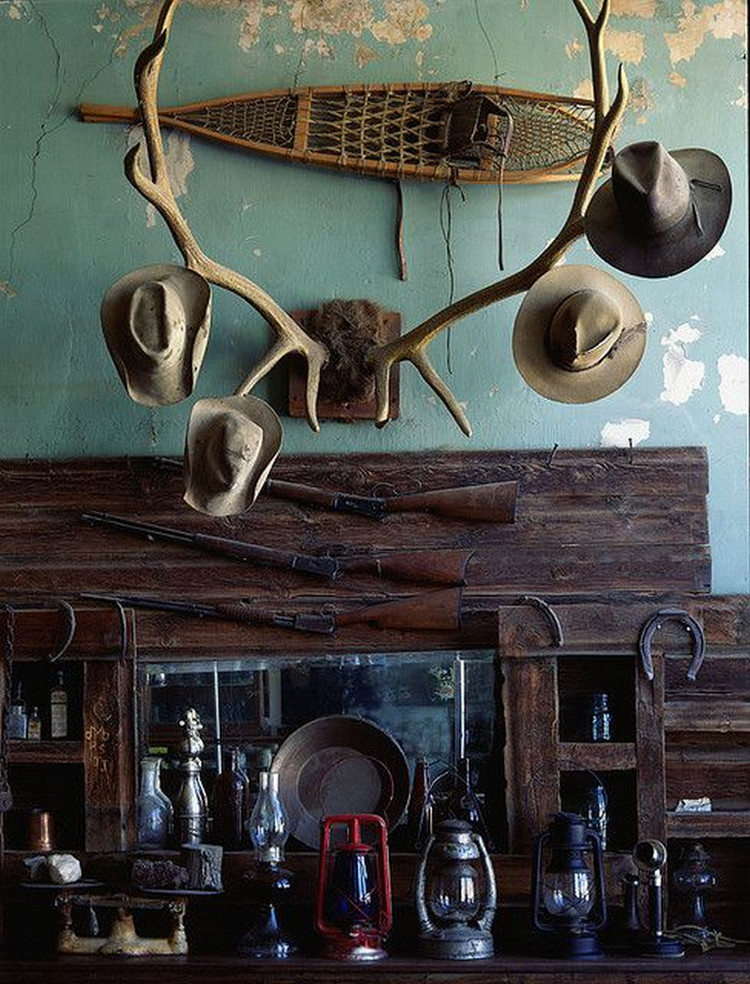 Living up north give you the chances to witness the majestic Aurora and having this awesome antler hat rack. When, during a walk in the wood, chances make you find this beauty lying on the ground, grab it and turns it into this beautiful antler hat rack.
This will be the easiest DIY hat rack so far, for all you need to do is fixing a strong base for the antler to hang firmly on the wall.
22. Cute DIY Hat Rack for the Children
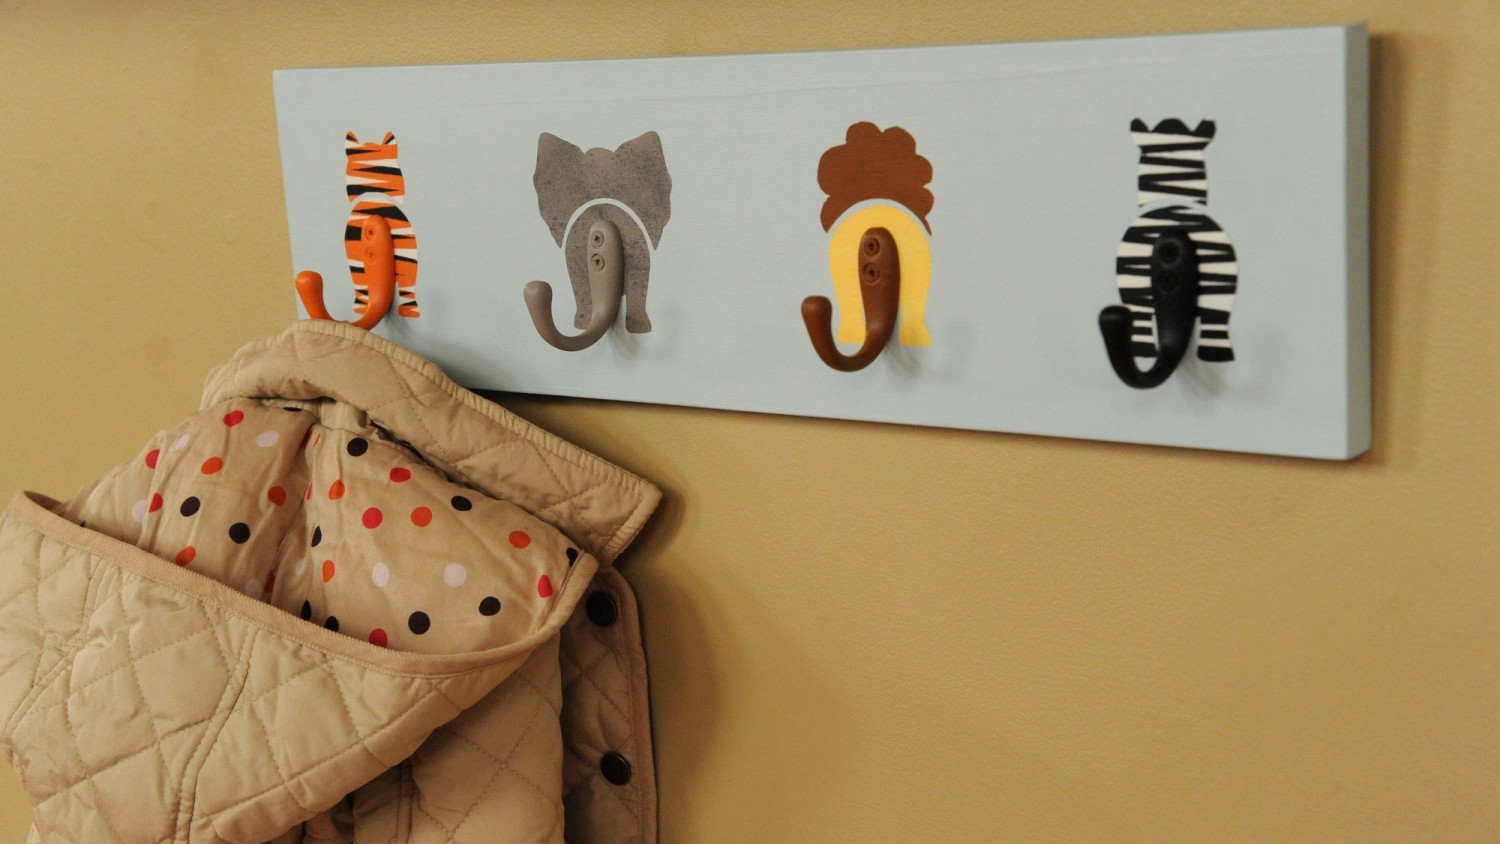 For the kids, here’s a cute hat rack plan you should try. If you still remember the DIY cheap wooden hat rack previously, the working steps are similar. Only now you need to smooth the finish with a layer of white wood laminate sheets. Lastly, fix animal characters on each of its holder for a cute finish.
23. Quick Hat Rack Scheme with Golf Stick
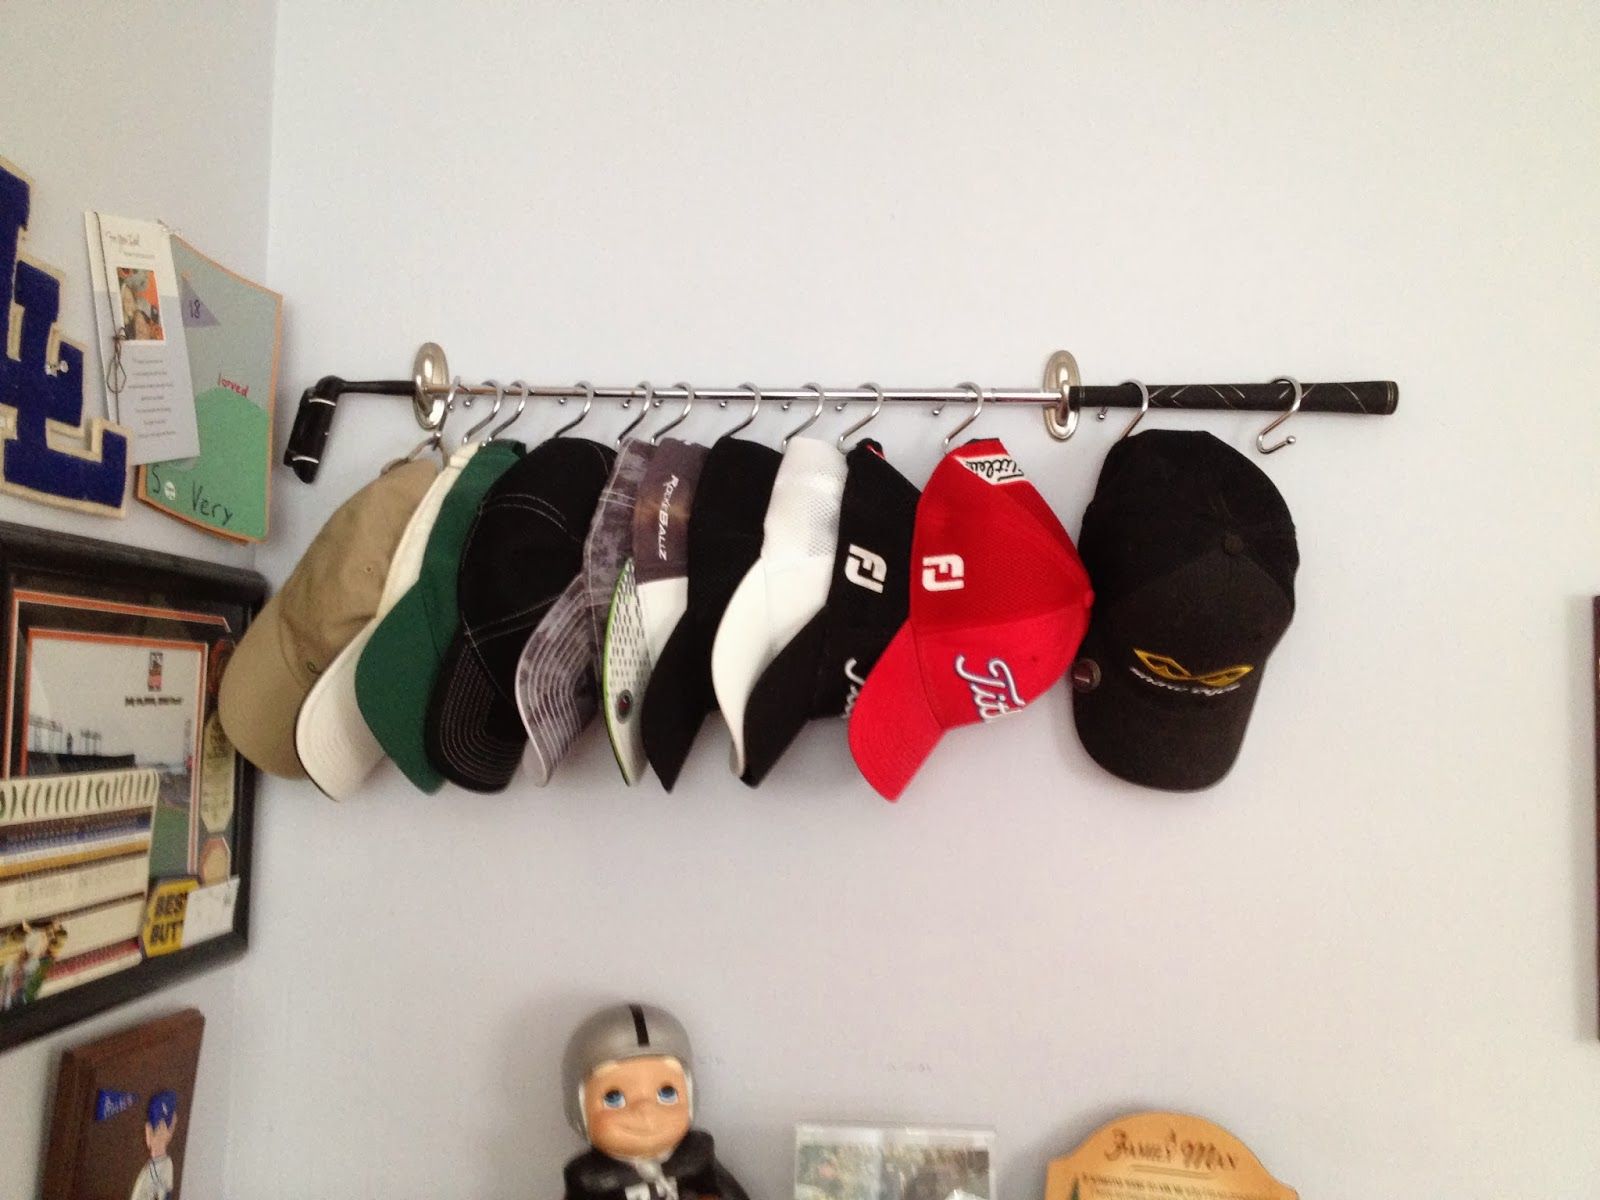 Just like a baseball fans with their baseball bat hat rack, the golfers also has their own cool golf stick hat rack. And not like the baseball hat rack where you have to drill the body for the wood pegs, you don’t have to do that for this DIY hat rack from golf stick. Just hung several metal hooks like the following picture. And you have a chic golf stick hat rack.
24. Simple Ring Hat Rack
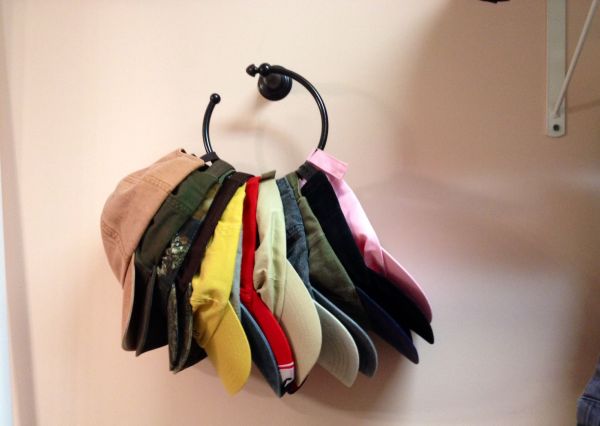 Don’t have enough space for a regular hat rack? Try this wall mount ring hat rack. The circular construction won’t eat your room. And it still can hold several of your baseball hats at once. This black ring hat rack also has another feature: its look. You have a nice hat rack with a classic-vintage look.
25. A Simple and Easy Pallet Hat Rack
 This pallet wood DIY hat rack project promises you a warm bed room –from the impressive pallet wood you’ve just completed. This project uses wood pallet, the stuff you always find as a wooden crate materials.
This wood rack has a asymmetrical design, with various length of its vertical pallets. Two horizontal pallet are used for support behind the vertical pallets. After setting the rustic hat holders, you have a warm and impressive hat rack.
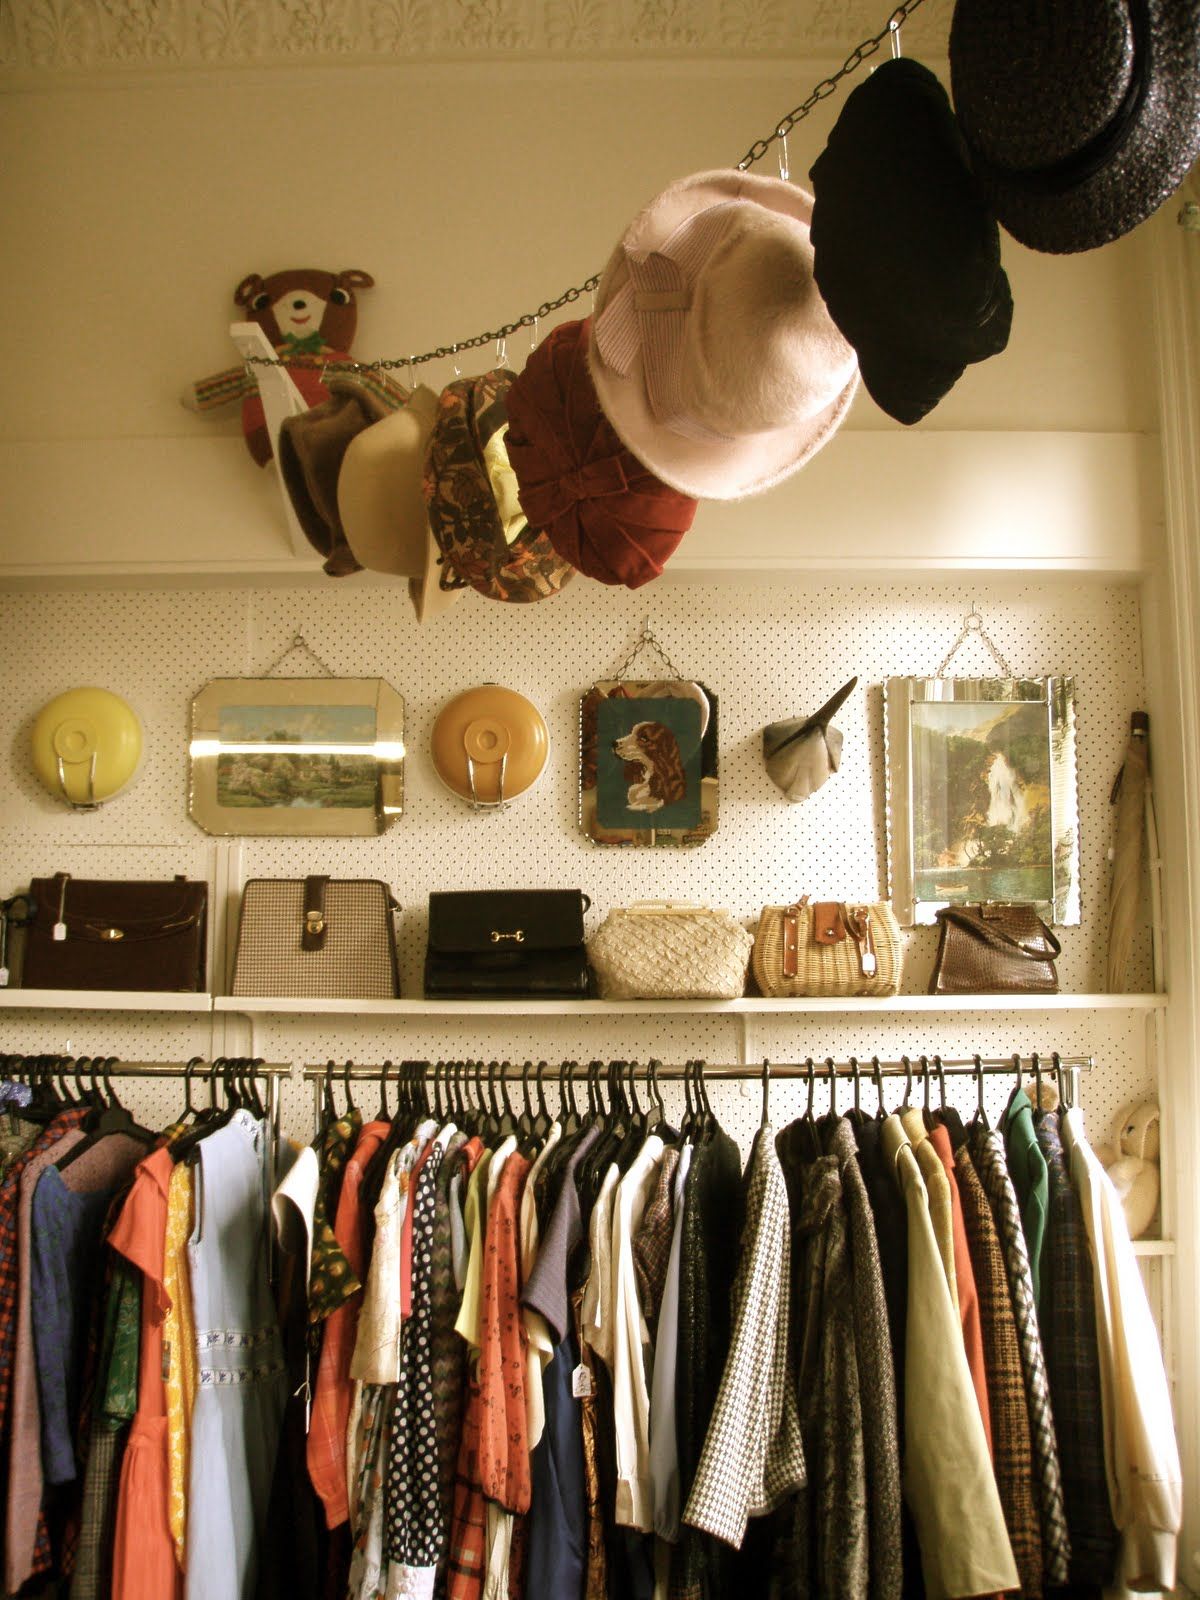
26. A Total Hat Rack and Storage
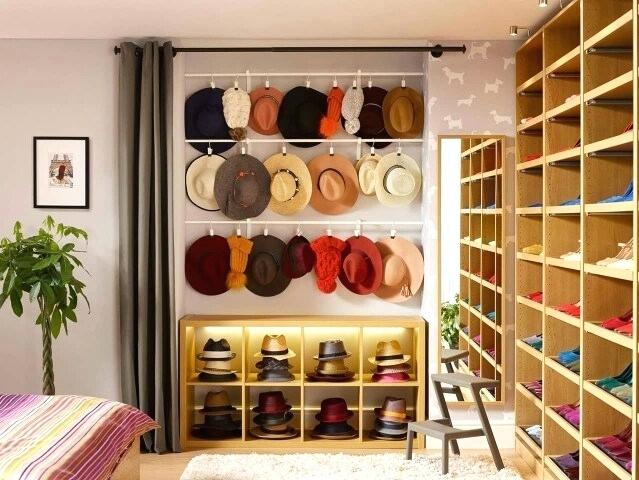 This Hat rack project is for you hat lovers. In this plan, you have comprehensive hat rack setup, complete with storage. The hat rack consists of two part. The top part is a hanging hat rack, while the bottom is a shelf-style hat rack. All the parts are spacious enough for your hat collection.
27. DIY Modern Minimalist Wood-Metal Hat Rack
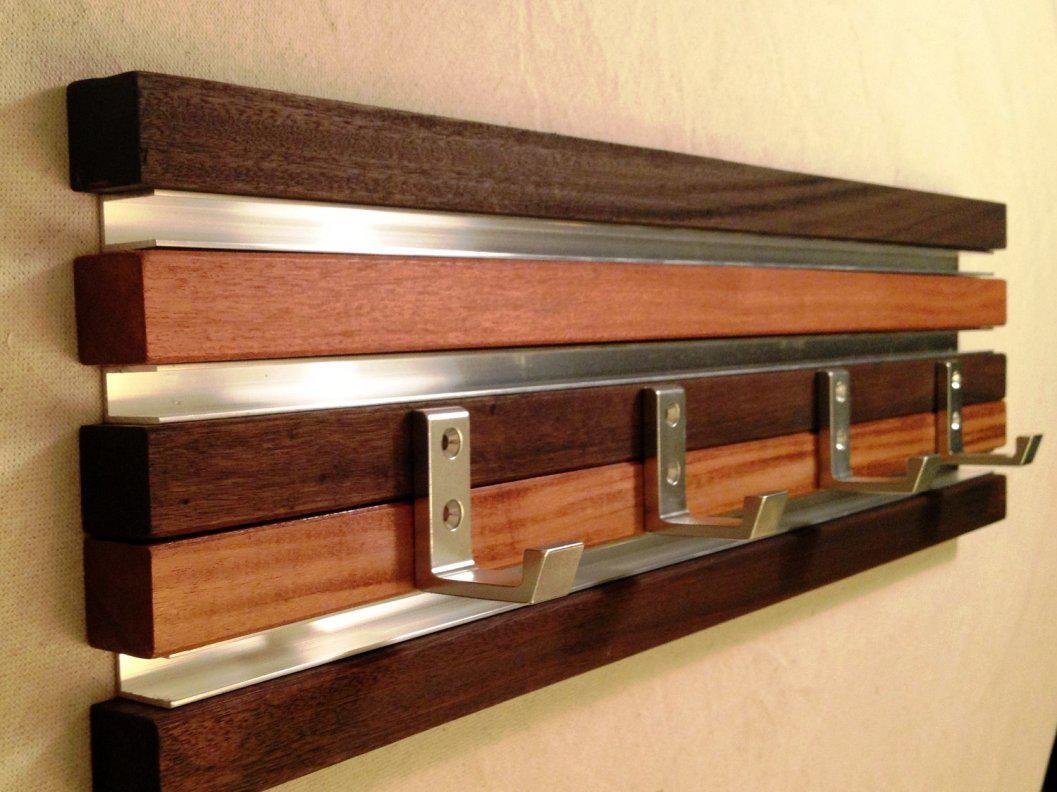 This easy hat rack fits nicely to your minimalist bed room wall. It even add warm accents into it. And, most of all, you can build it yourself easily. Like to try?
What you need:
- Several square dowels in various wood colors
- Some U-shaped aluminum
- Metal holders
- Strong multipurpose glue
Tools:
- Wood and metal saw
How to make:
- Cut the dowels and aluminum in the same length.
- Set them like the photo in example,
- Glue them strong.
- Lastly, fix the metal holders
- The hat rack is ready
28. Tropical Hat Rack, Also as Wall Accent
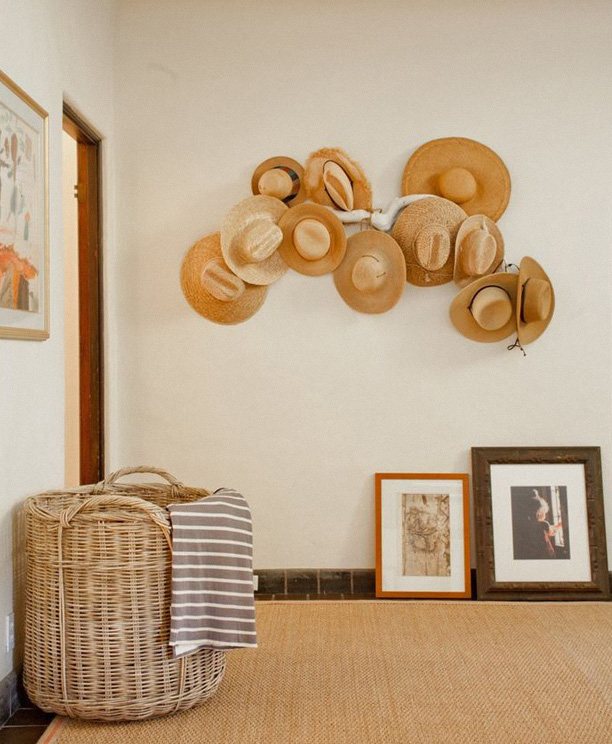 Tropical style always offers a fresh and open vibes. For this style, comfort and airy room is the most important. For the decoration or accent, it also often chooses light features. This hat rack is an example of a functional accent for tropical room.
The hat rack is made of a tree branch (painted white). Along its length, pegs are inserted. The fluid natural curving of the tree make the hats look artistic and even become a nice accent to the room.
29. Plywood DIY Hat Rack with Bright Chevron Pattern
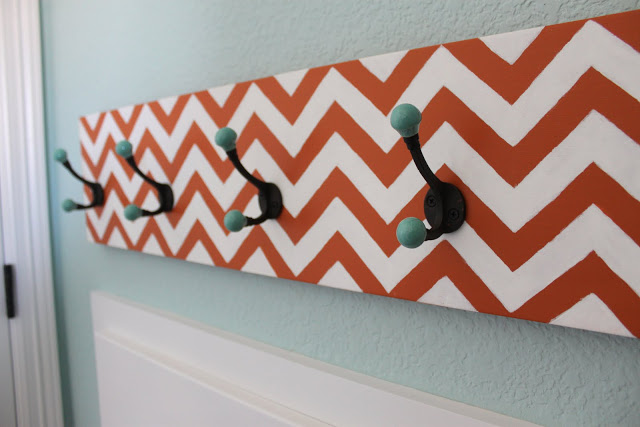 Sometimes, a solid wood is just too lavish for a hat rack. If you’re in the position, but want to have a hat rack badly, try to find the more affordable alternative. You need plywood and a simple DIY hat rack plan.
This hat rack is worth to try. First, because its simple design. Secondly, because it has nice patterns. Once you have cut the board, layer the surface with bright chevron wallpaper, like the picture. Afterward, put the holders along the board. Yes, you have a cute cheerful plywood hat rack.
30. Lego Hat Rack for the Kids’ Room
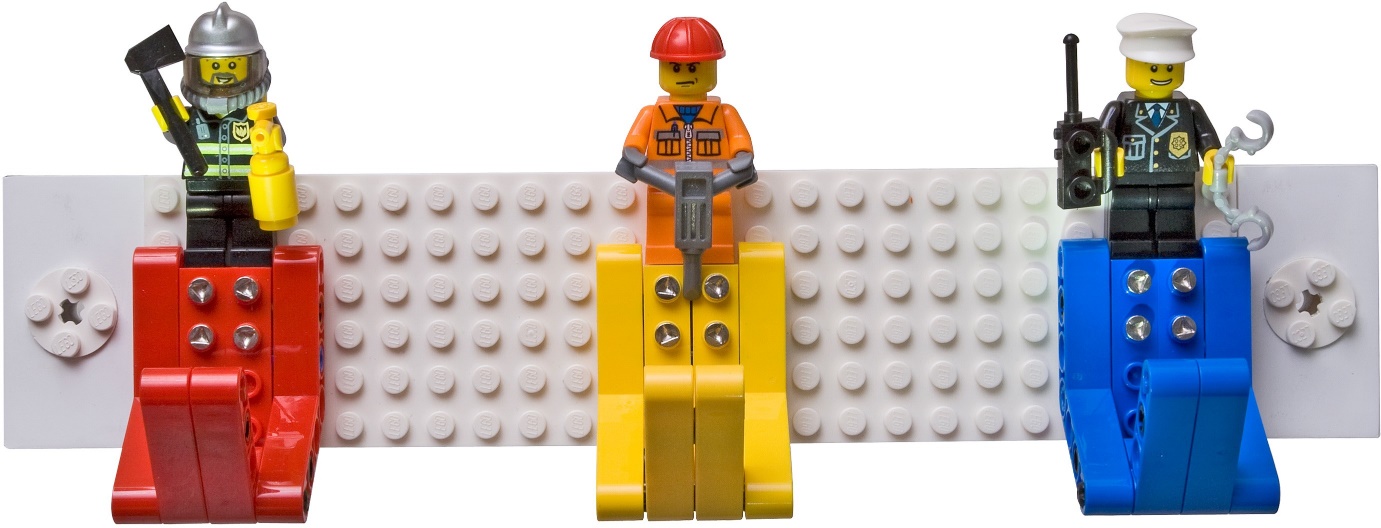 For the kids’ room, there’s no other joy than having this Lego hat rack for their room. And even happier still, they can assembly the rack their selves. The precision and strength of Lego, combined with the kids’ creativity, surely will make their room look brighter and funnier.
Read More: 25 Easy DIY Computer Desk for You
Having read all the DIY hat rack collection, we hope you’re ready to move to the next step: to build the hat rack yourselves, in your DIY projects. We’re sure you can do it, as we’ve picked the easy and simple hat rack designs.
Not only the simple one, we also include some rather intricate DIY hat rack plans, in case you need a more advanced inspiration. Finally, have a good day.
 This DIY project suits you well if you have two kids or twins, mainly if you have no enough space to let them have their own computer desk separately.
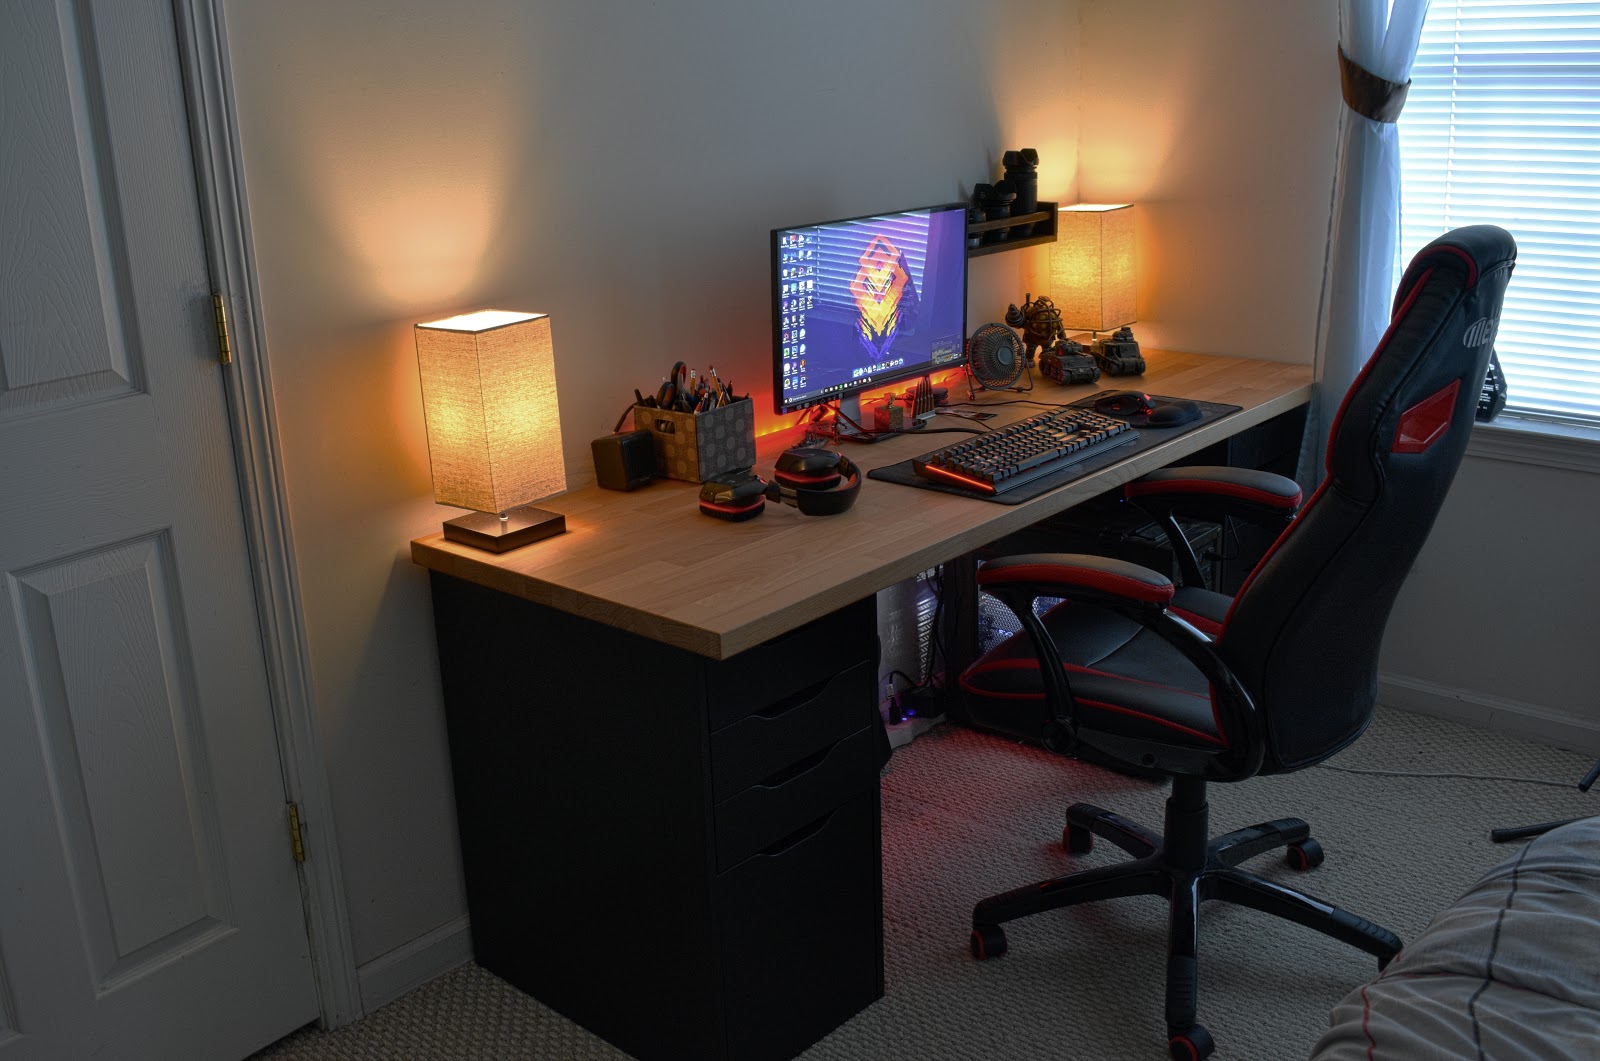 The existing working space is to cramped? Find something bigger. If you think a regular big computer desk is way too much for the budget, try this DIY working desk with a countertop.
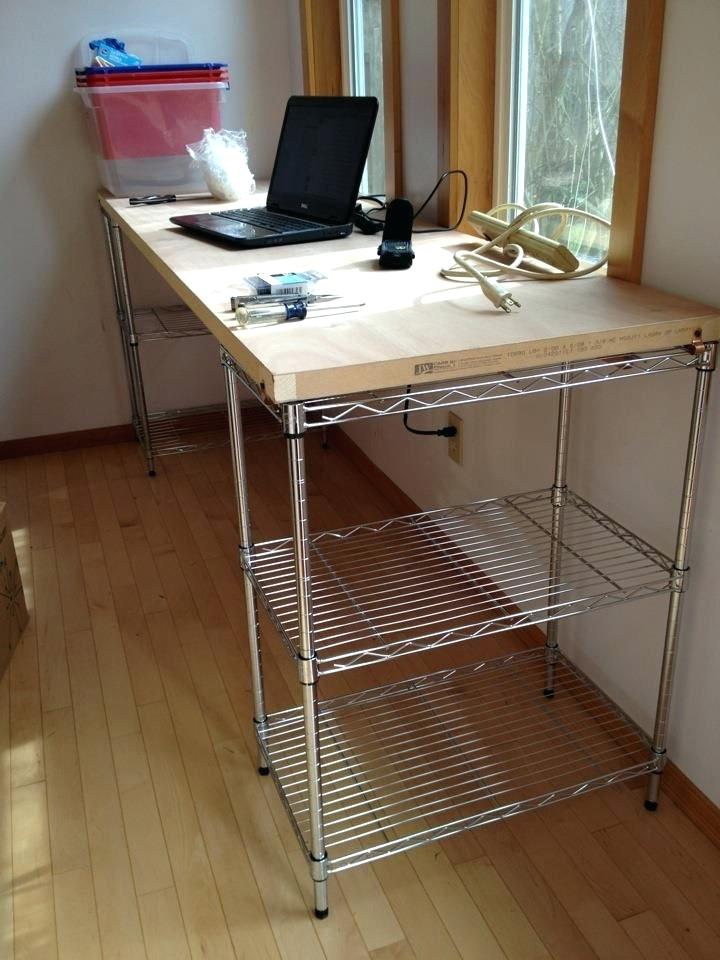 This DIY computer desk is your cheap solution to have a large working desk. The desk has simple structures, and you even can set it up in under an hour.
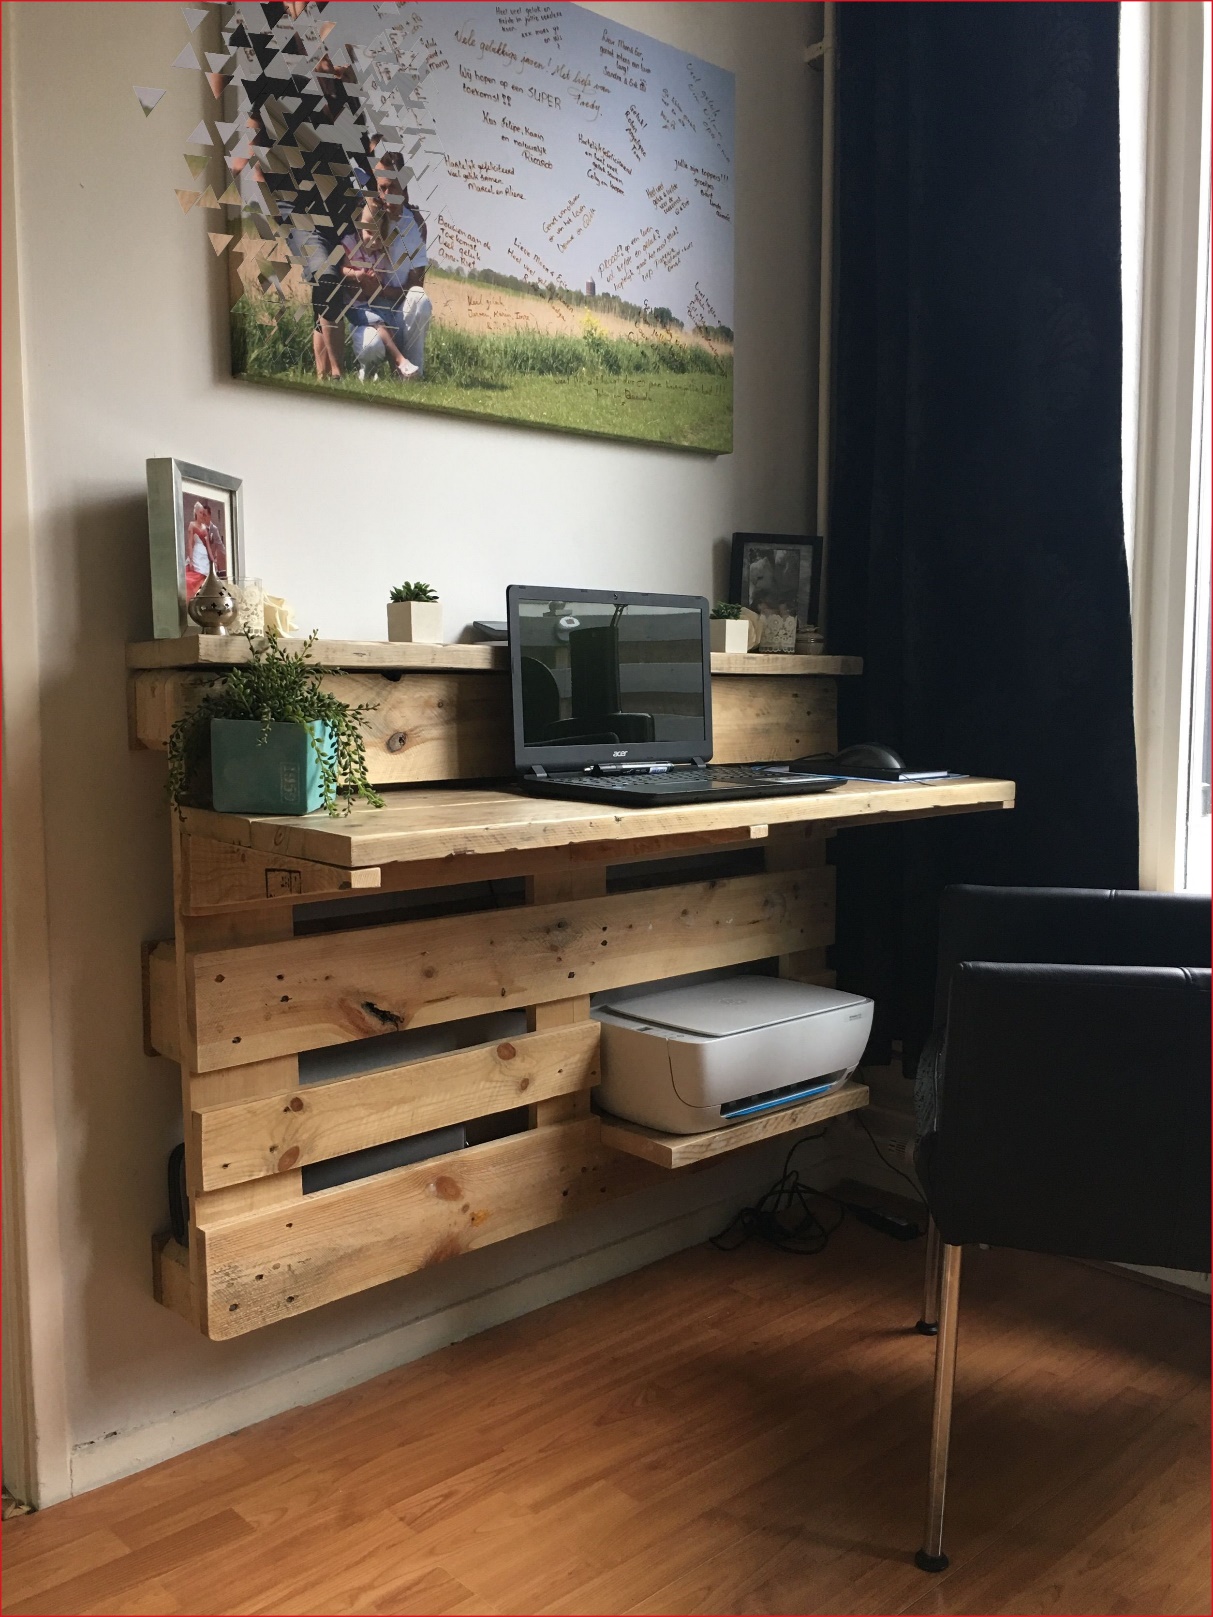 Now this is, again, an easy project for you. You even don’t need to purchase any materials at all. The basic materials are wood pallets, things you can have it easily from unused wood containers or from salvaged old furniture structures.
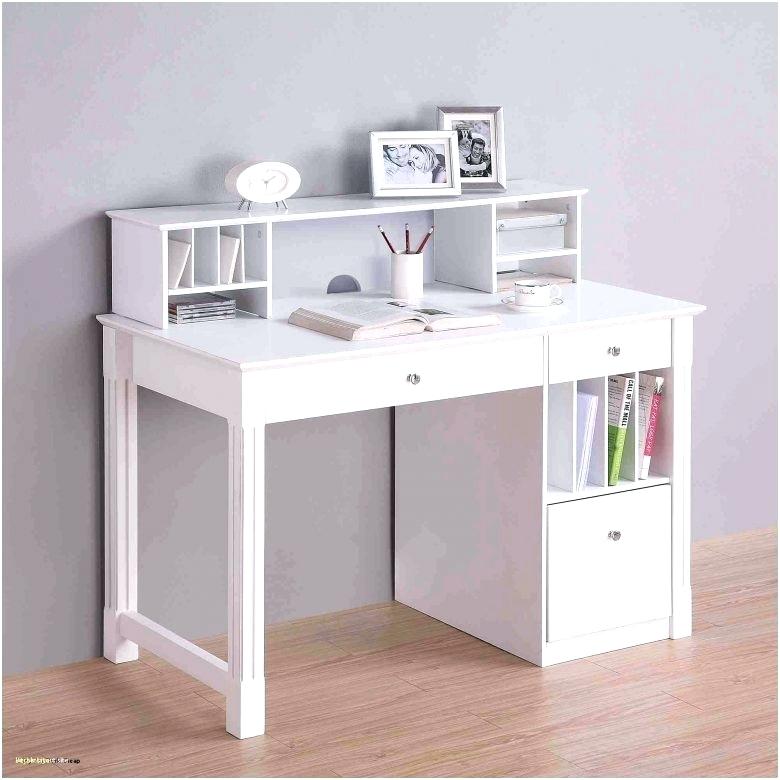 A cluttered desk only let your mood slips down. To declutter the desk, install additional storage system on it. In this case, you need a hutch. You don’t need any fancy or big hutches. Pick the small one, kind of hutches you can build yourself.
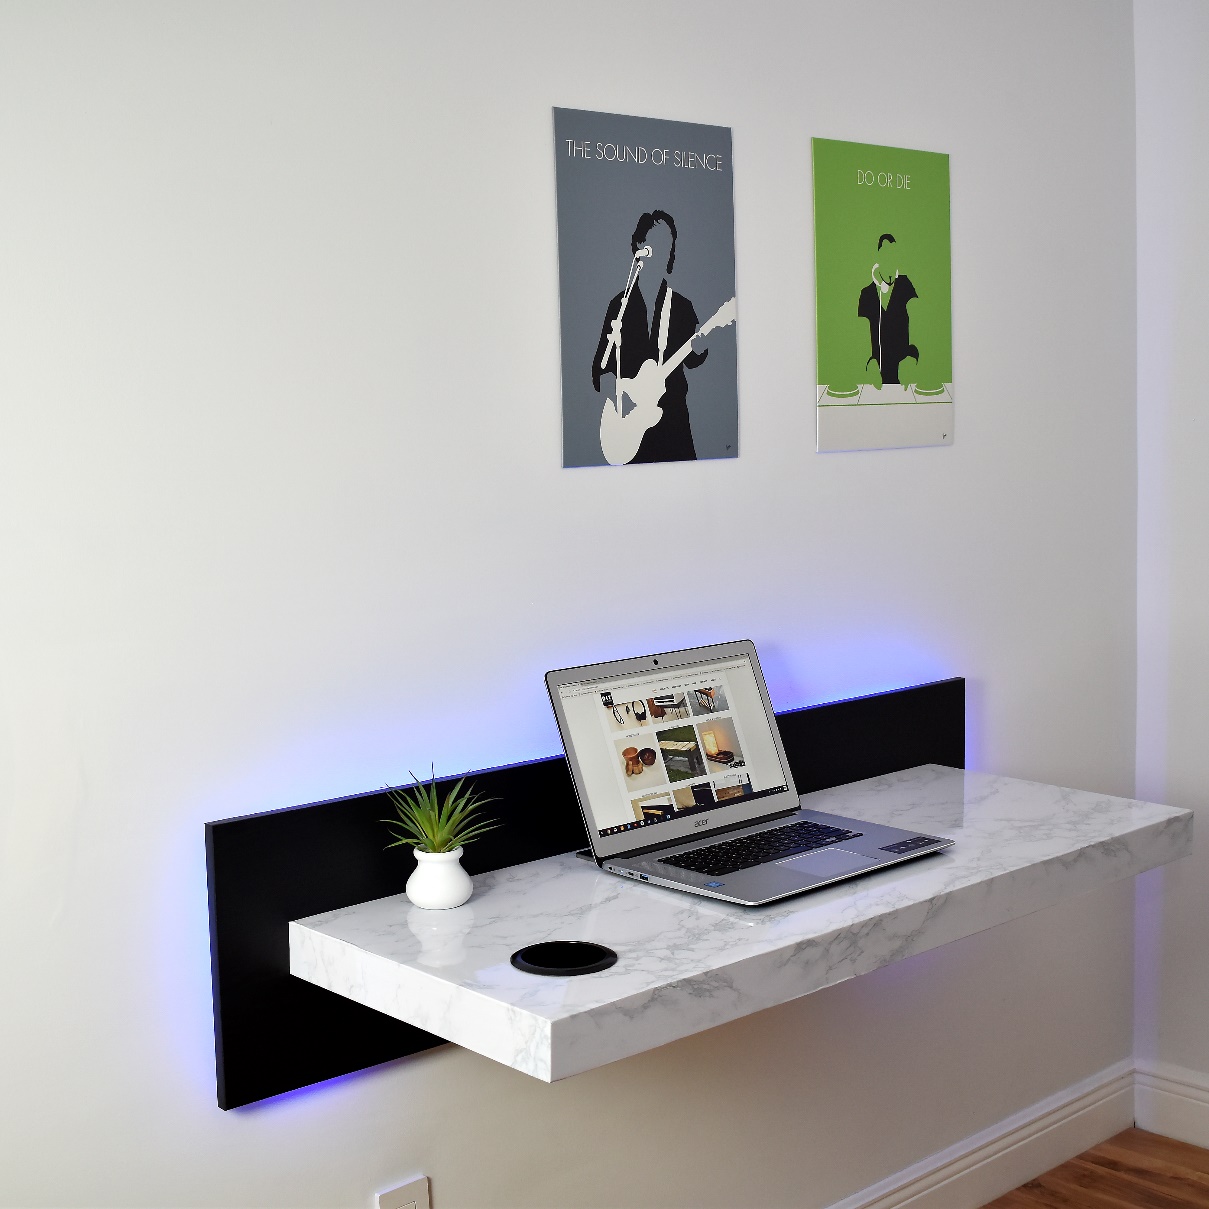 A Floating shelf is a feature of minimalist styles. And this feature increases its popularity among the minimalist lovers. Along with its function as shelves, you can modify the designs for desks too, floating desks, like this example.
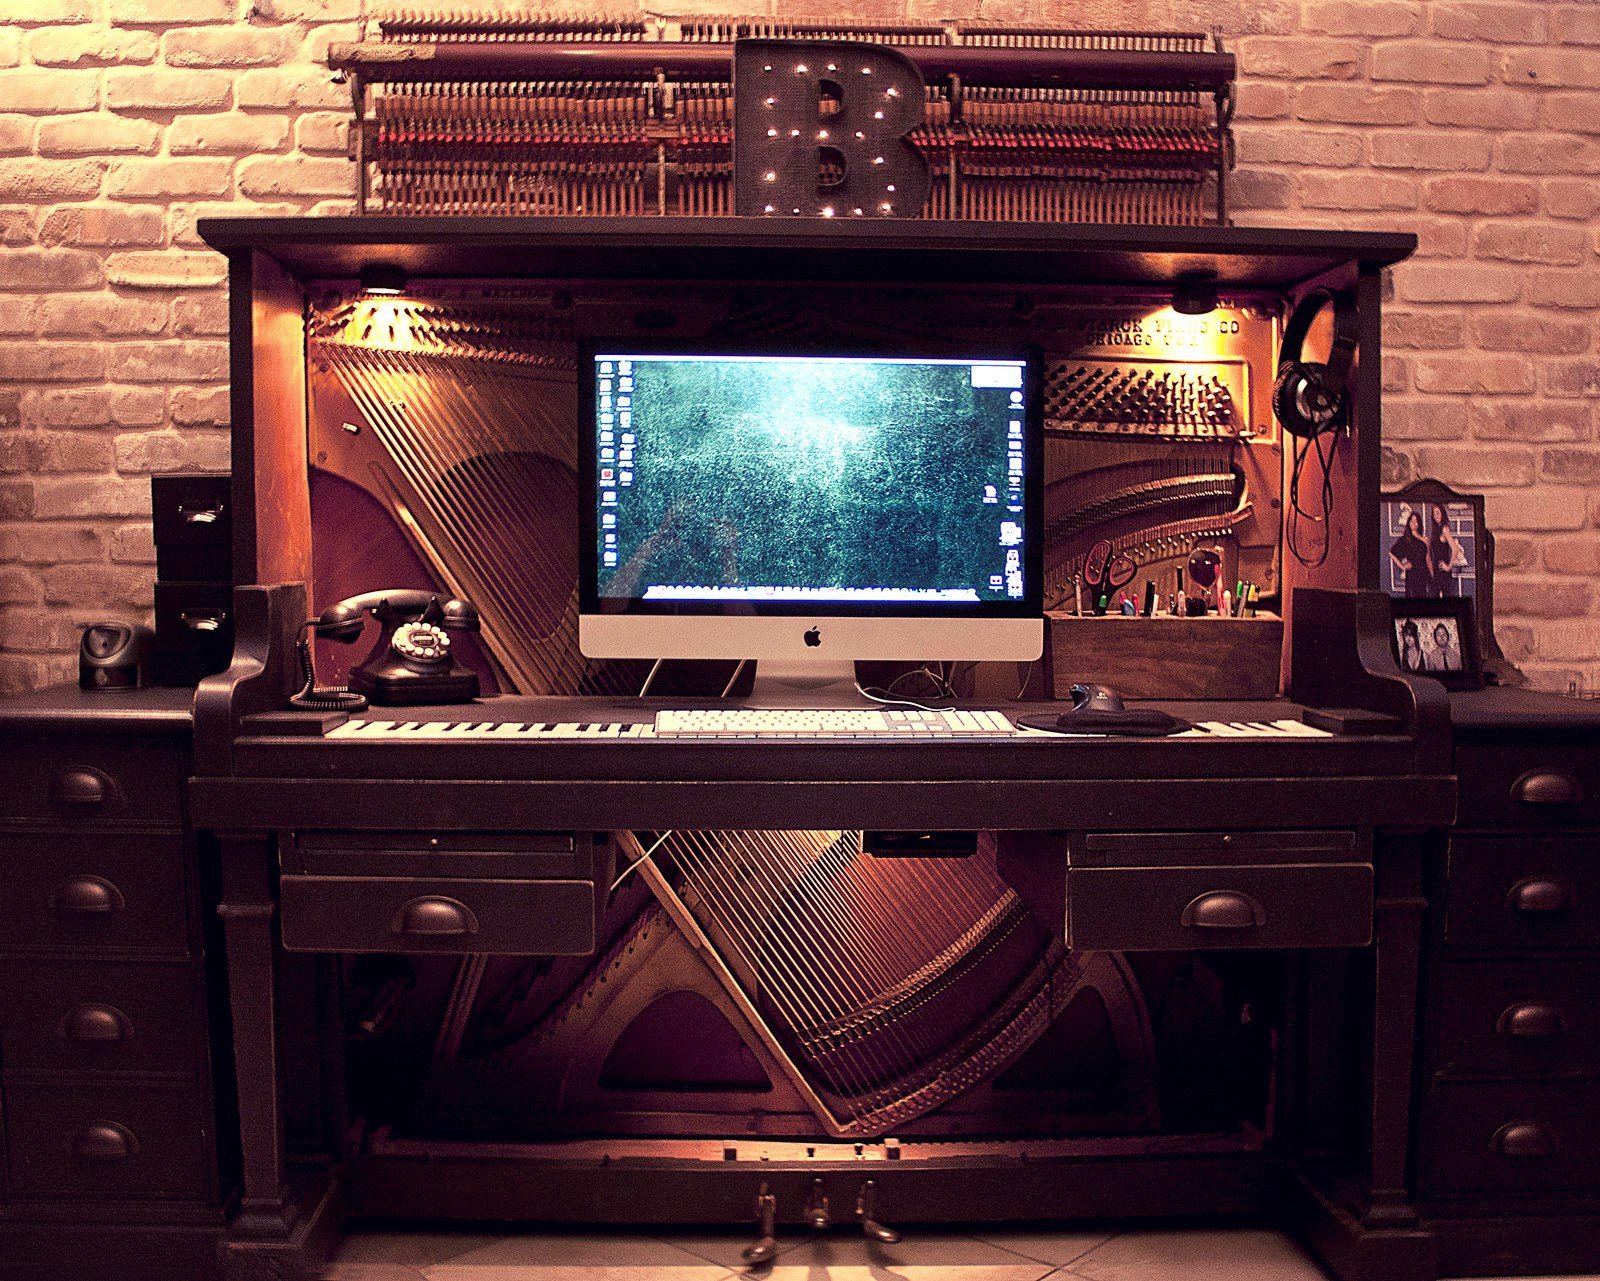 Now this DIY computer desk won’t make you build a computer desk from a scratch. Instead, for this project, you have to gut down an unused piano.
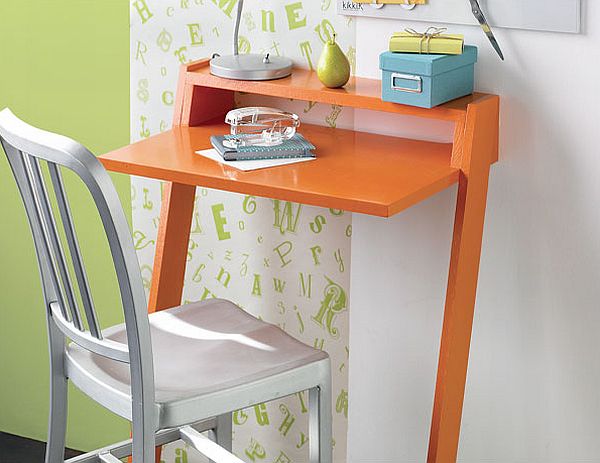 For small spaces, you need efficient computer or working desk. If a small regular desk probably is still too big for the room, try this design.
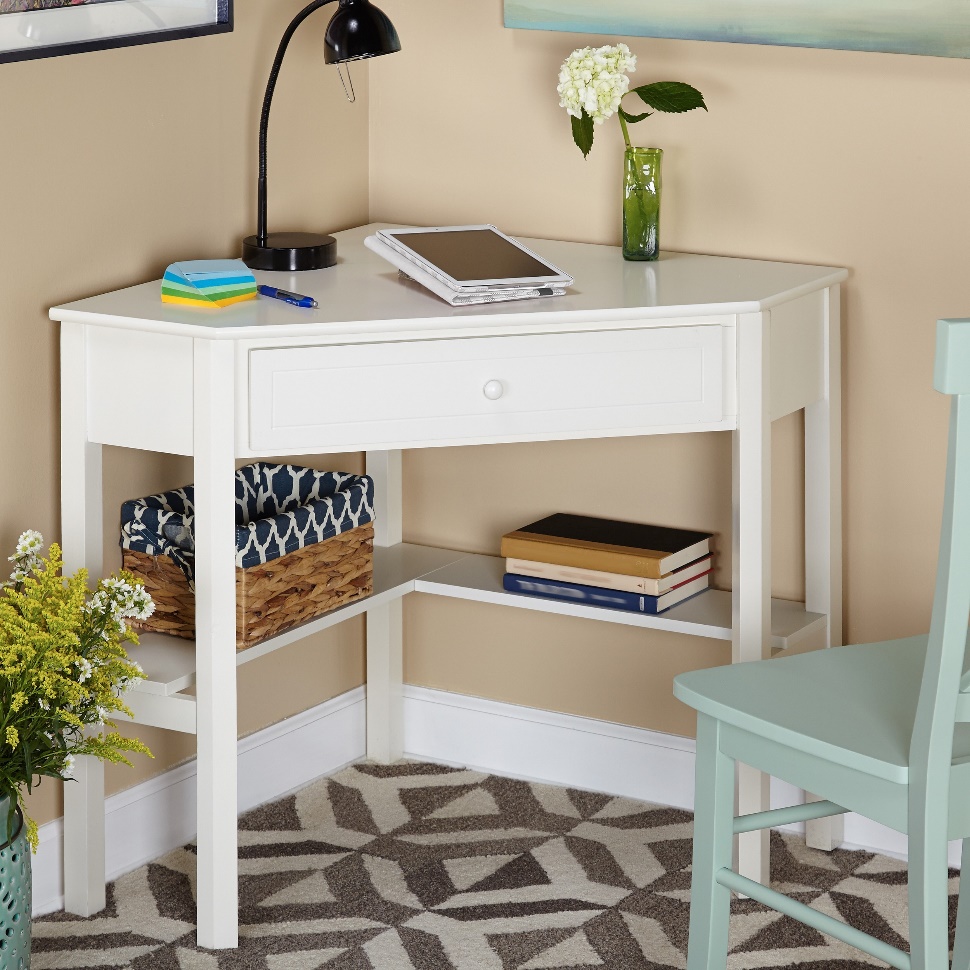 If you feel the corners are too empty, use them (or one of them) as your corner working station. Add a simple corner table and let the corner be an enjoyable haven. For inspiration, a white corner table is worth to try. The simple classis lines are simply graceful, it add charms to the now elegant corner.
 You have many alternative for a computer desk materials. Woods, metals, glass, are only to name some of the popular materials. Now you also can use concrete as a computer desk material. A desk made of all-concrete is possible.
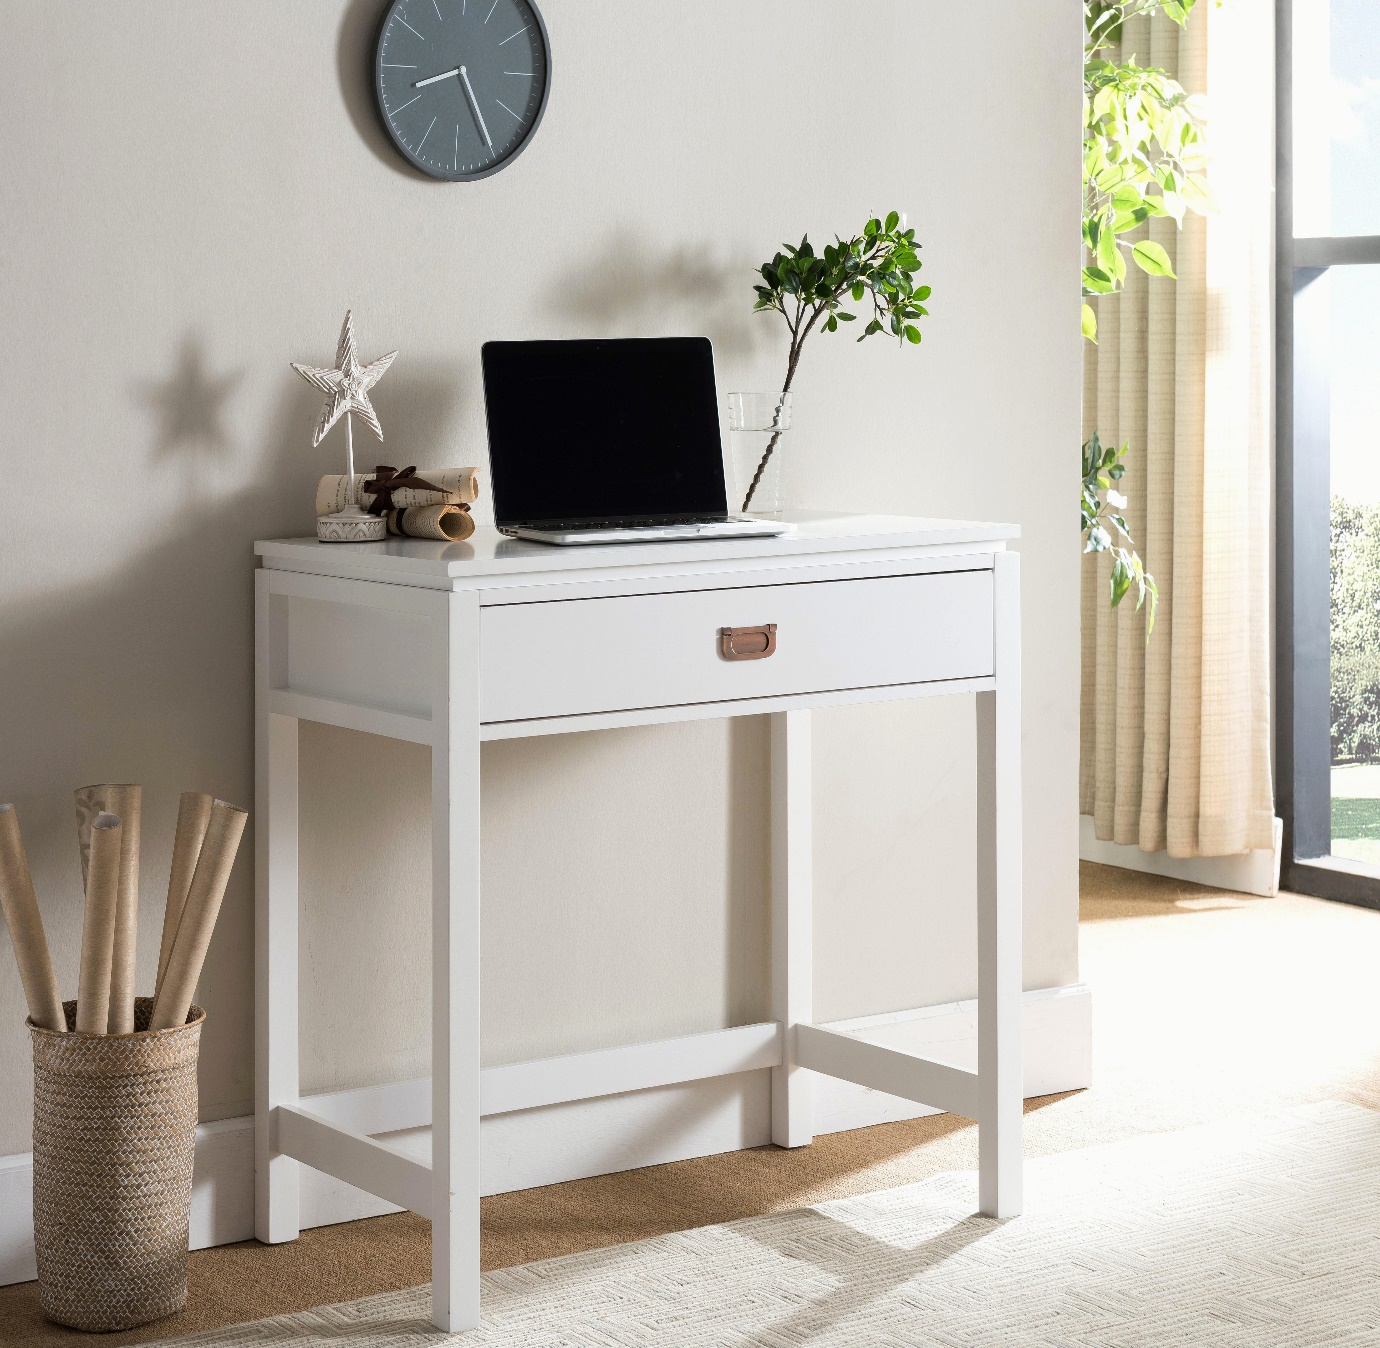 You don’t have to have big working desk to have an effective day works. It’s the mood of the room which contribute greatly to your productivity. So, don’t worry about the room or desk’ sizes. With small desk you can make great works as well.
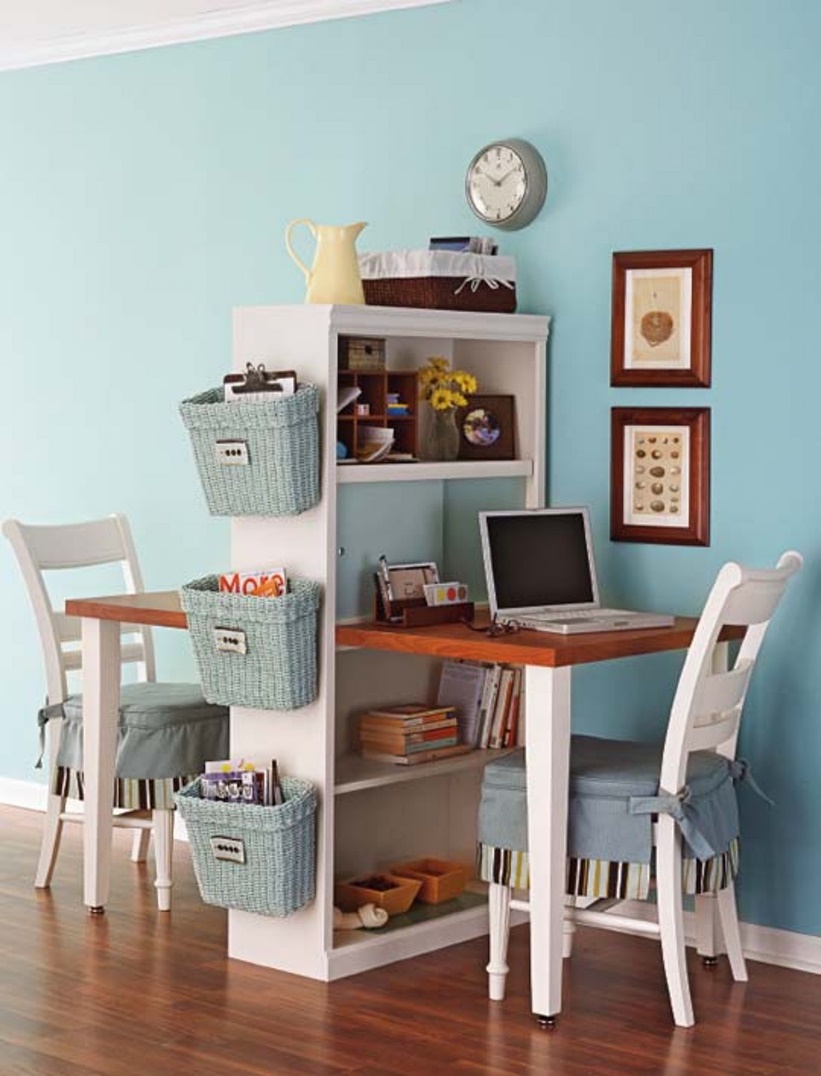
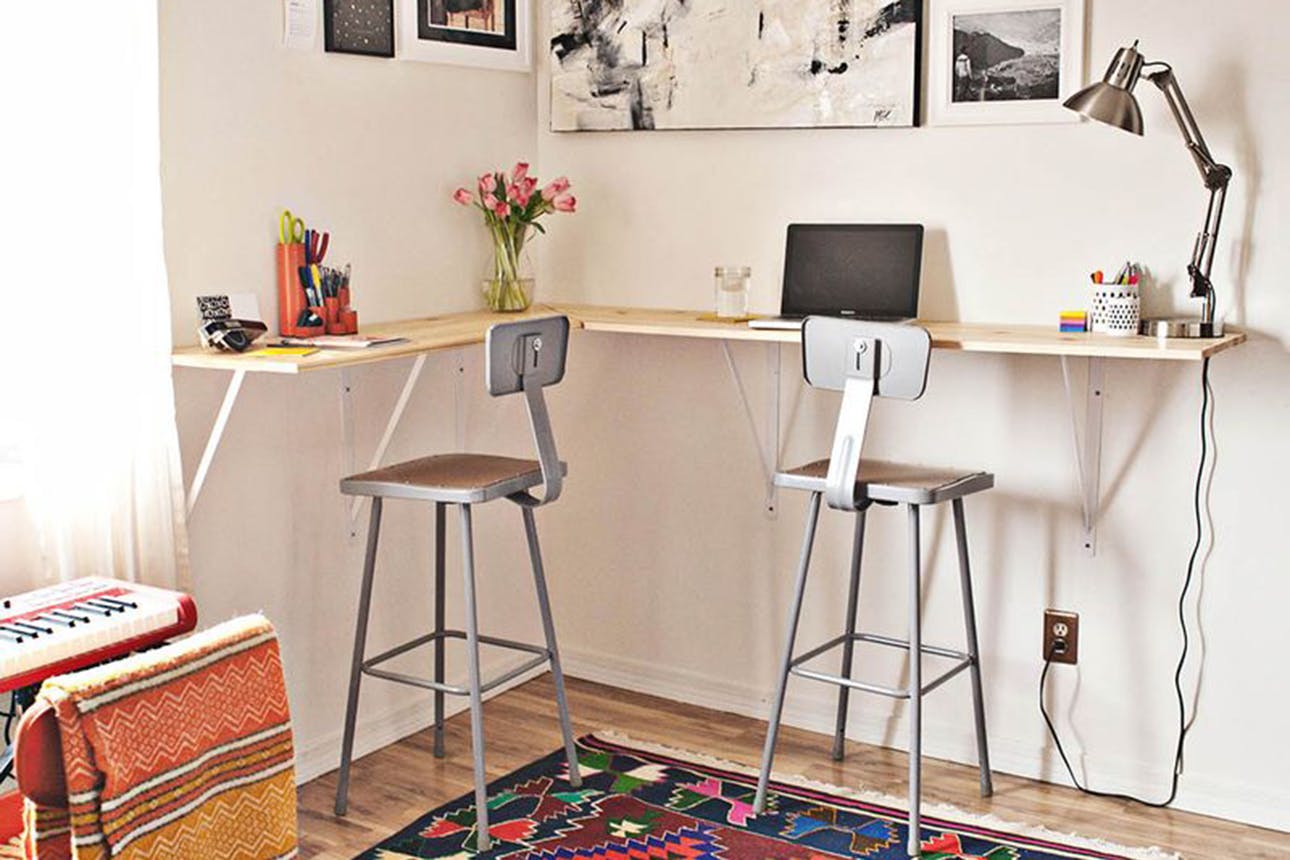 Two kids needs two separate work or study desks –ideally. But, if you cannot afford the space (or they share a room), this working station for two is your next project.
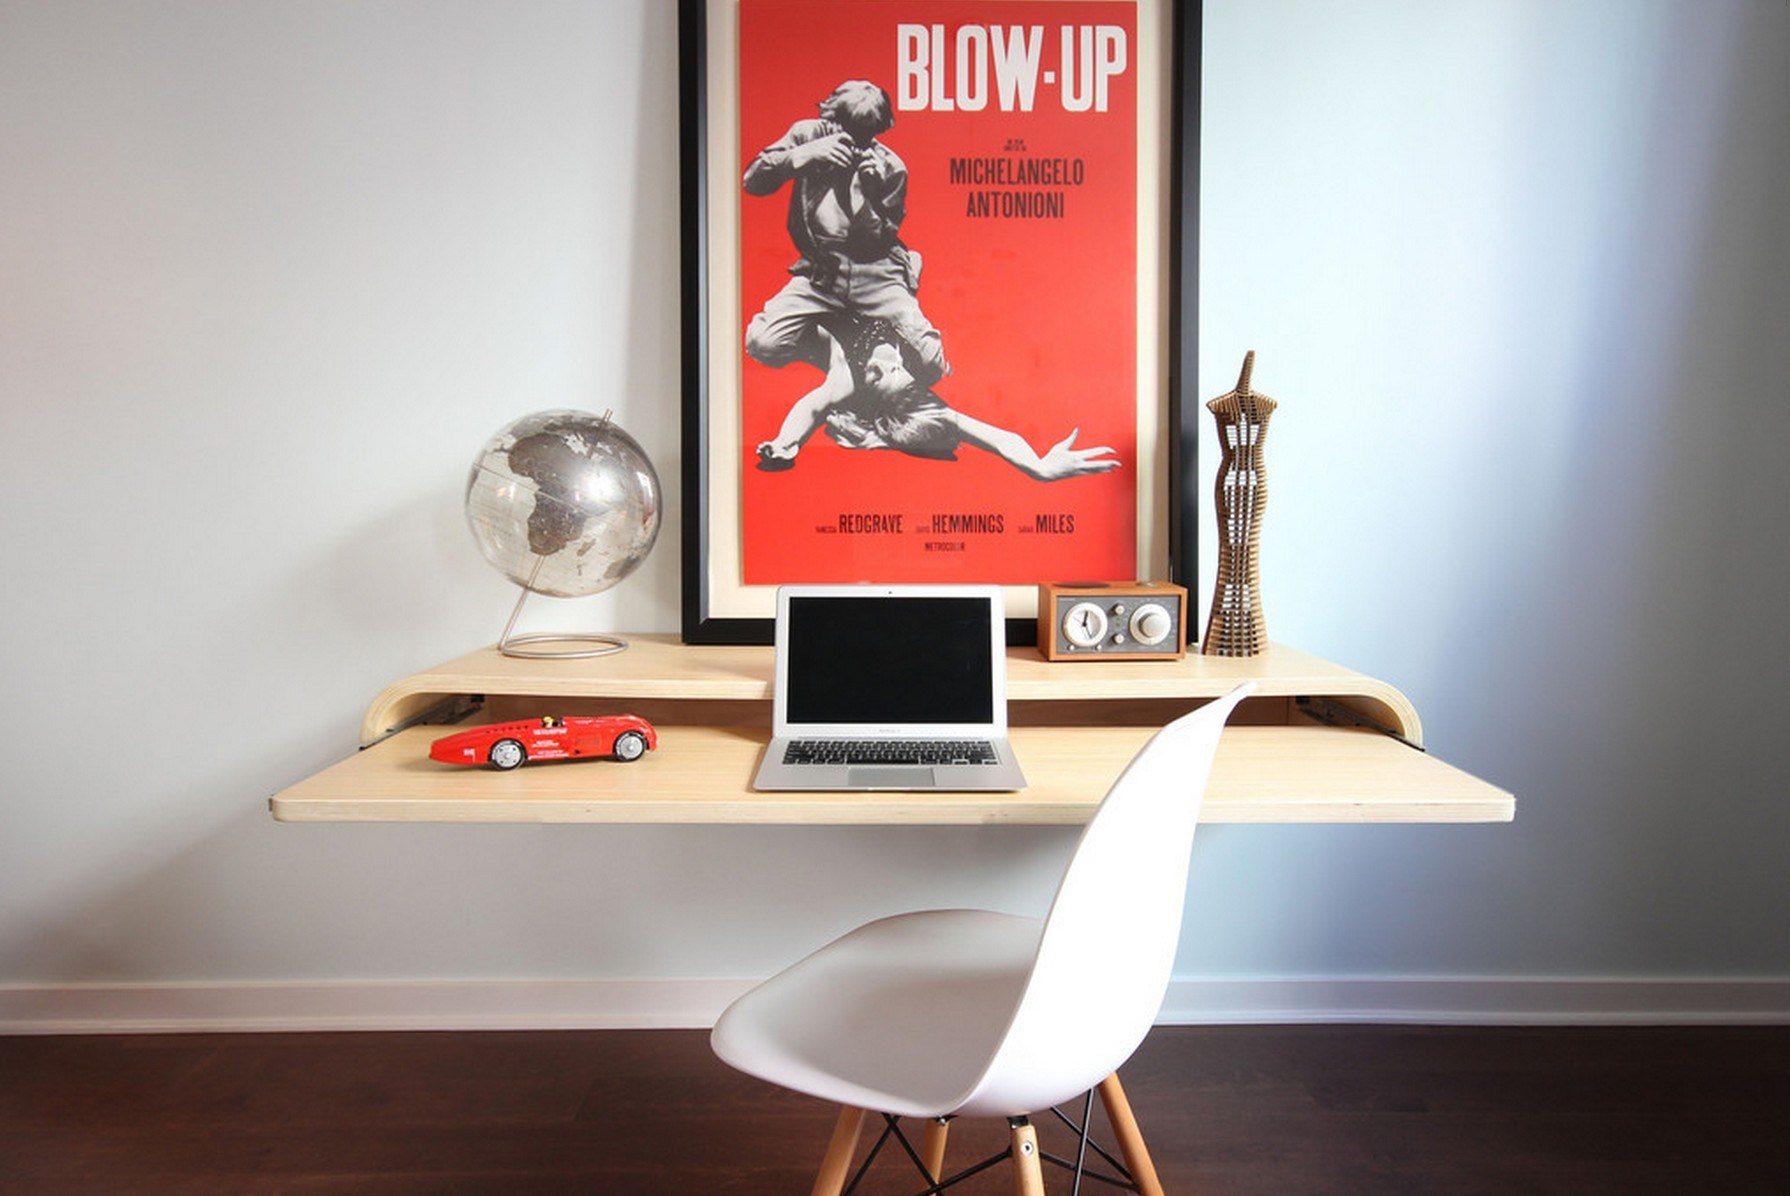
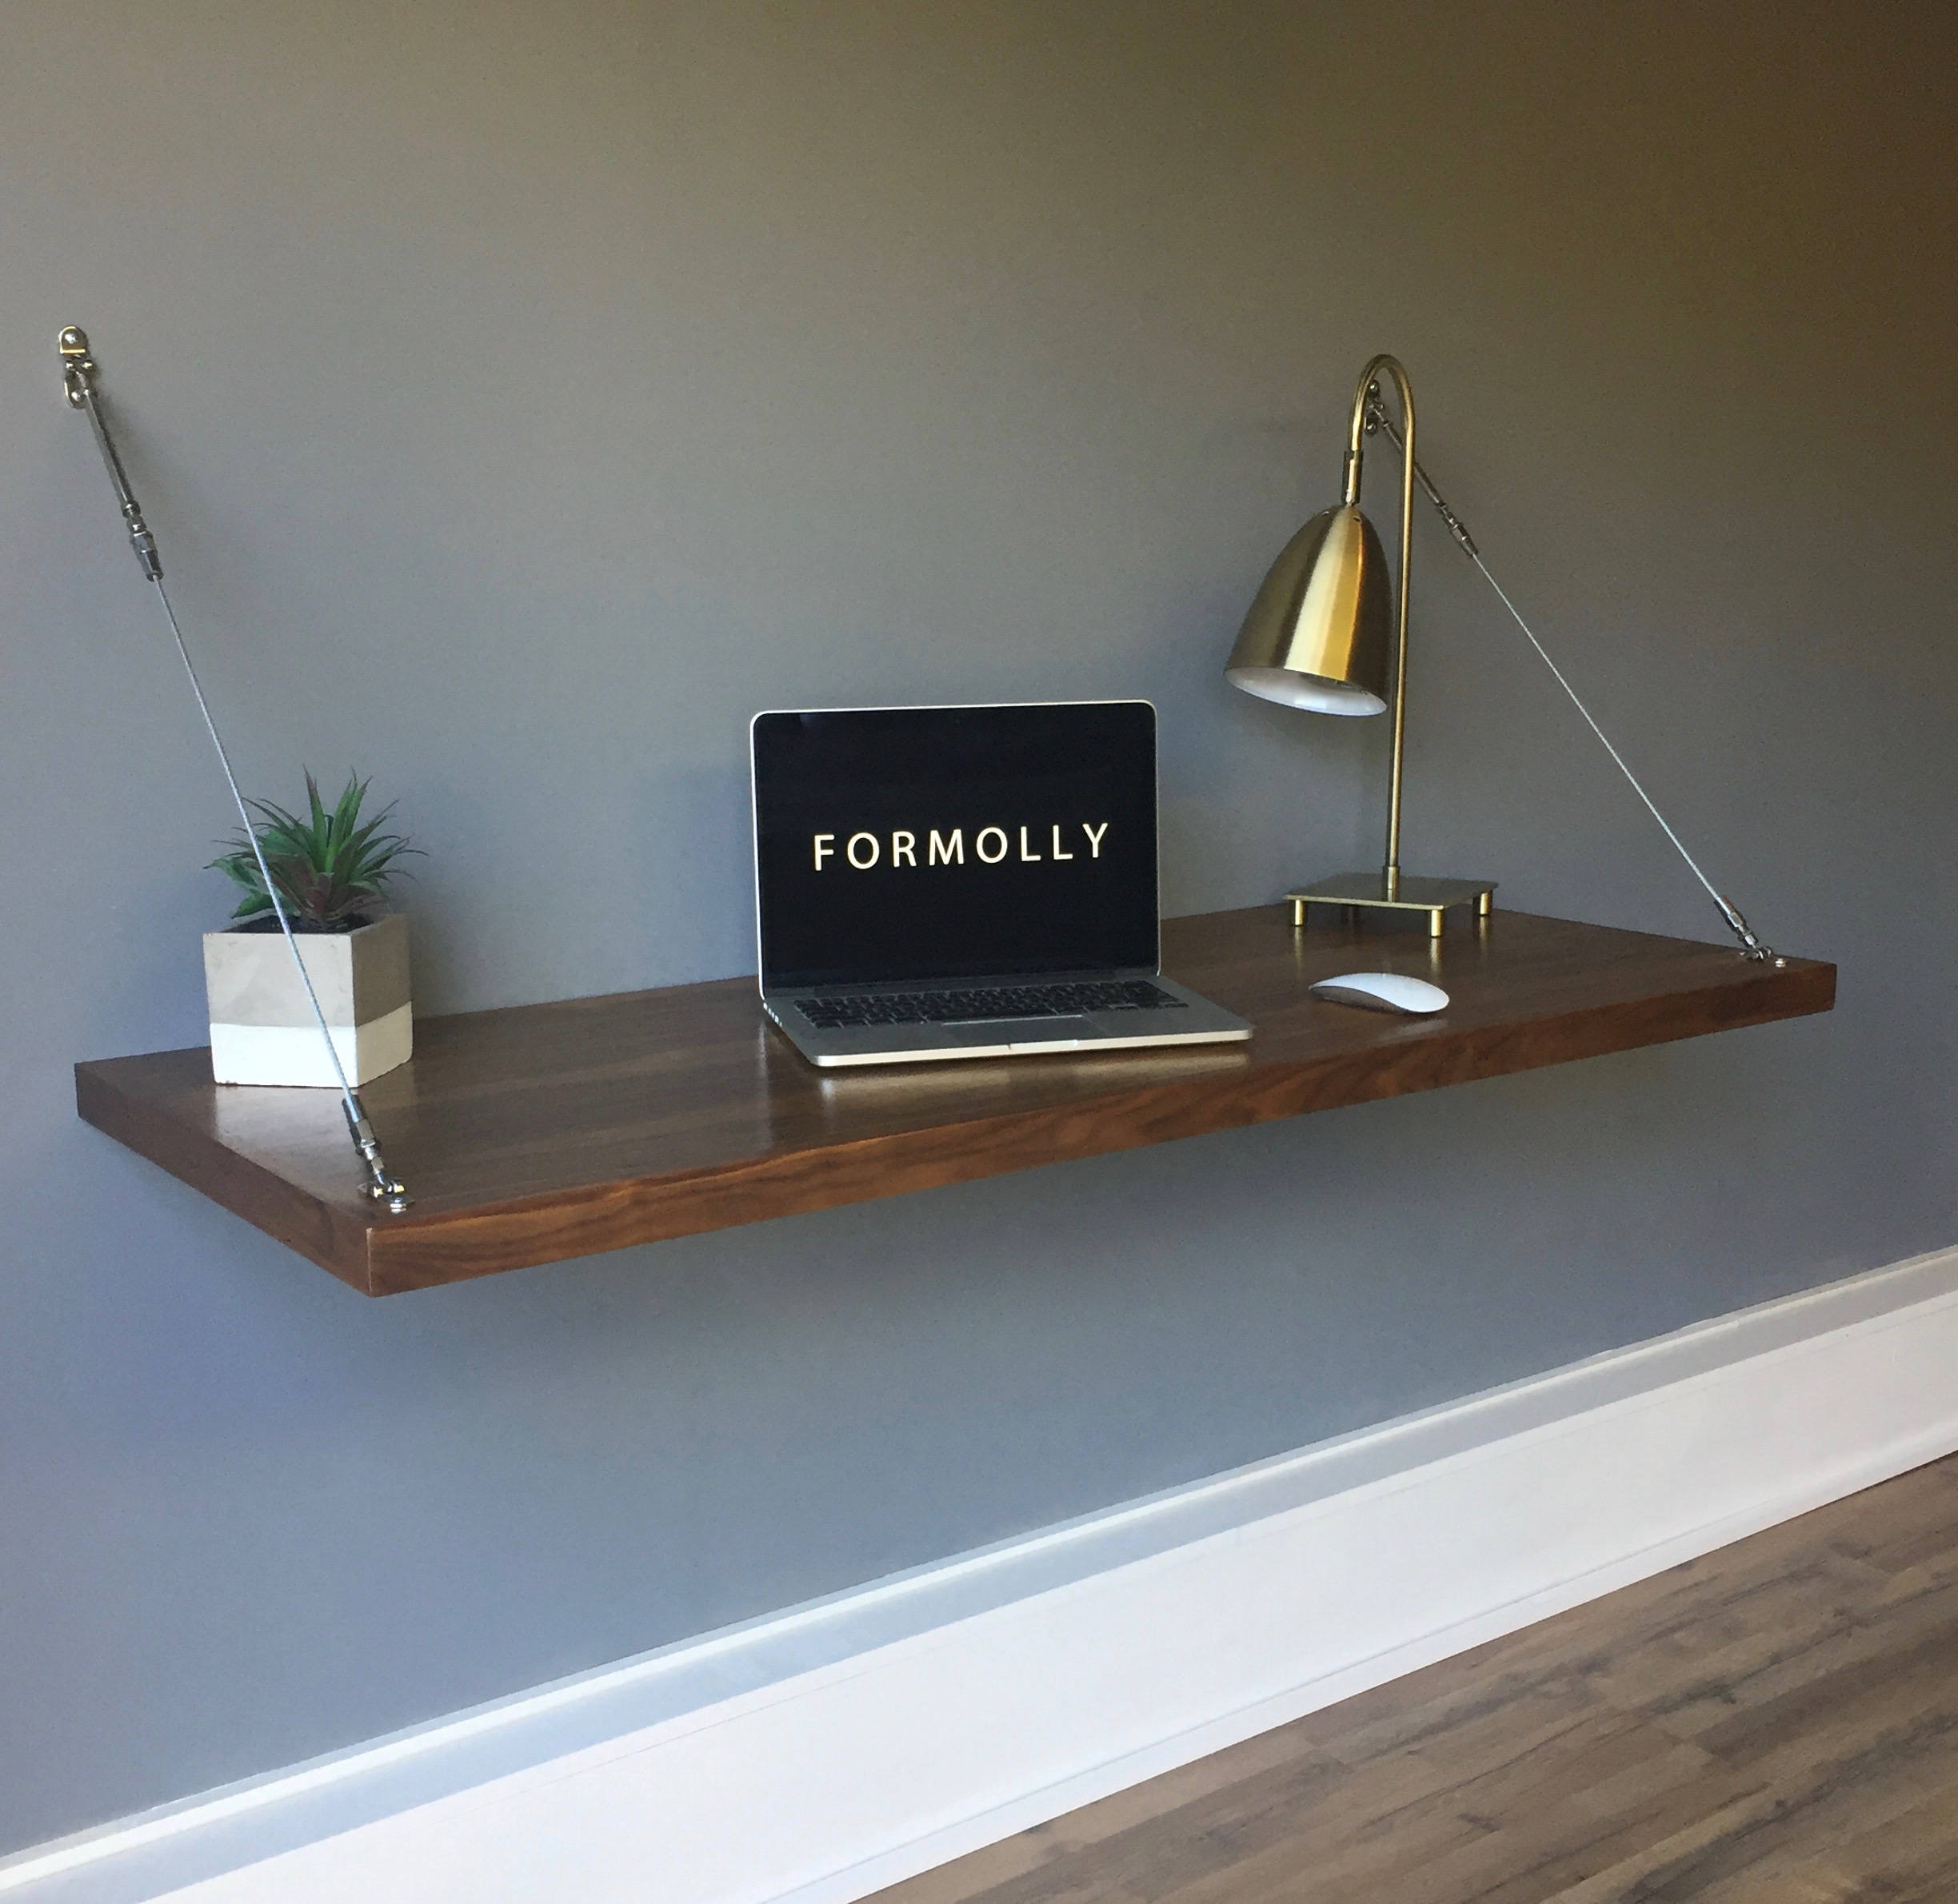 Solid wood, nothing compared to the grain and warmness of a piece of quality solid wood plank. And if you have a piece of that stuff, you can turn it into this elegant floating computer desk.
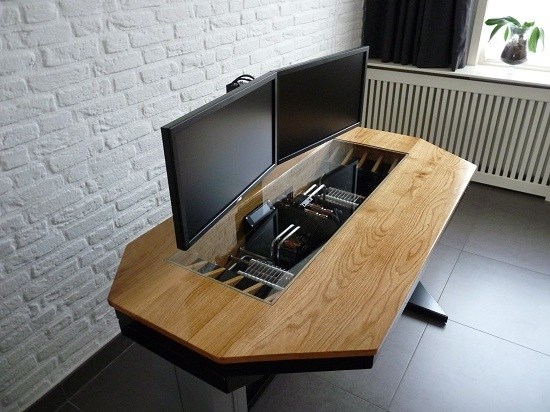 A Computer enthusiast know how it feel to have a cluttered computer desk with its entangled wiring. A clean and, if necessary, hidden wiring and porting are what’s needed. And, if necessary again, the computer should have no cases. The desk itself is the case, just like this example.
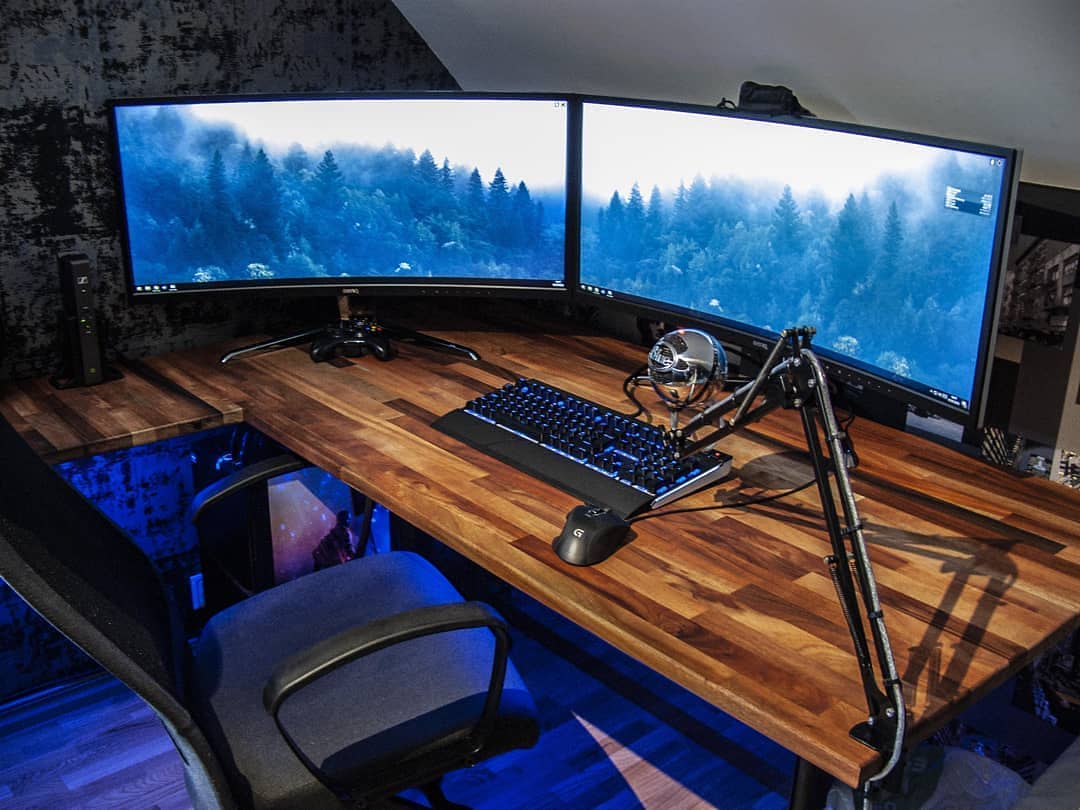 The ideal bench for gaming standards are relative to the users. But, they all have the the same characteristic: comfortable for long period of gaming sessions. So, you have very flexible gaming bench designs here, from the more advanced to the simple one.
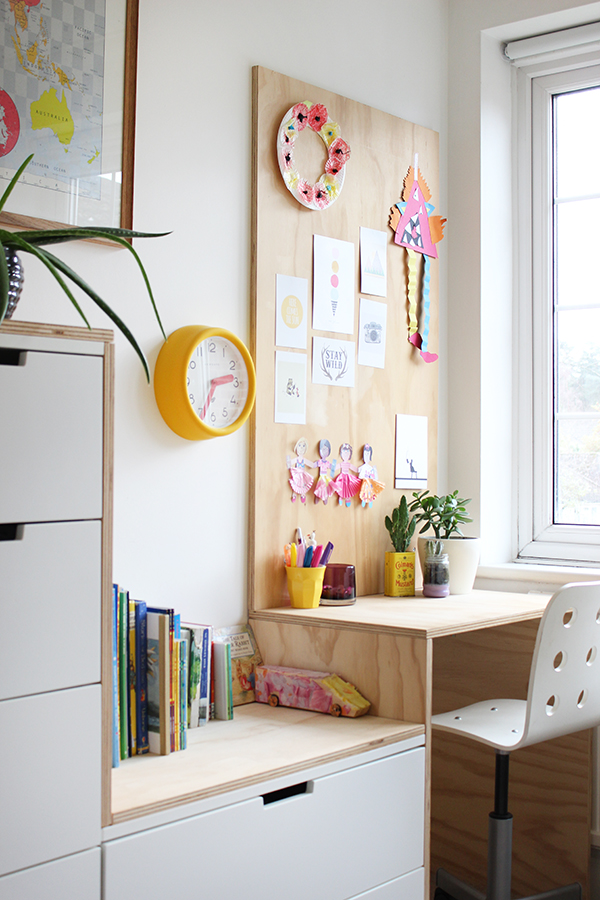 For the kids, gives them something warm but simple. Something from the North, the design from the Scandinavian countries might do well for them. The Nordic style won’t disappoint you want warm and pleasant atmosphere.
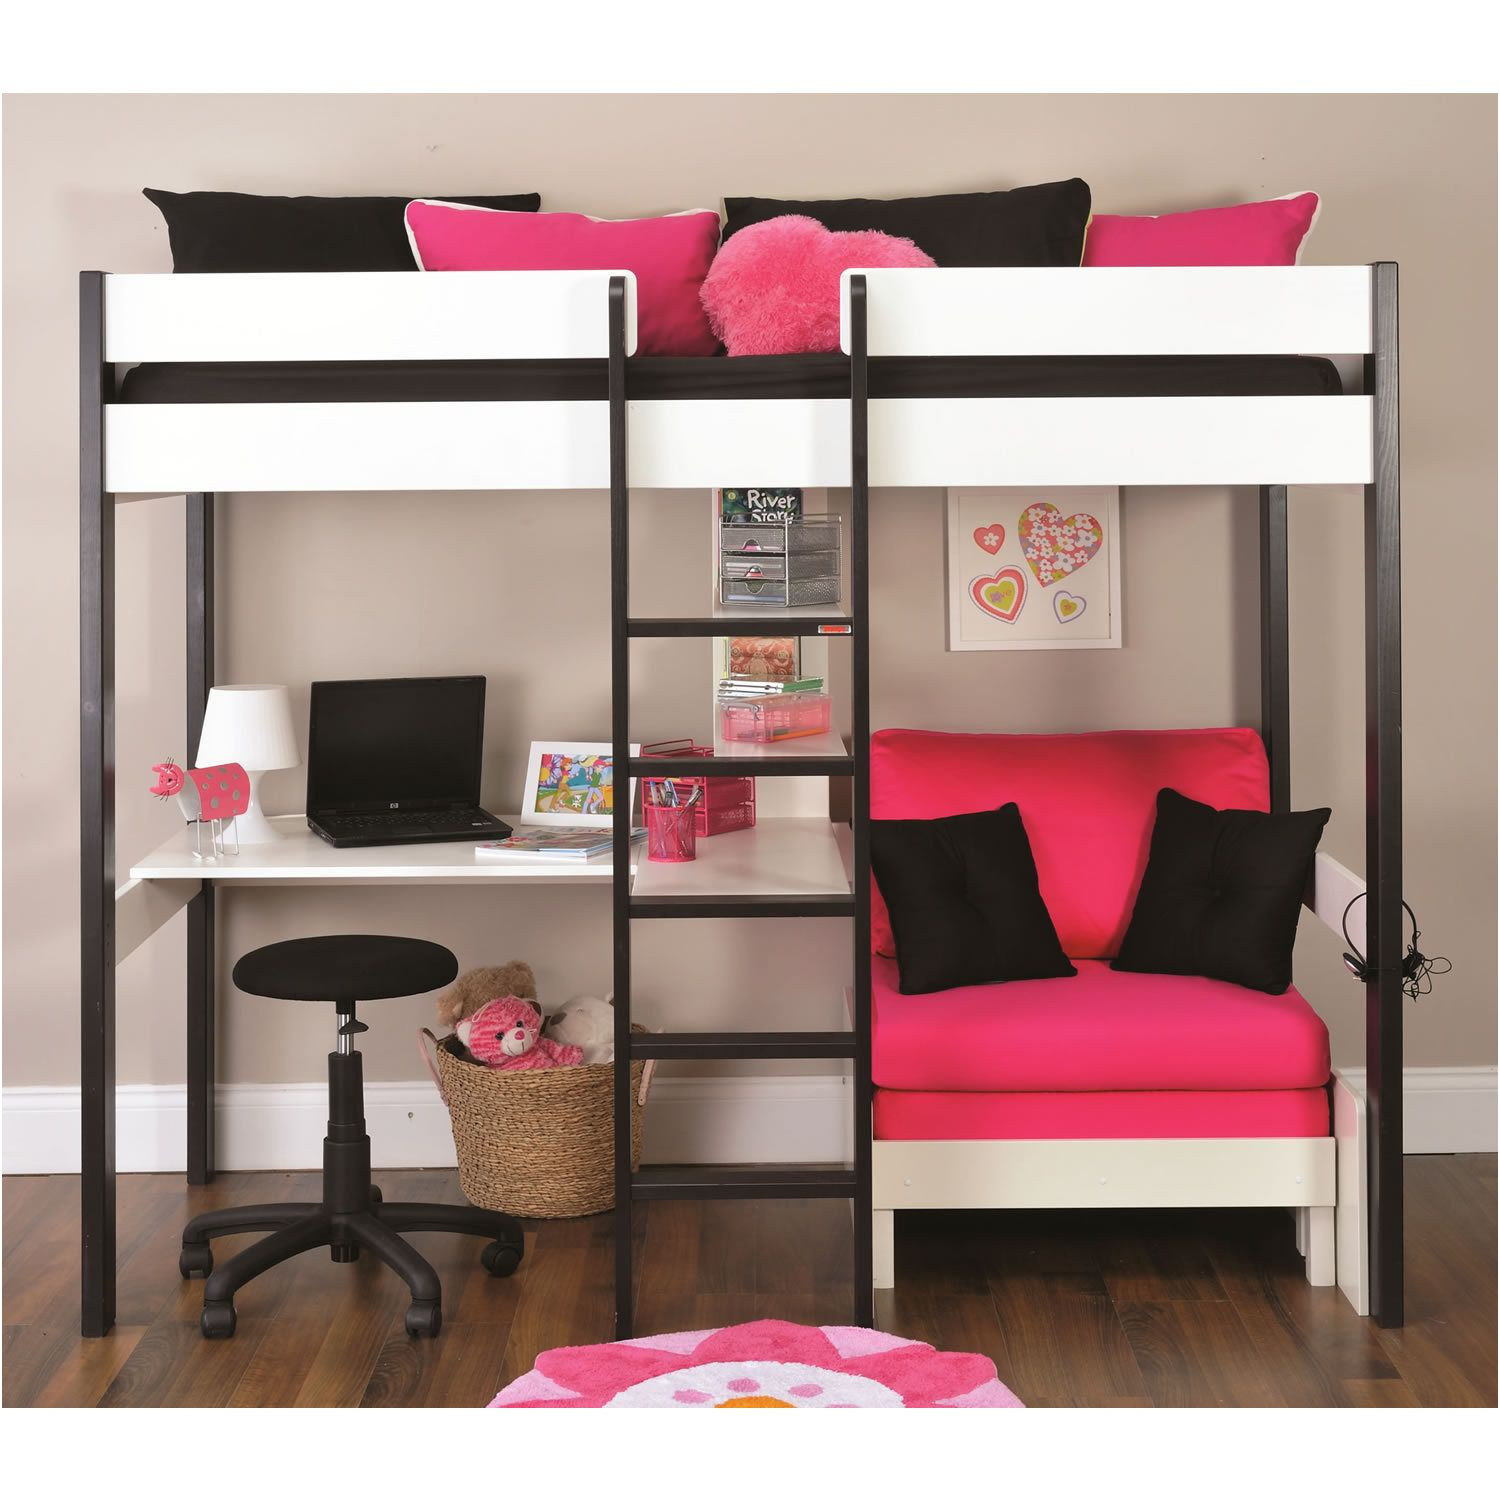 A working station for girl is a must, mainly if the little girl has turned into her teen years. Along with that, she also need a combination of privacy and chic study desk. This example might represent all of those characteristics.
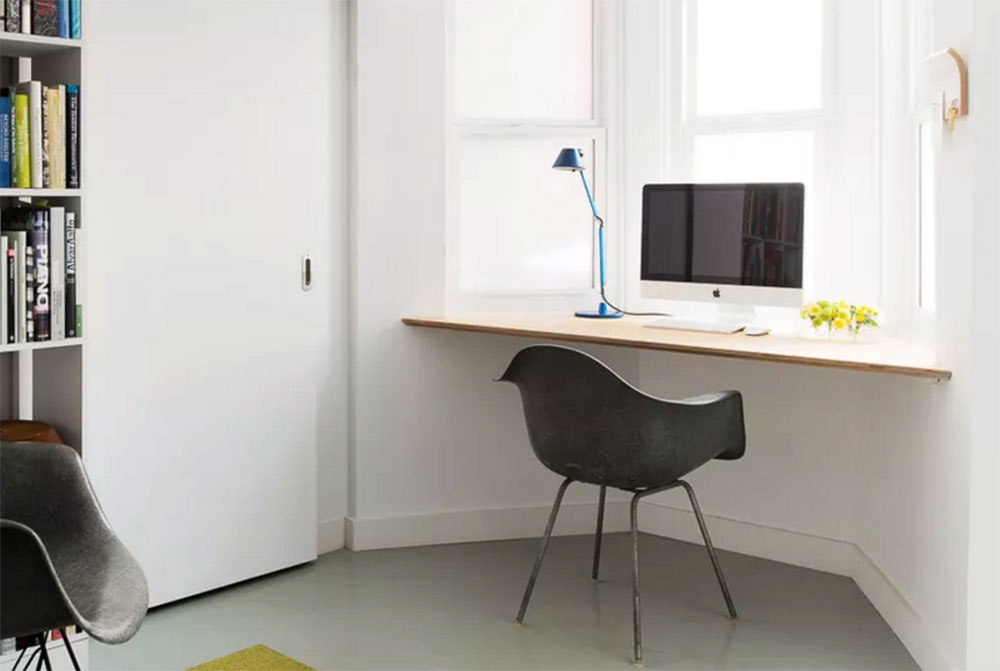 A bay window adds a classic tone to the house. Apart as its main purpose as view window, a bay window also offers you some other purposeful options. And it includes this cheap work station.
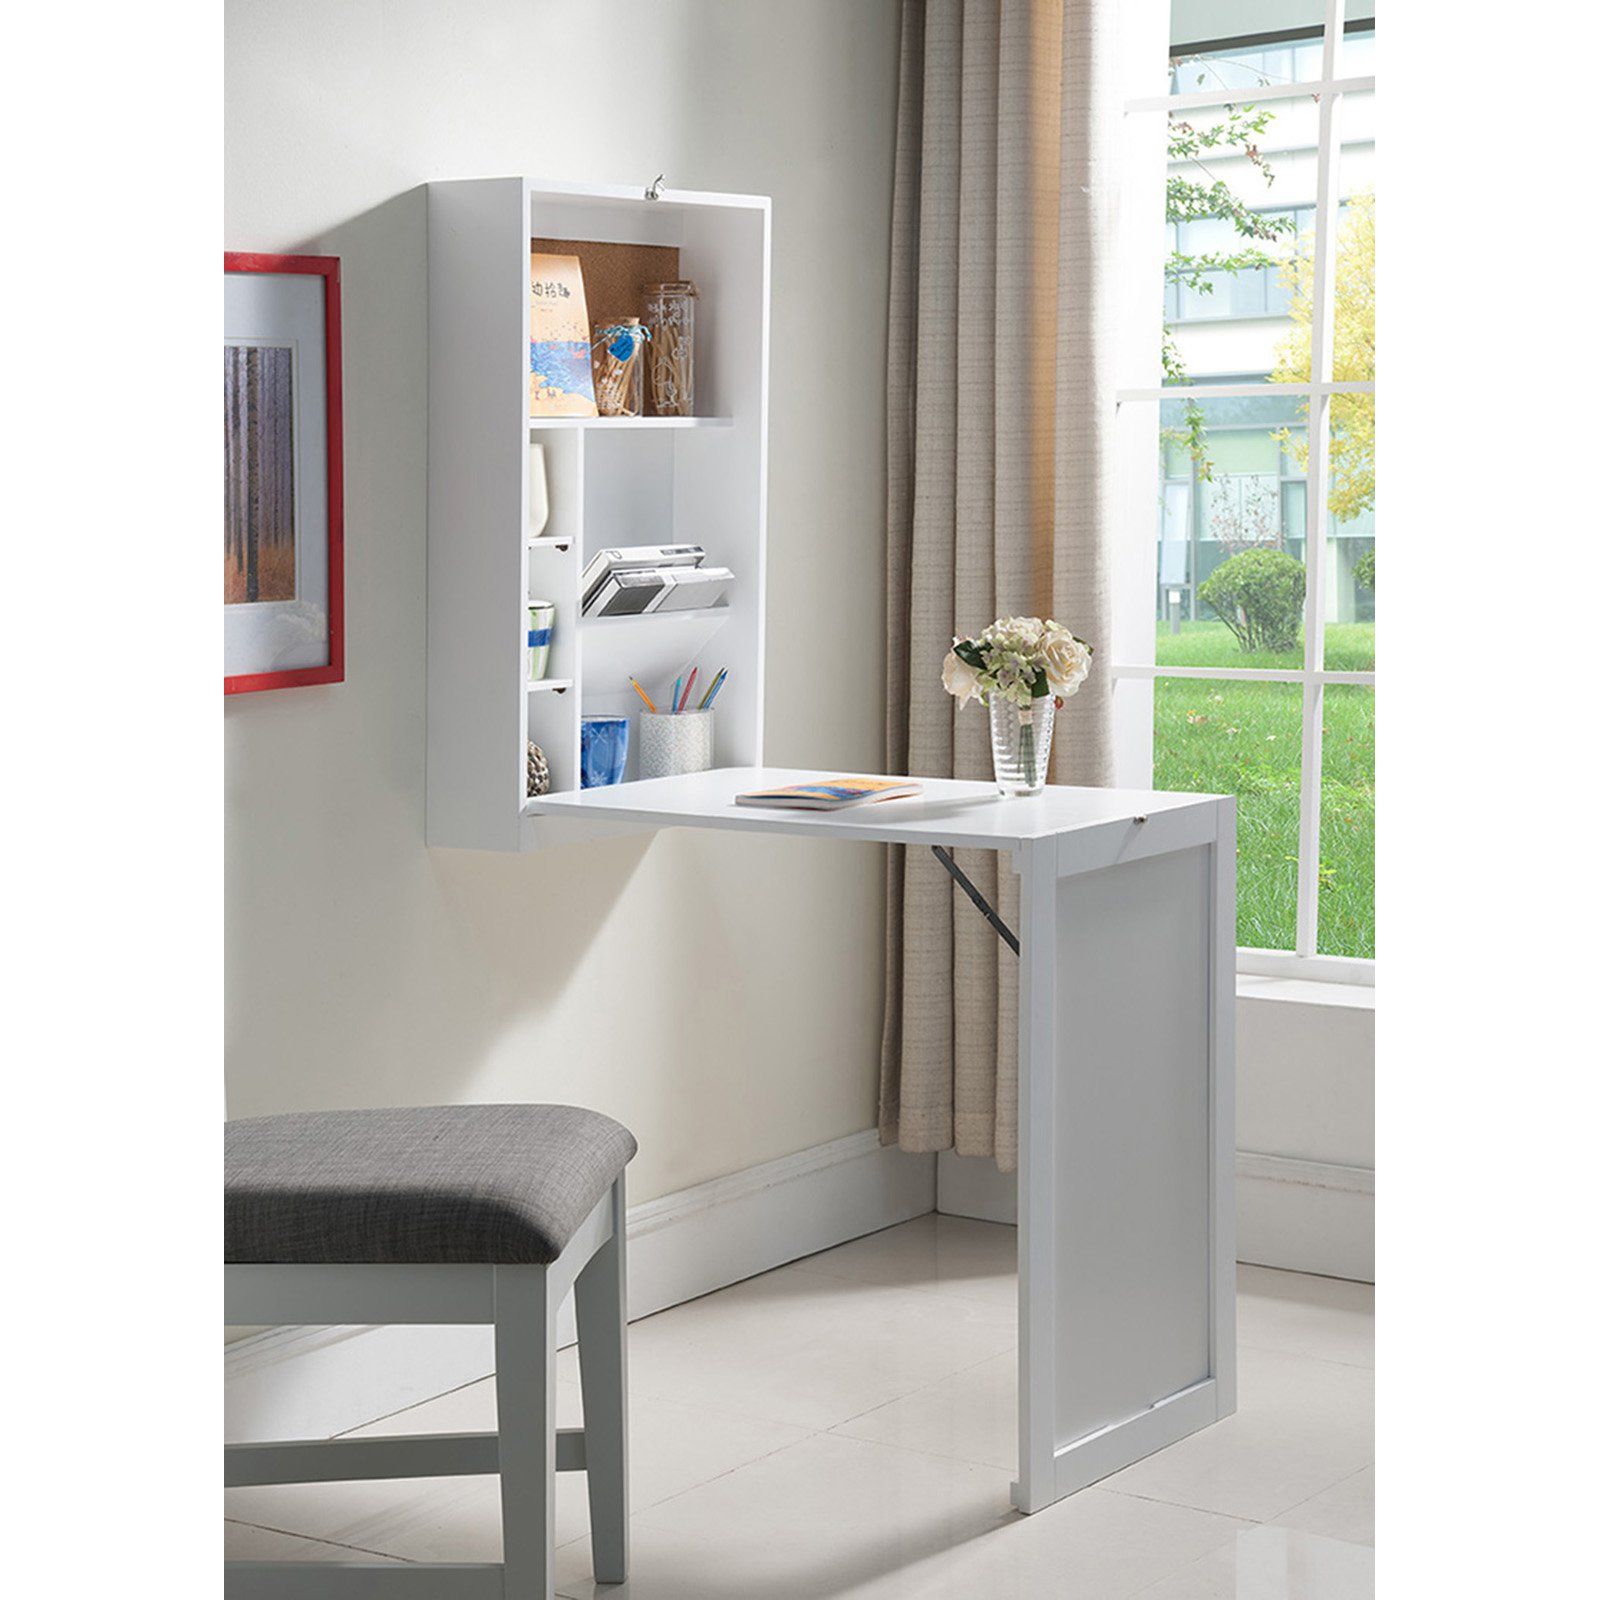 Again, if you still in need of an efficient working desk for limited areas, this computer desk design works well for small spaces. It won’t eat the leg room as well, since this desk is a fold up type.
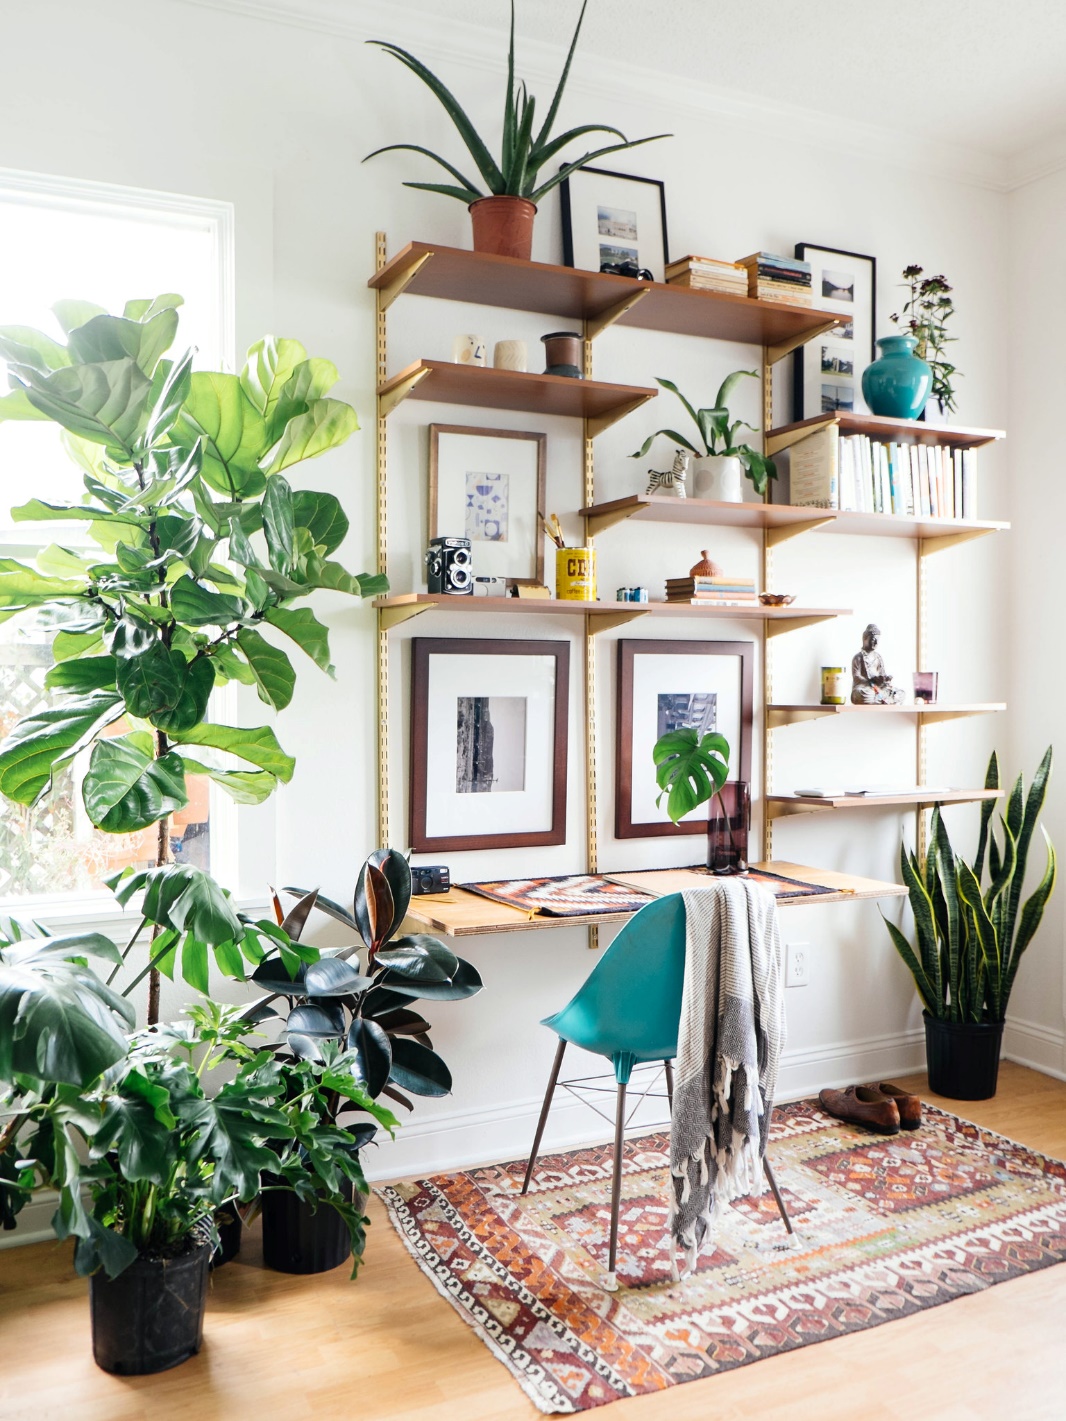 You can make an affordable computer desk plus its shelving system with multipurpose twin tracks. You only need a flat wall to mount the tracks. Its practical and evenly spaced holes enable you to put shelves on any places along the tracks.
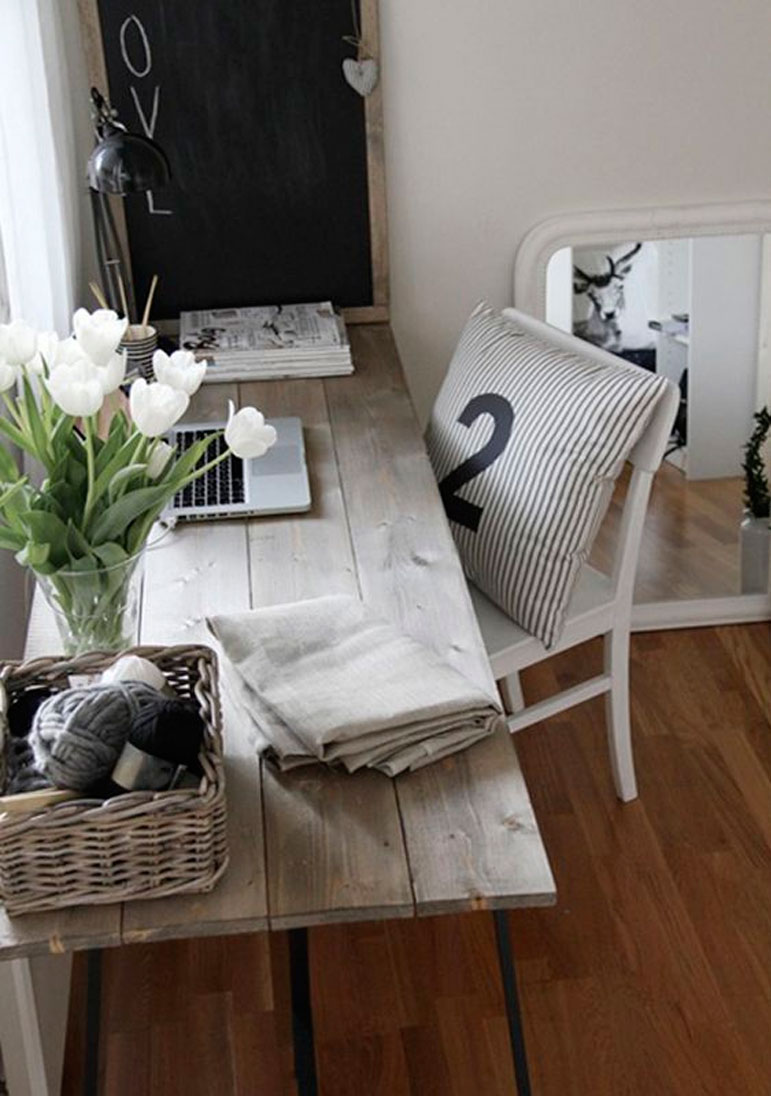 The finishing touches of a computer desk has an impact to your mood. They have to be in tune with your personal tastes. So, for an example, if you love minimalist design, you love the desk to have natural touches. As alternative, say, if you love the pleasant air of a cottage, this DIY computer desk with distressed white finishing touch is a better choice.
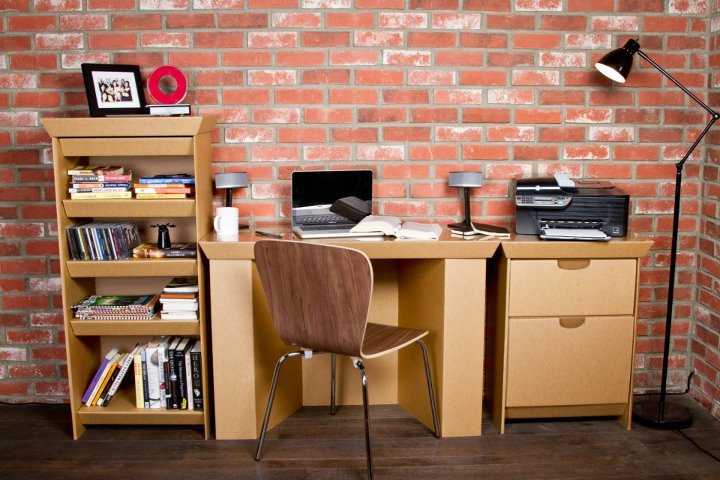 This DIY project only needs your deft hands and a scissors. You are to make computer desk from cardboards. This desk won’t need any nails or even glues. All you have to do is just fold and fold again until the cardboards turn into this ergonomic computer desk.
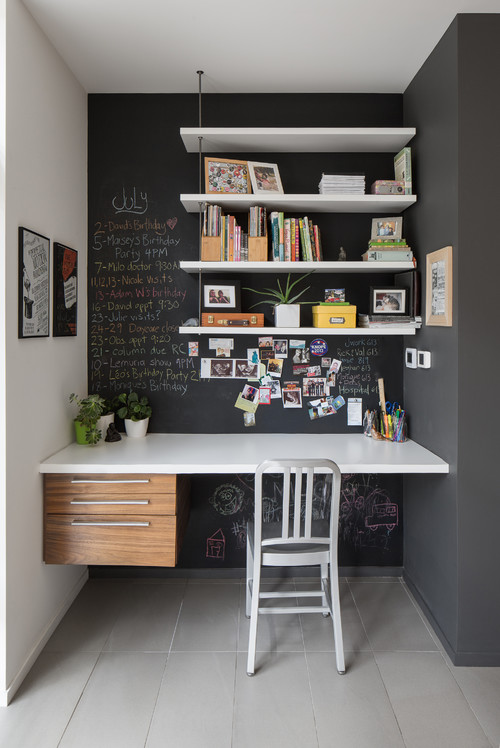 Having unused spots can spark imagination. An unused nook in your home makes your fertile minds get nicest idea, like turning it into a nook working station like this example.
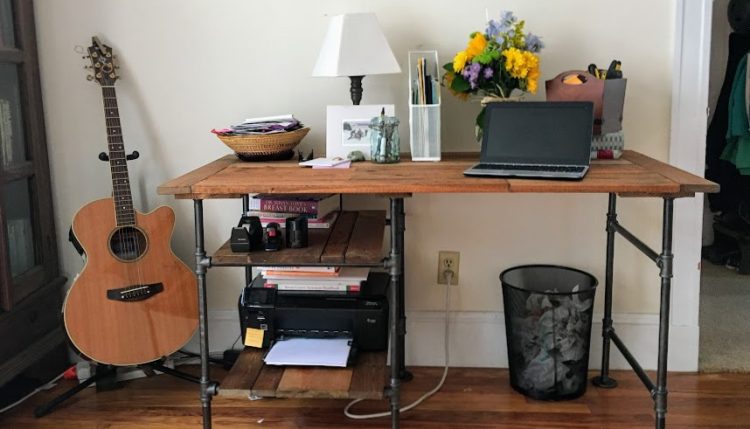 This last computer desk design is for industrial and repurposed stuff enthusiasts. Here you need reclaimed woods and several length of iron metal pipes. You also need some pipe joints to connect them all into a table’s frame. And that’s all. Once completed, you have this rustic computer desk with industrial vibes on it.
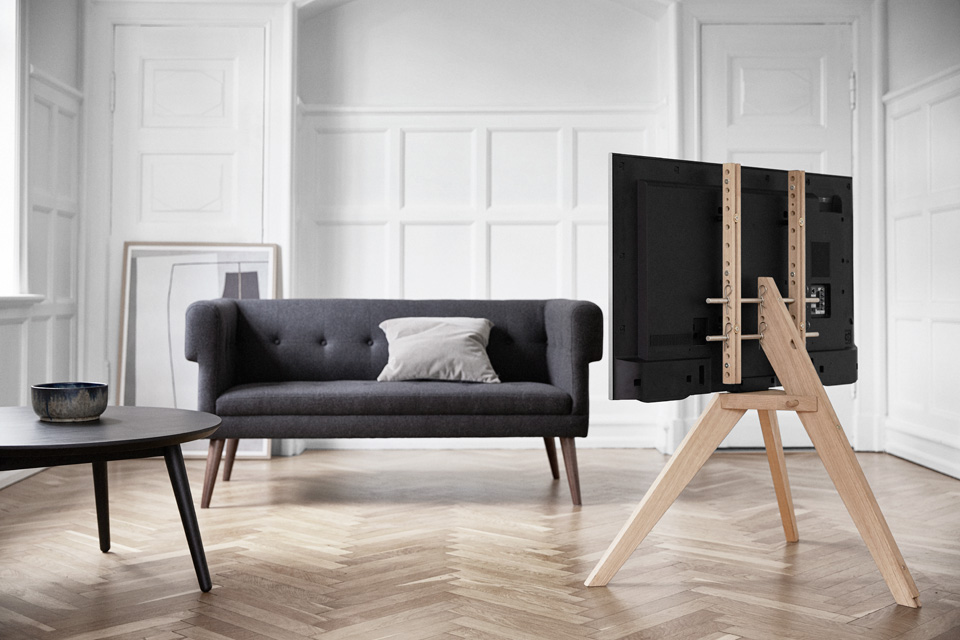 Need a TV stand for a small space? No Problem. Remember the last time you paints some nice pictures on an easel? Now you turn the ease into a TV stand. It won’t eat your room, you even can set them on a corner.
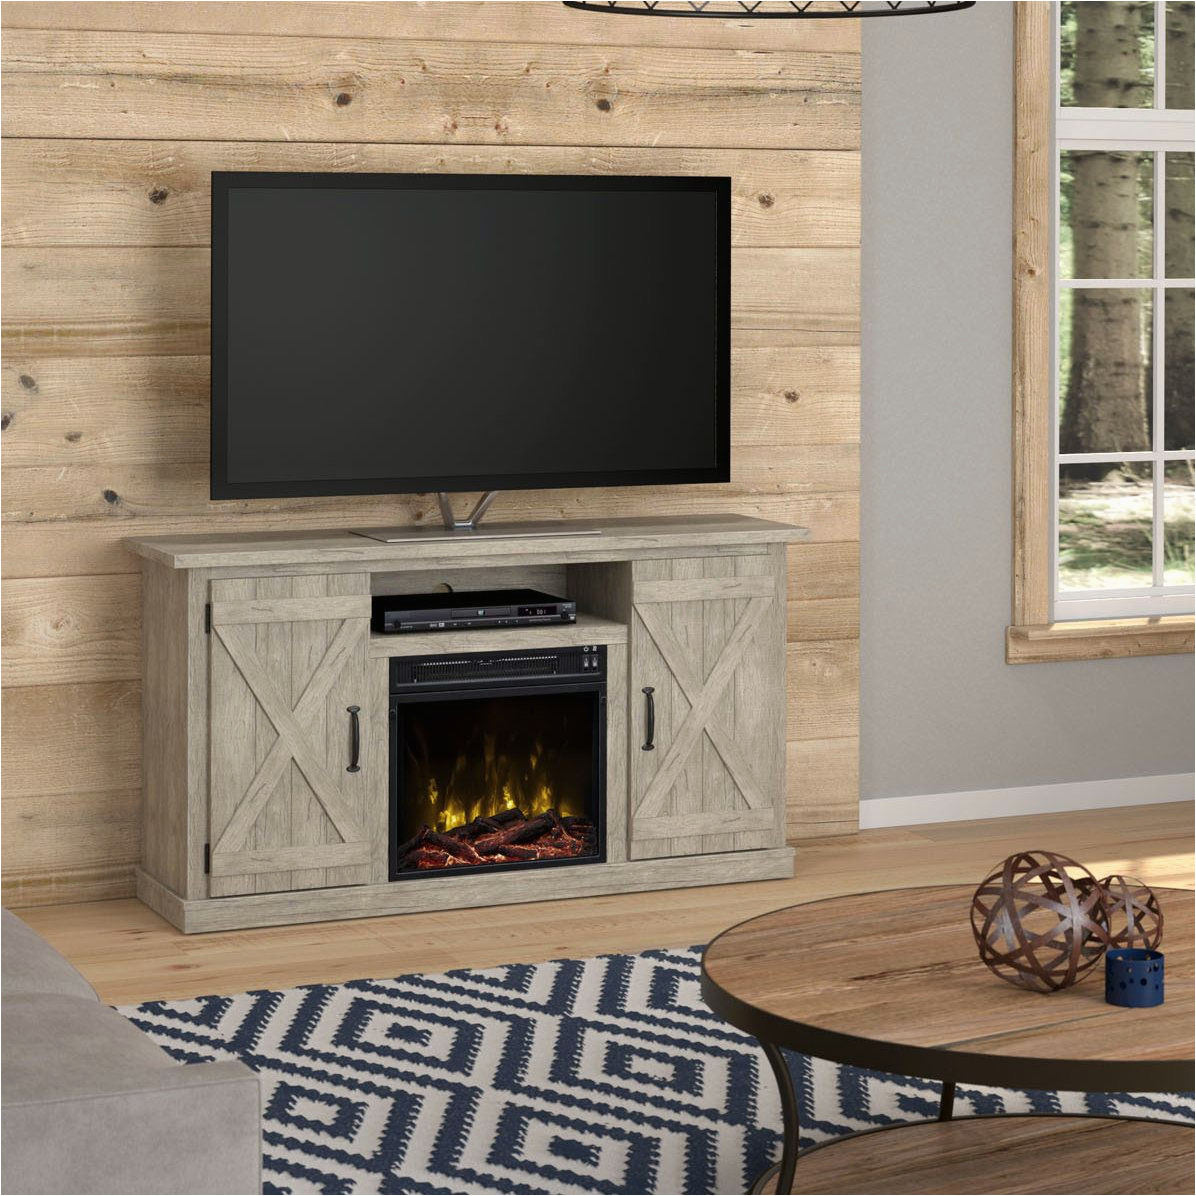 Wood lovers now that nothing compare to wooden stuff when they talk about warmness vibes. Wooden structure or furniture are best at giving you the pleasant and cozy air. That’s probably the reason of why the rustic or barn style you always love barn style.
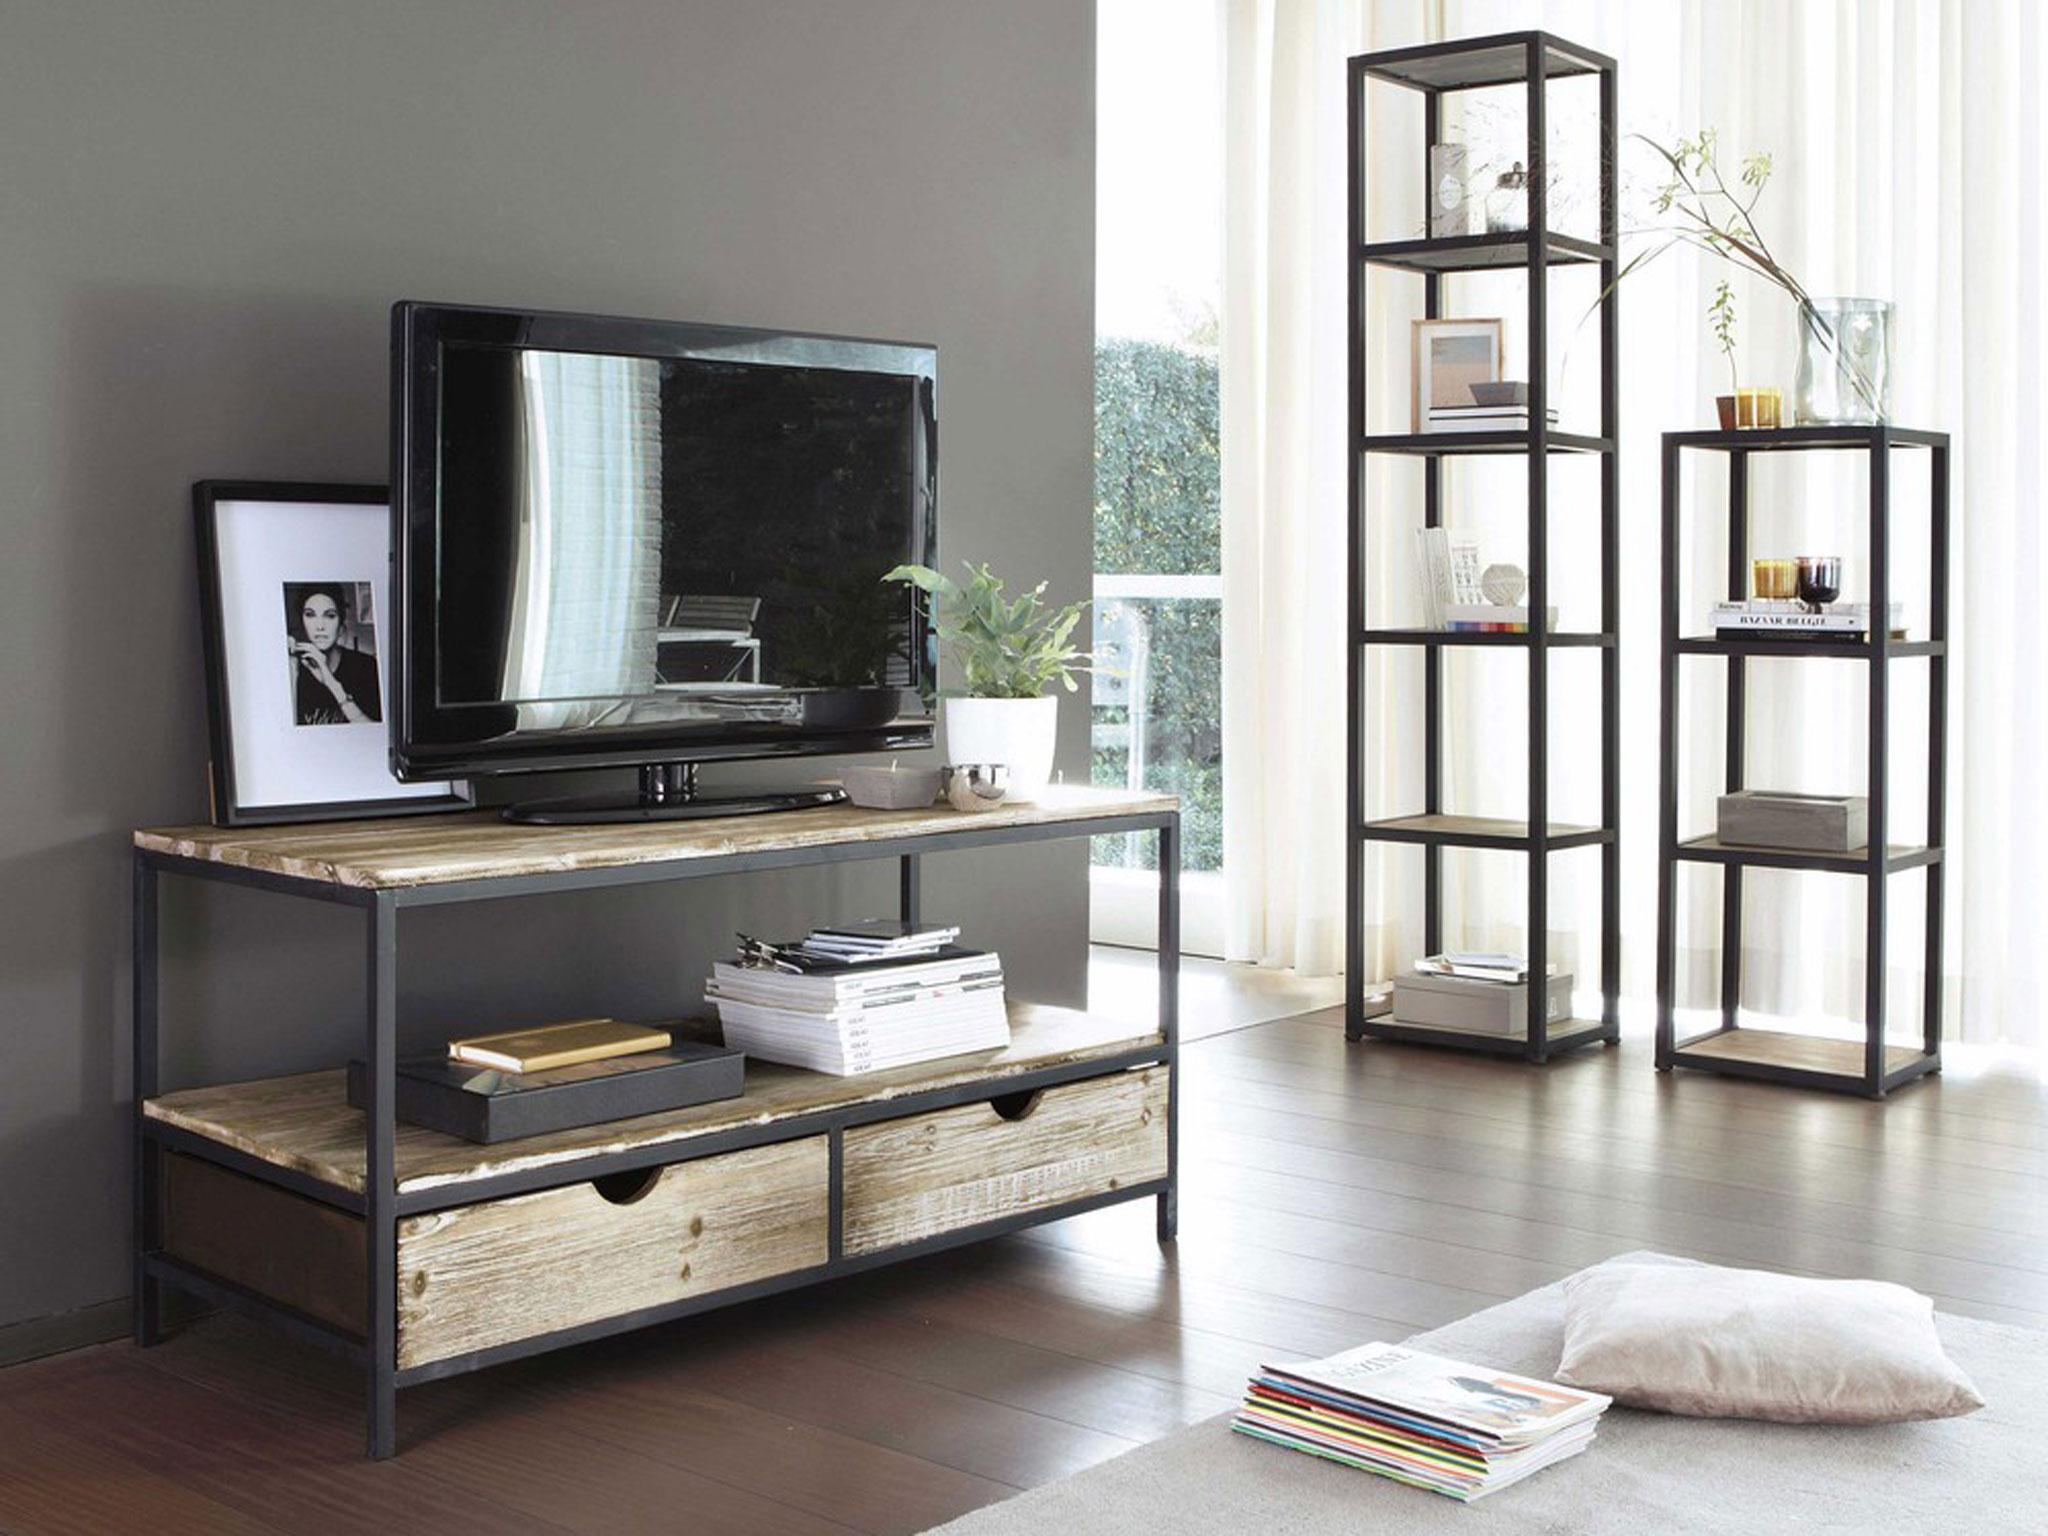 A contemporary living room needs a contemporary TV stand. Ever consider one with industrial flair? If you love neat, efficient, and uncomplicated design, this design is yours to try.
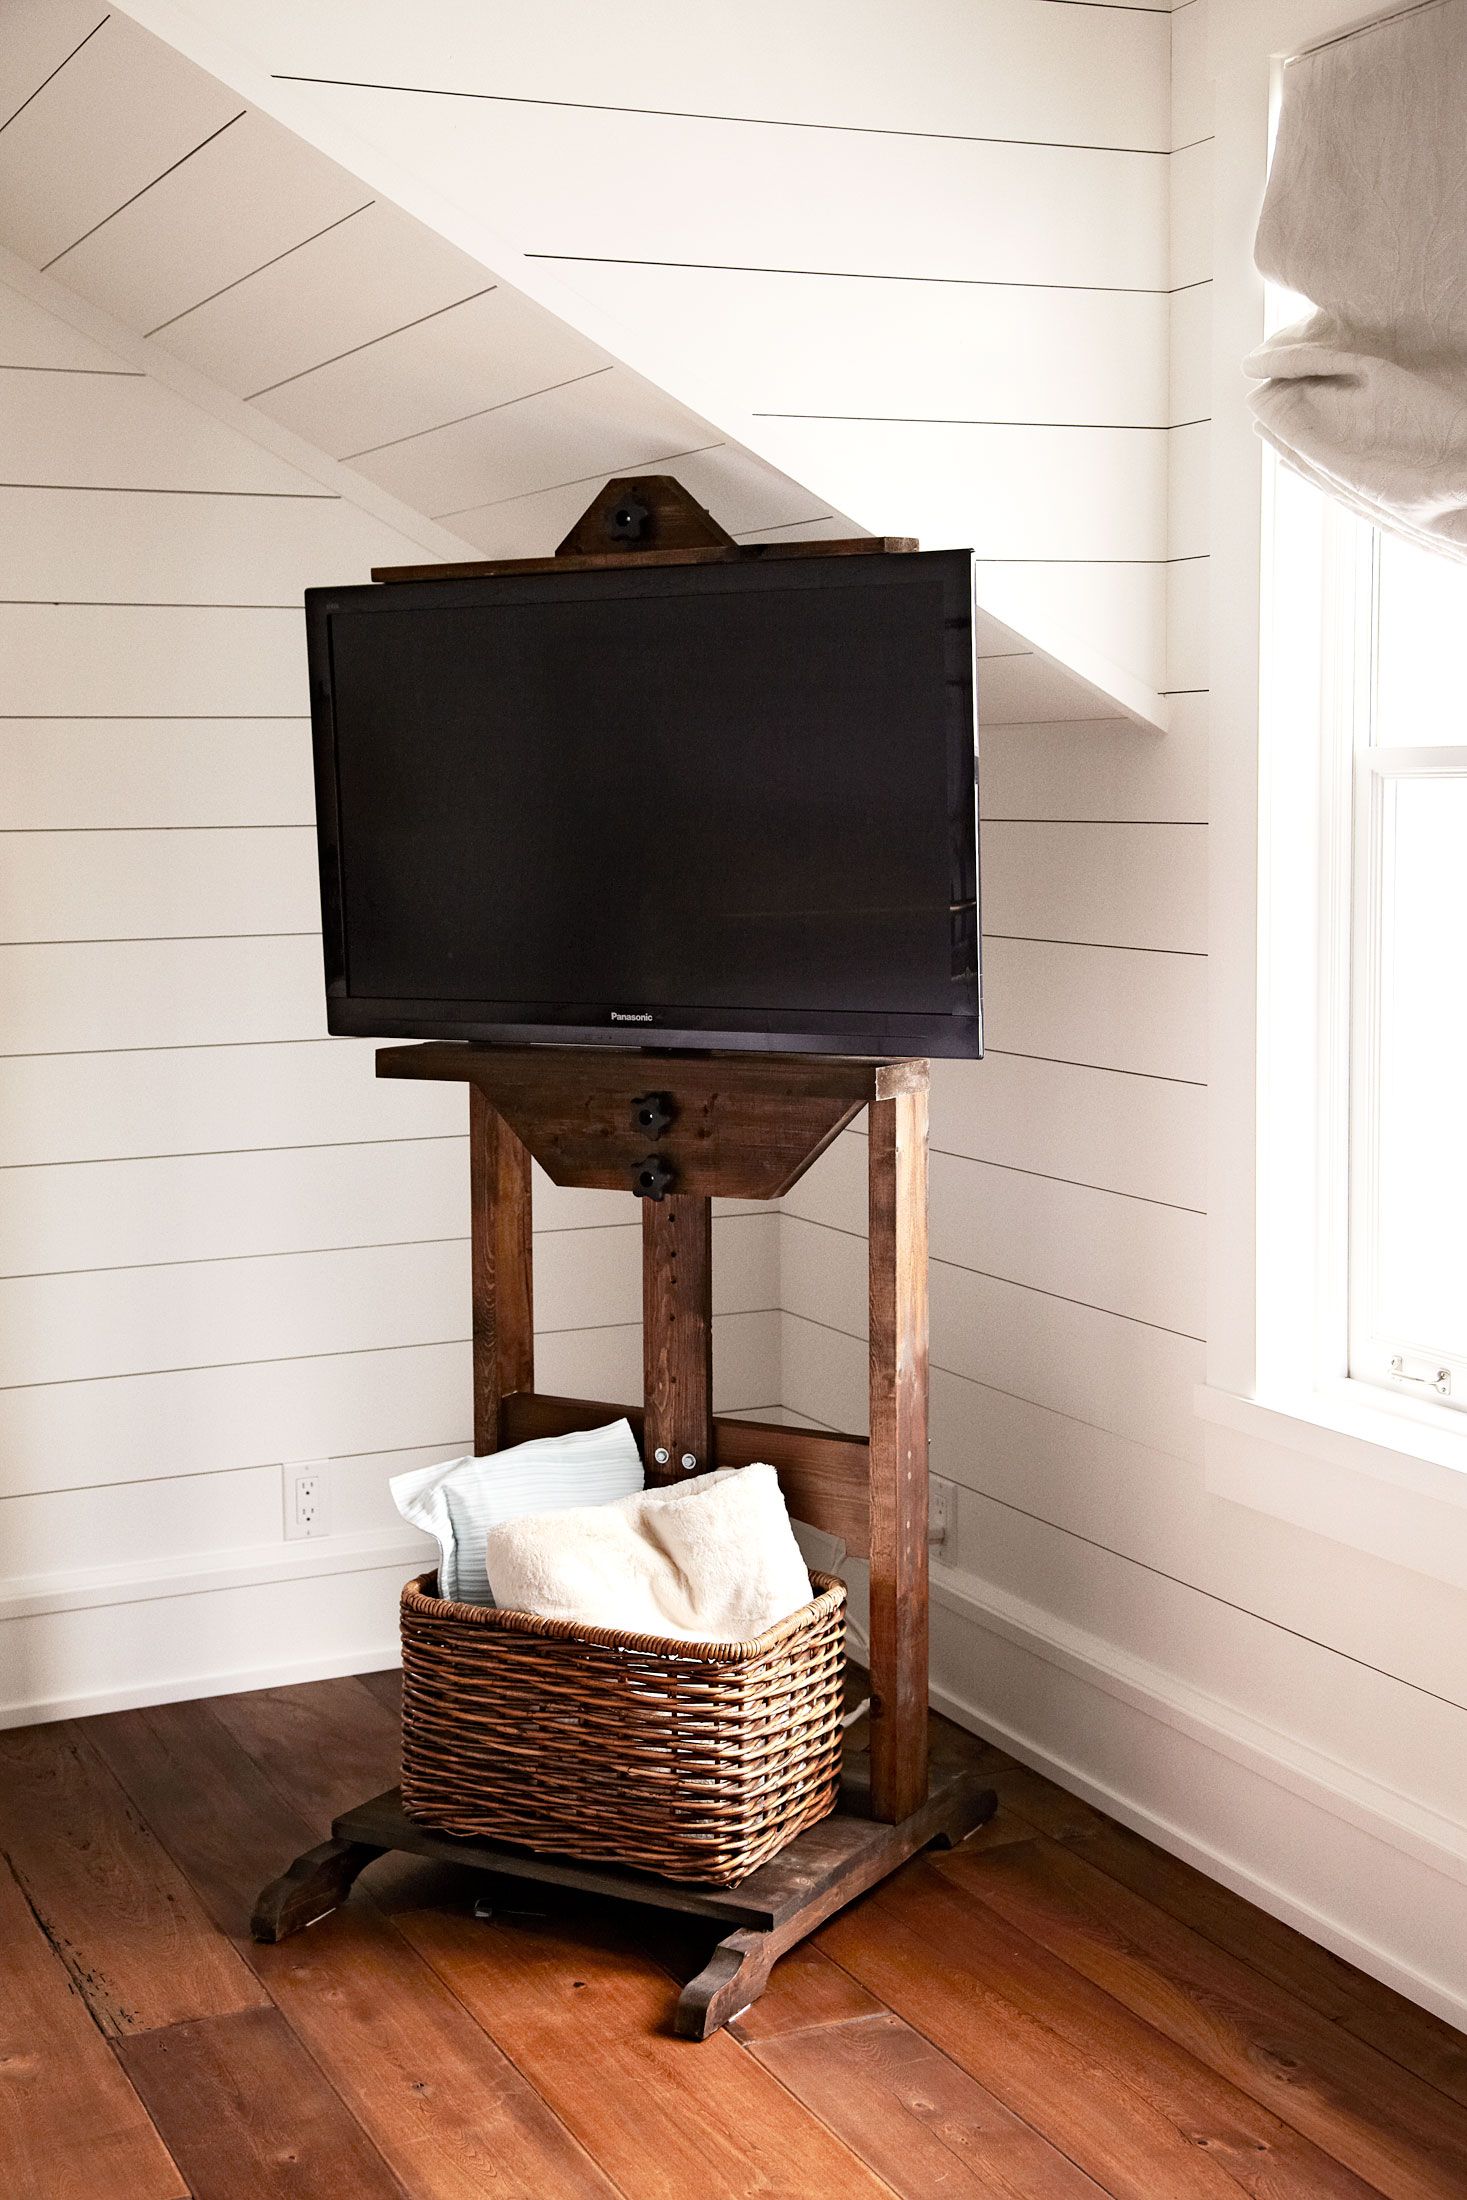 Still looking for a suitable TV stand for small spaces? Here’s another design for you. It’s a bit complicated than the first design (see list no.1), but you can still make it in your DIY project, as the structure only has several parts –and all are exposed.
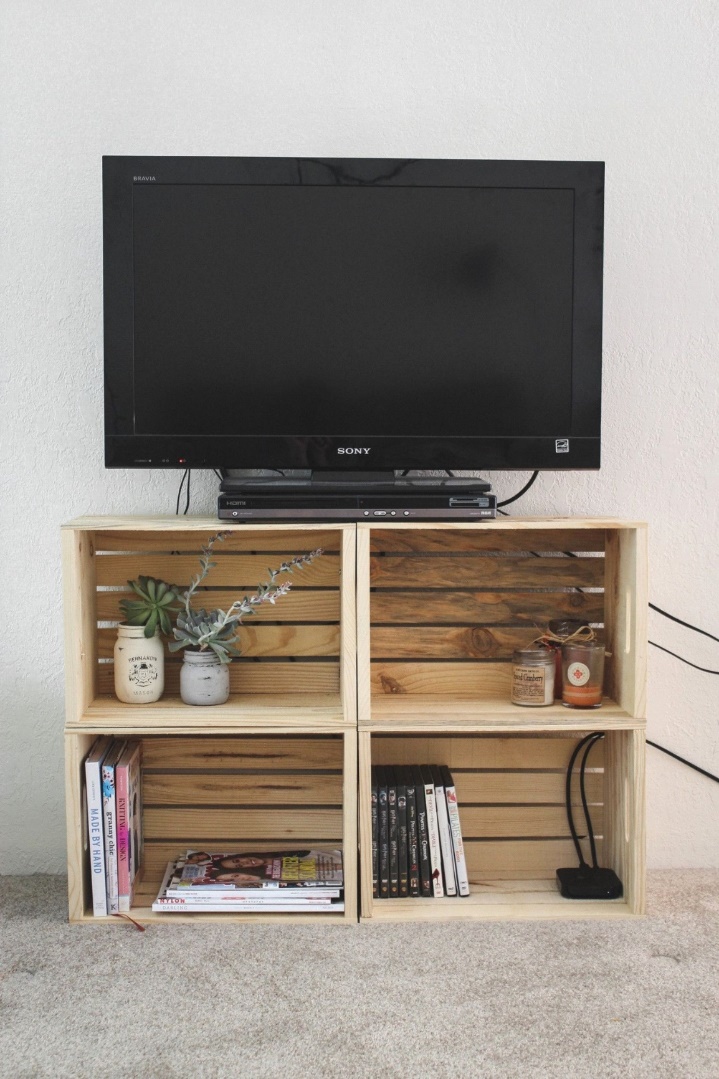 When it comes to designing a TV stand, only imagination is your limit. Here’s the example: a TV stand out of wood grocery crates. With a simple and quick setup, you have this shabby chic stand.
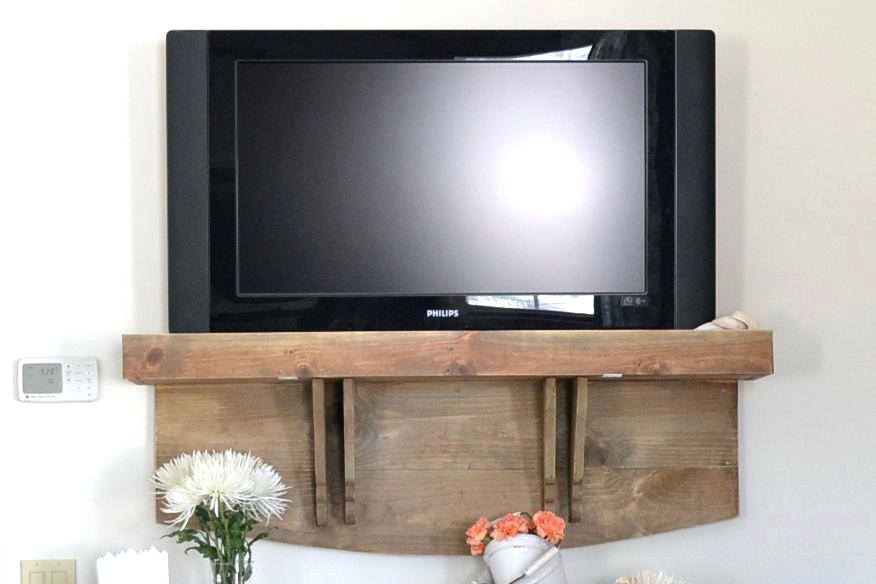 Neat people hate a messy living room –messy TV cables included. Are you the one? The one who always strives to hide the cabling and wiring in the house? Then you need to consider this TV stand.
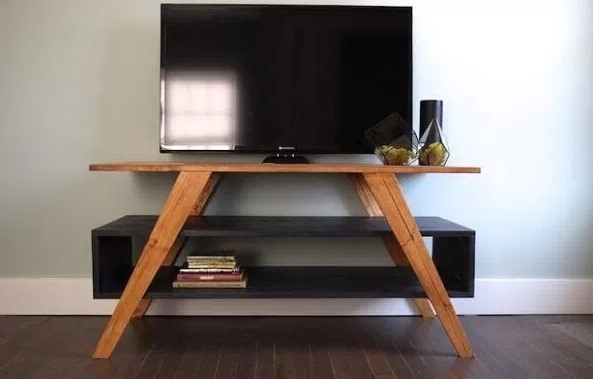 Want to make a DIY TV stand with the retro 50s kicks? Here we offer you one. It’s easy enough to build and, once completed, it easily helps you to fly back into the great and glory of 50s.
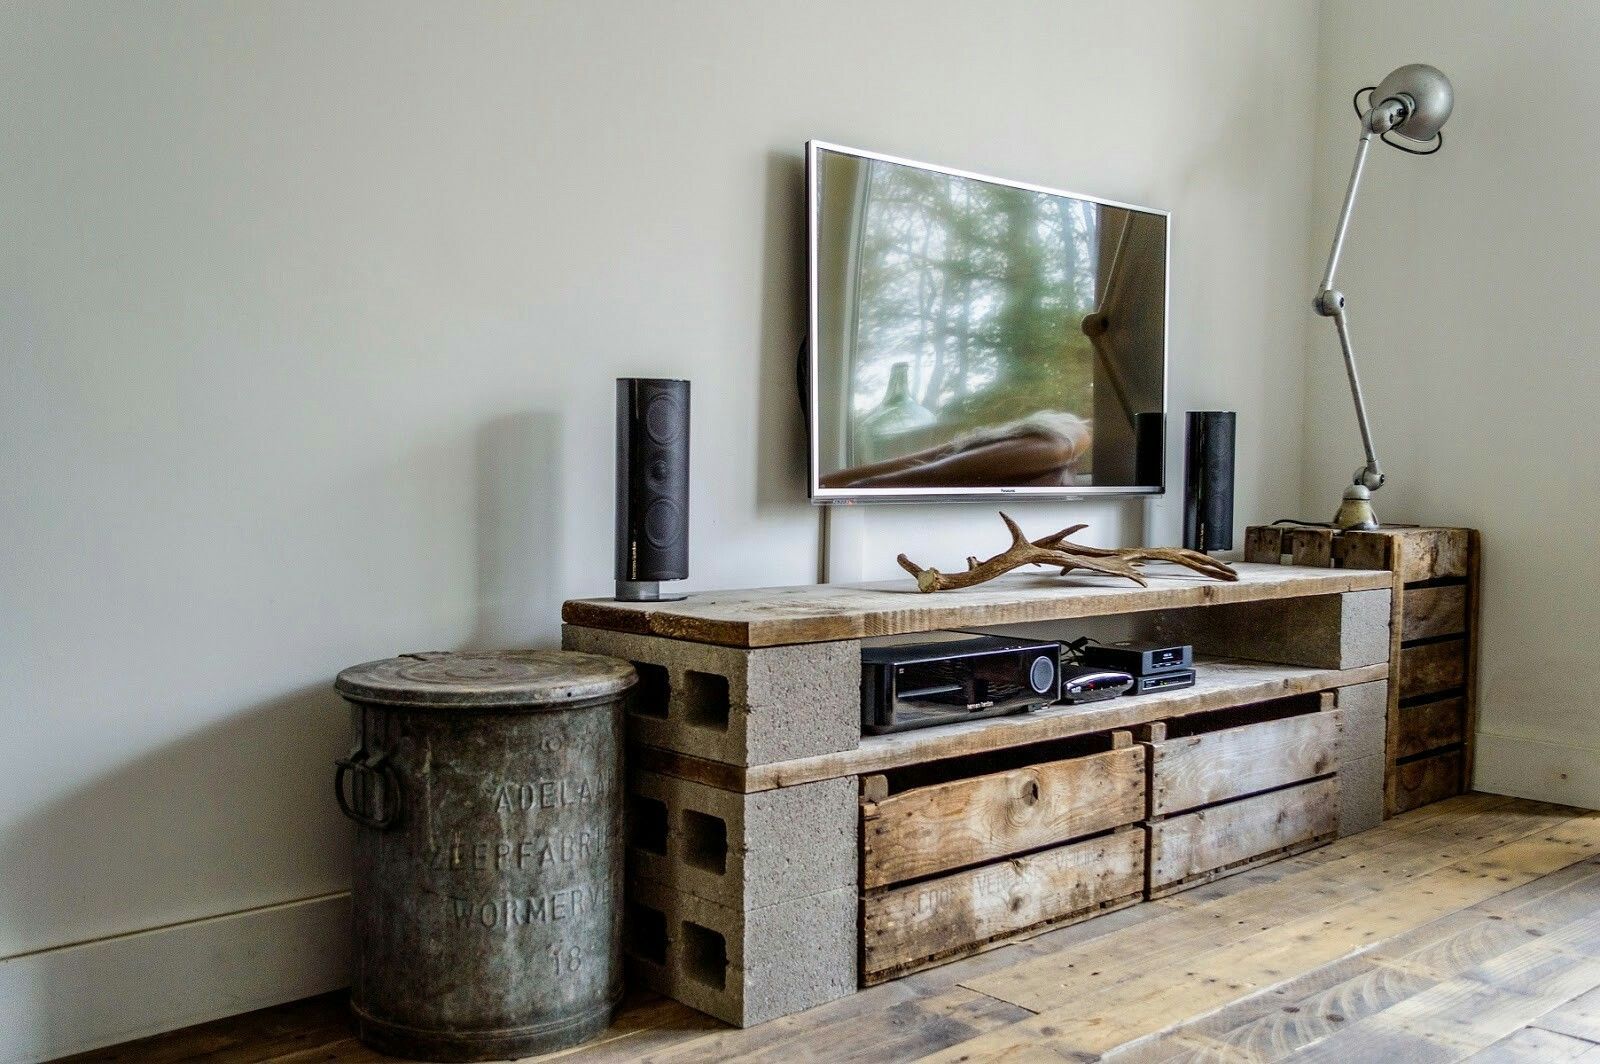 Ok, you only have piles of old wood planks and several unsightly cinder blocks on the corner. And you want to have a cool TV stand out of them. Possible? Yes. You can have it, just like the example. And here’re the step.
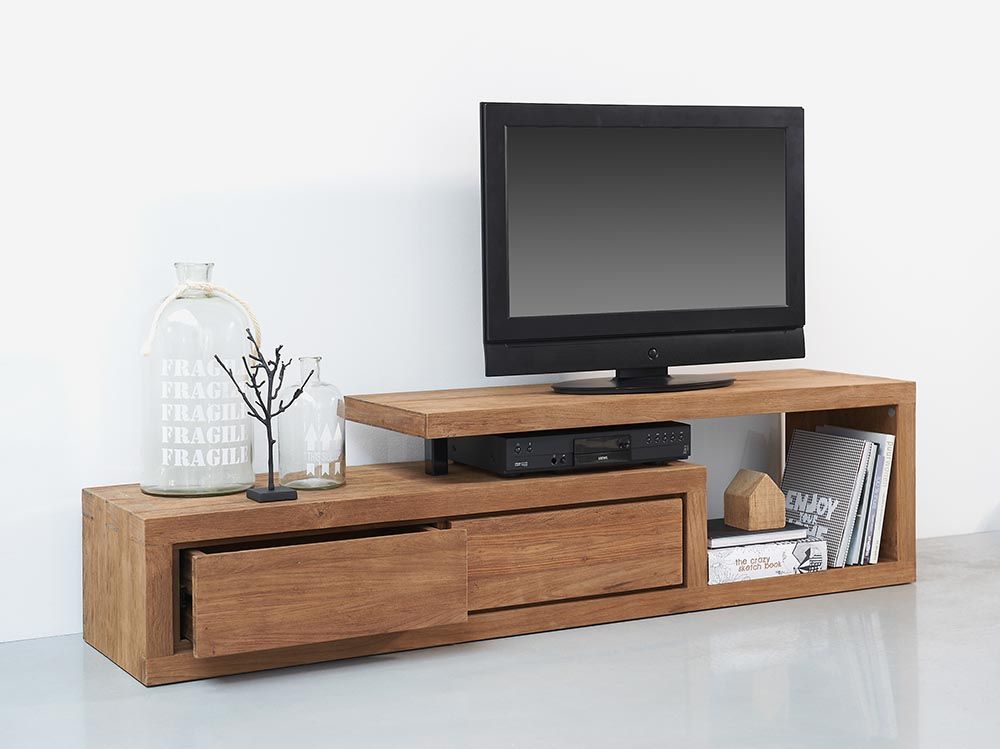 When you need more leg rooms but you also need to find better place for the TV, try a minimalist floating TV stand. The design hugs the wall, no legs needed. You can size up the stand to fit in with the any room sizes.
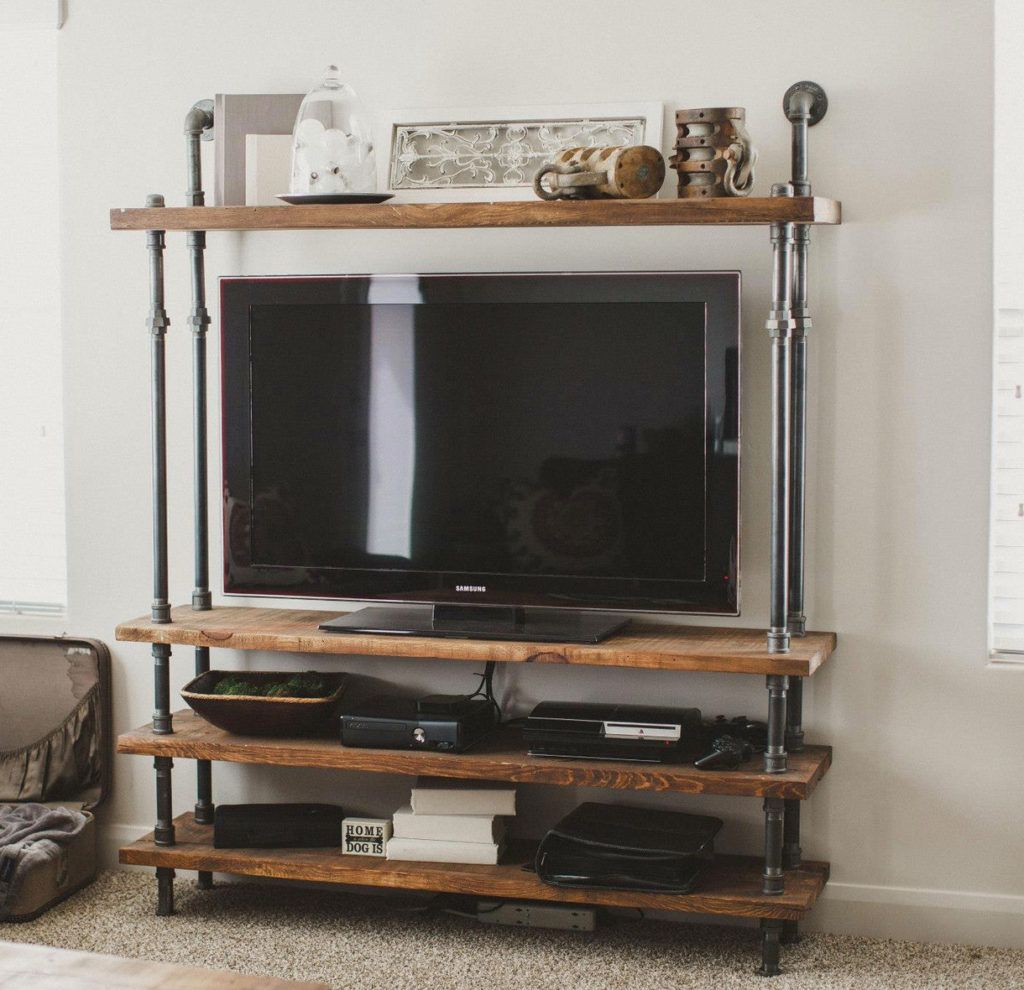 Still love the industrial look? Now we offer you a TV stand with steam punk flairs. You, of course, can make it yourself in a snap. The materials are easy to find, and they are also affordable.
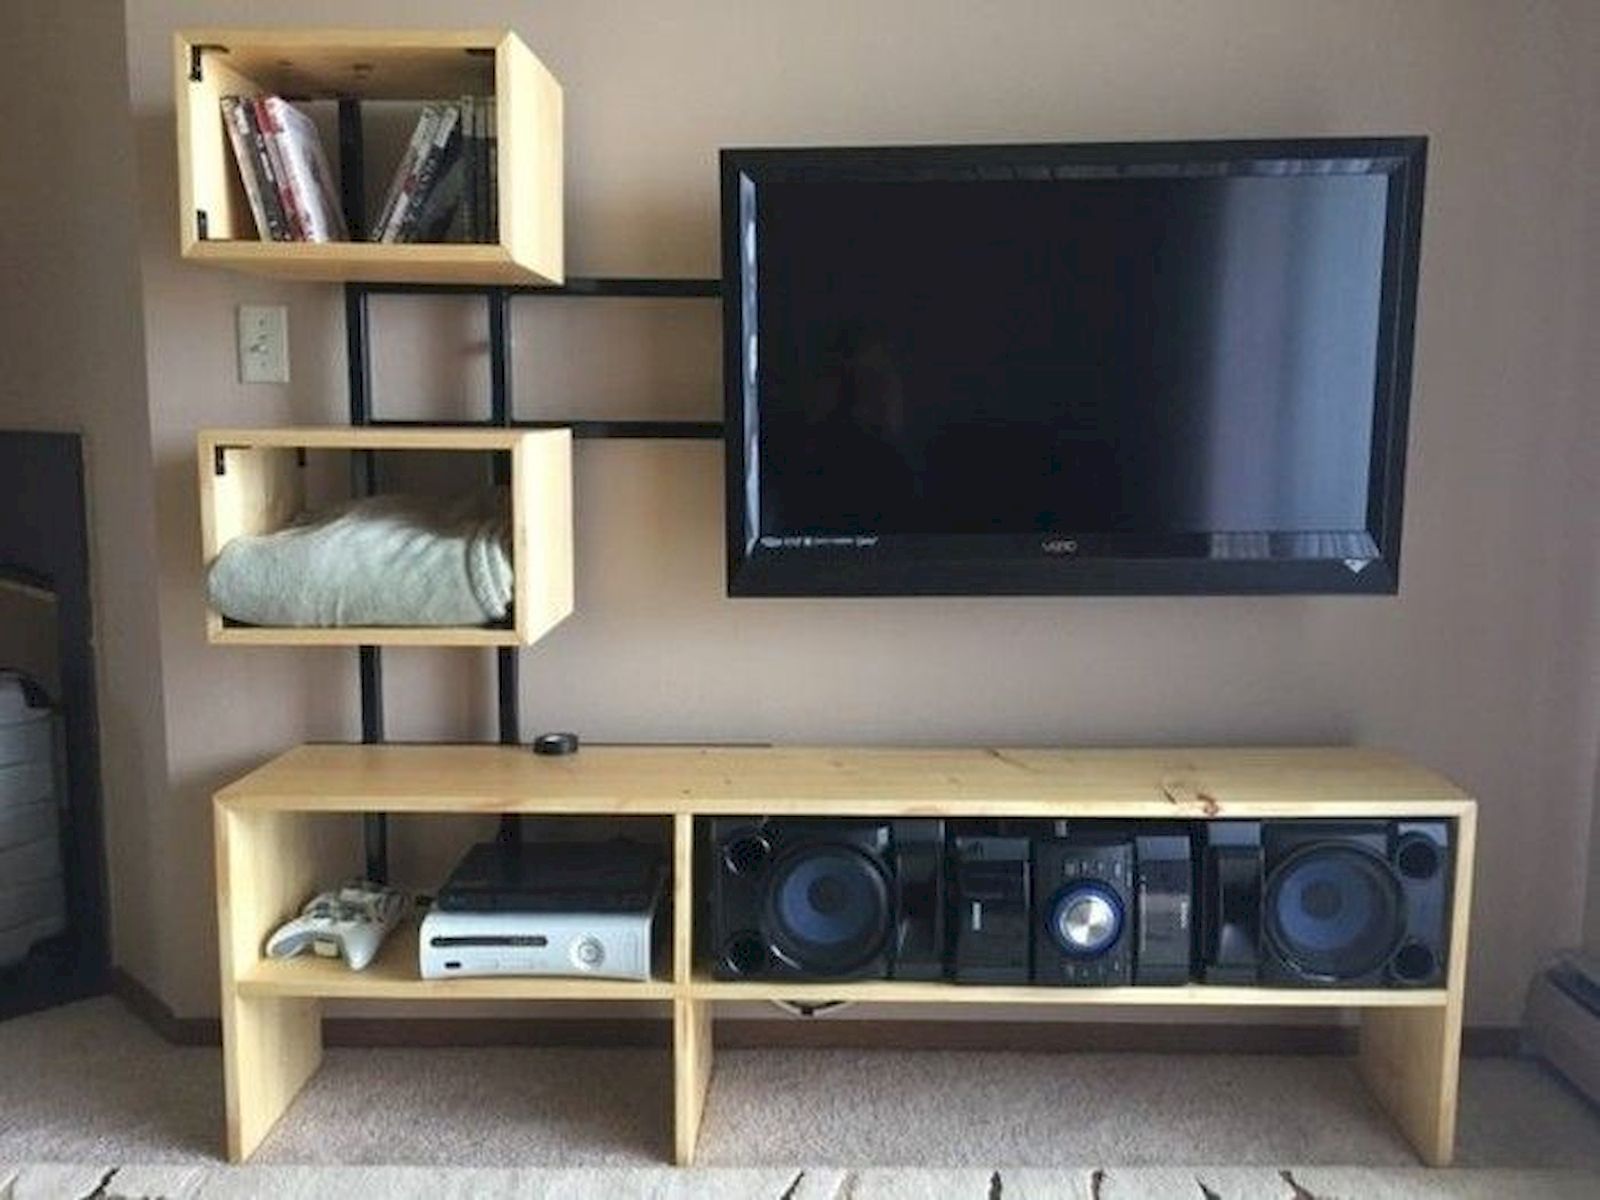 Contemporary furniture designers love to combine wood and metal materials. For the contemporary eyes, the combination looks neat and chic. The TV stand design proves it.
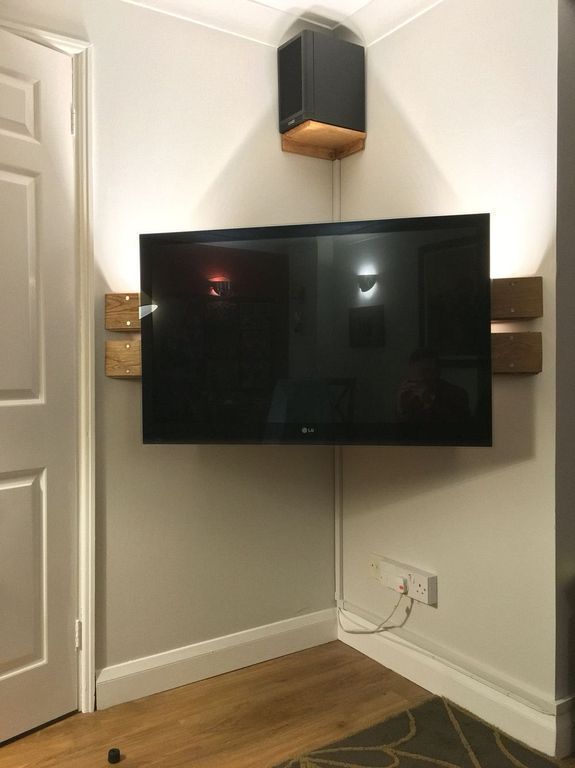 Corner TV stand again, a corner stand that fits perfectly for any of corner in the house. And the design is so simple that you can make it in a breeze, provided you have the materials and the basic carpentry tools.
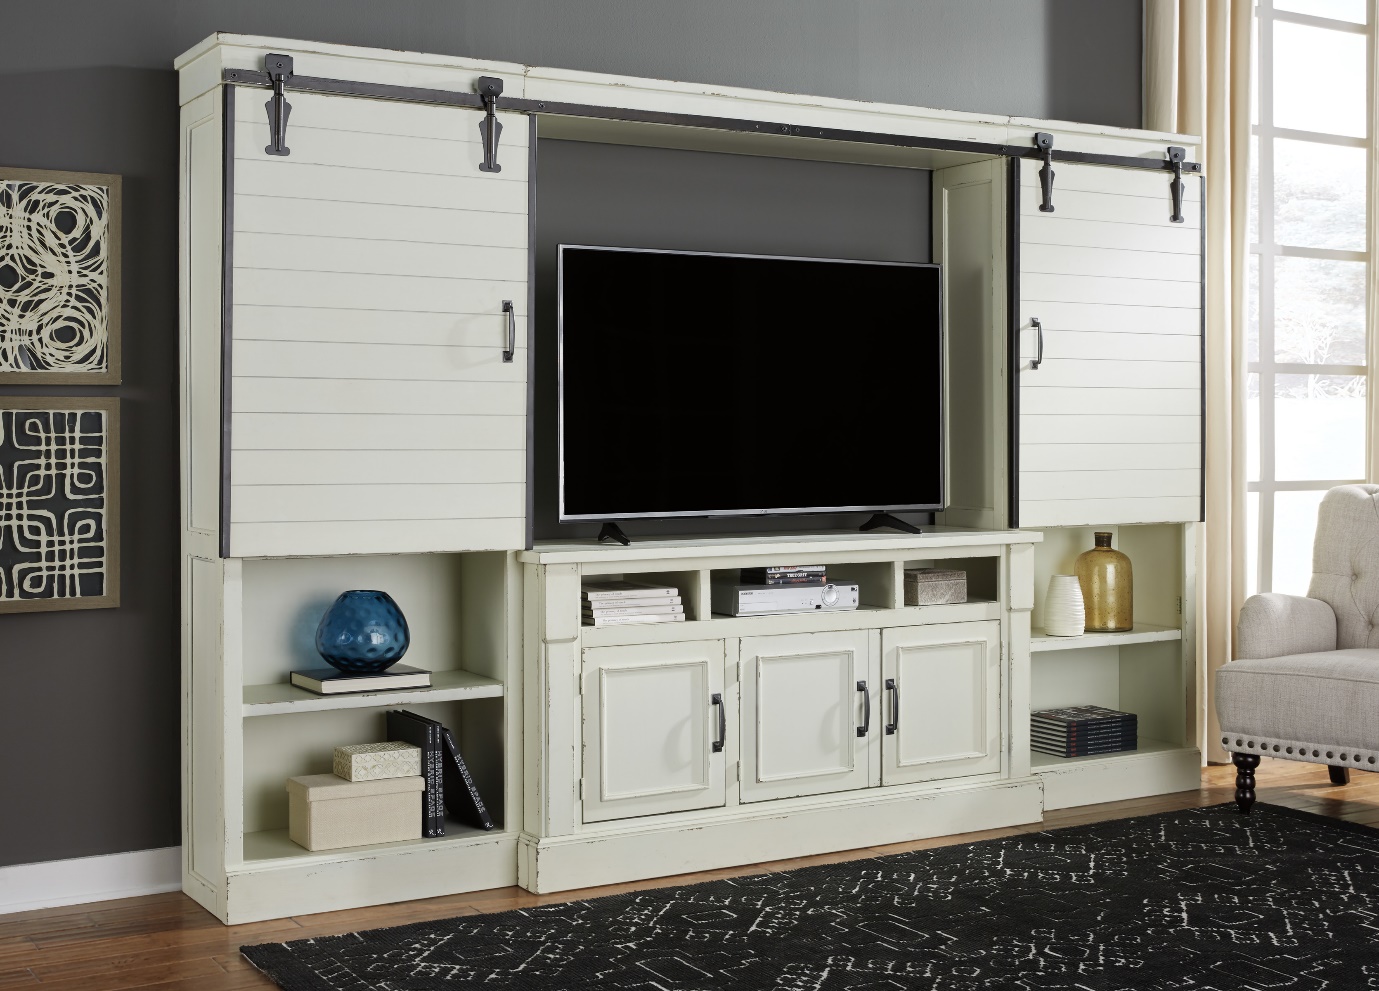 You’ve met a retro-contemporary TV stand design up on the list before. Now we take you to the country side to meet this country style TV stand with doors. The stands still retains its elegant old classic lines. All the while, it also offers rustic vibes with its sliding doors –barns style. An eclectic and unique air build up around this stand design. Love to have one?
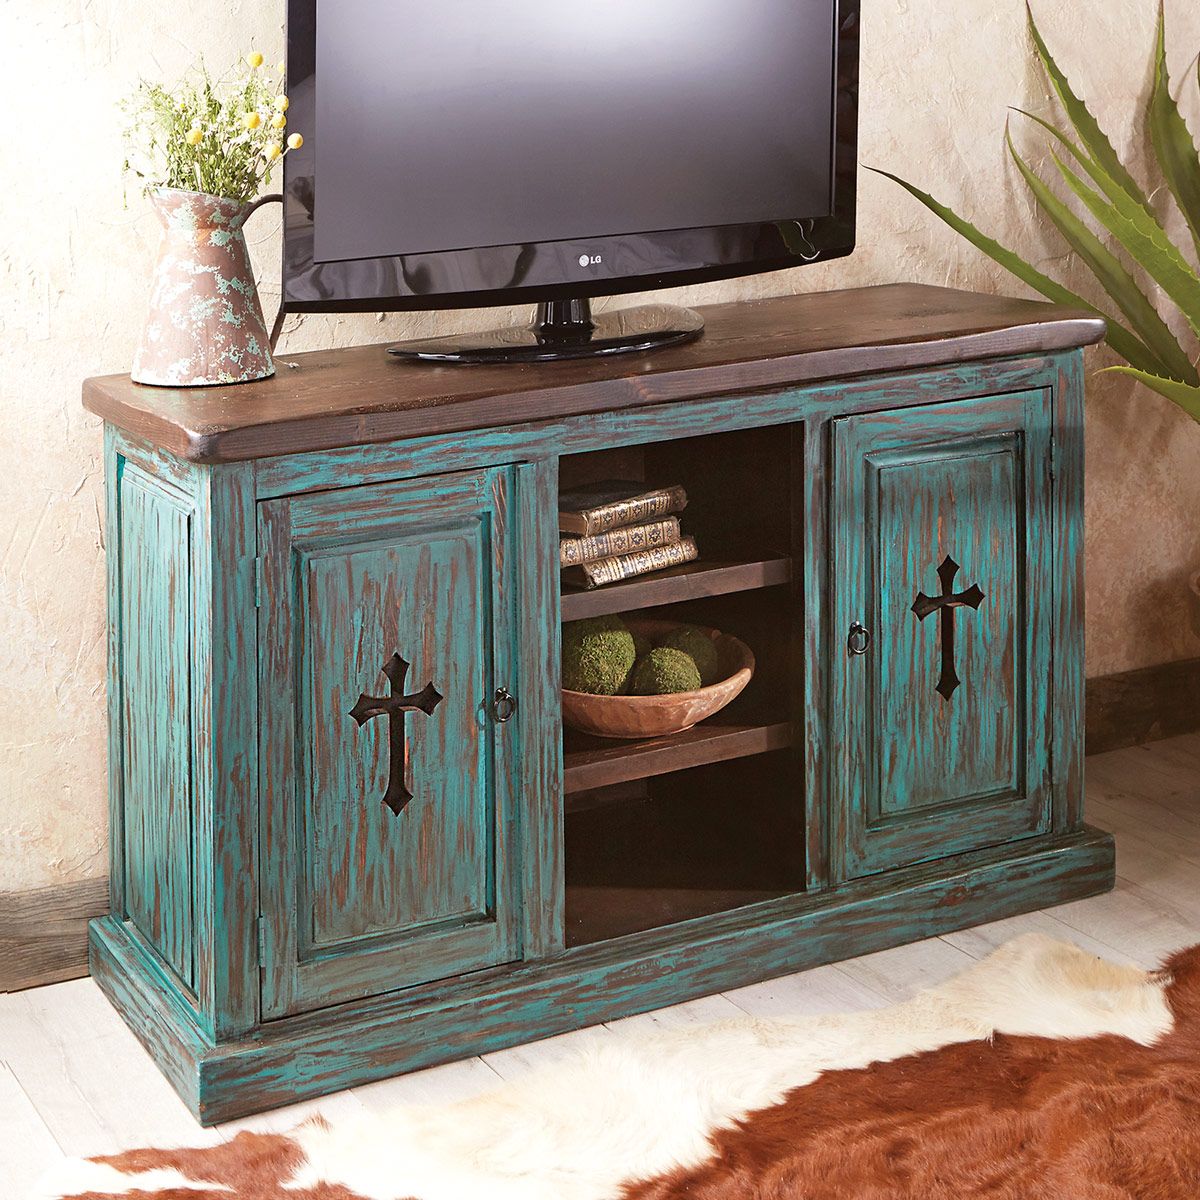 Having an old unused cabinet? Try to repurpose the furniture into something awesome like this plan. You have a TV stand from repurposed small cabinet. You have the stand. And you have an ample storage system.
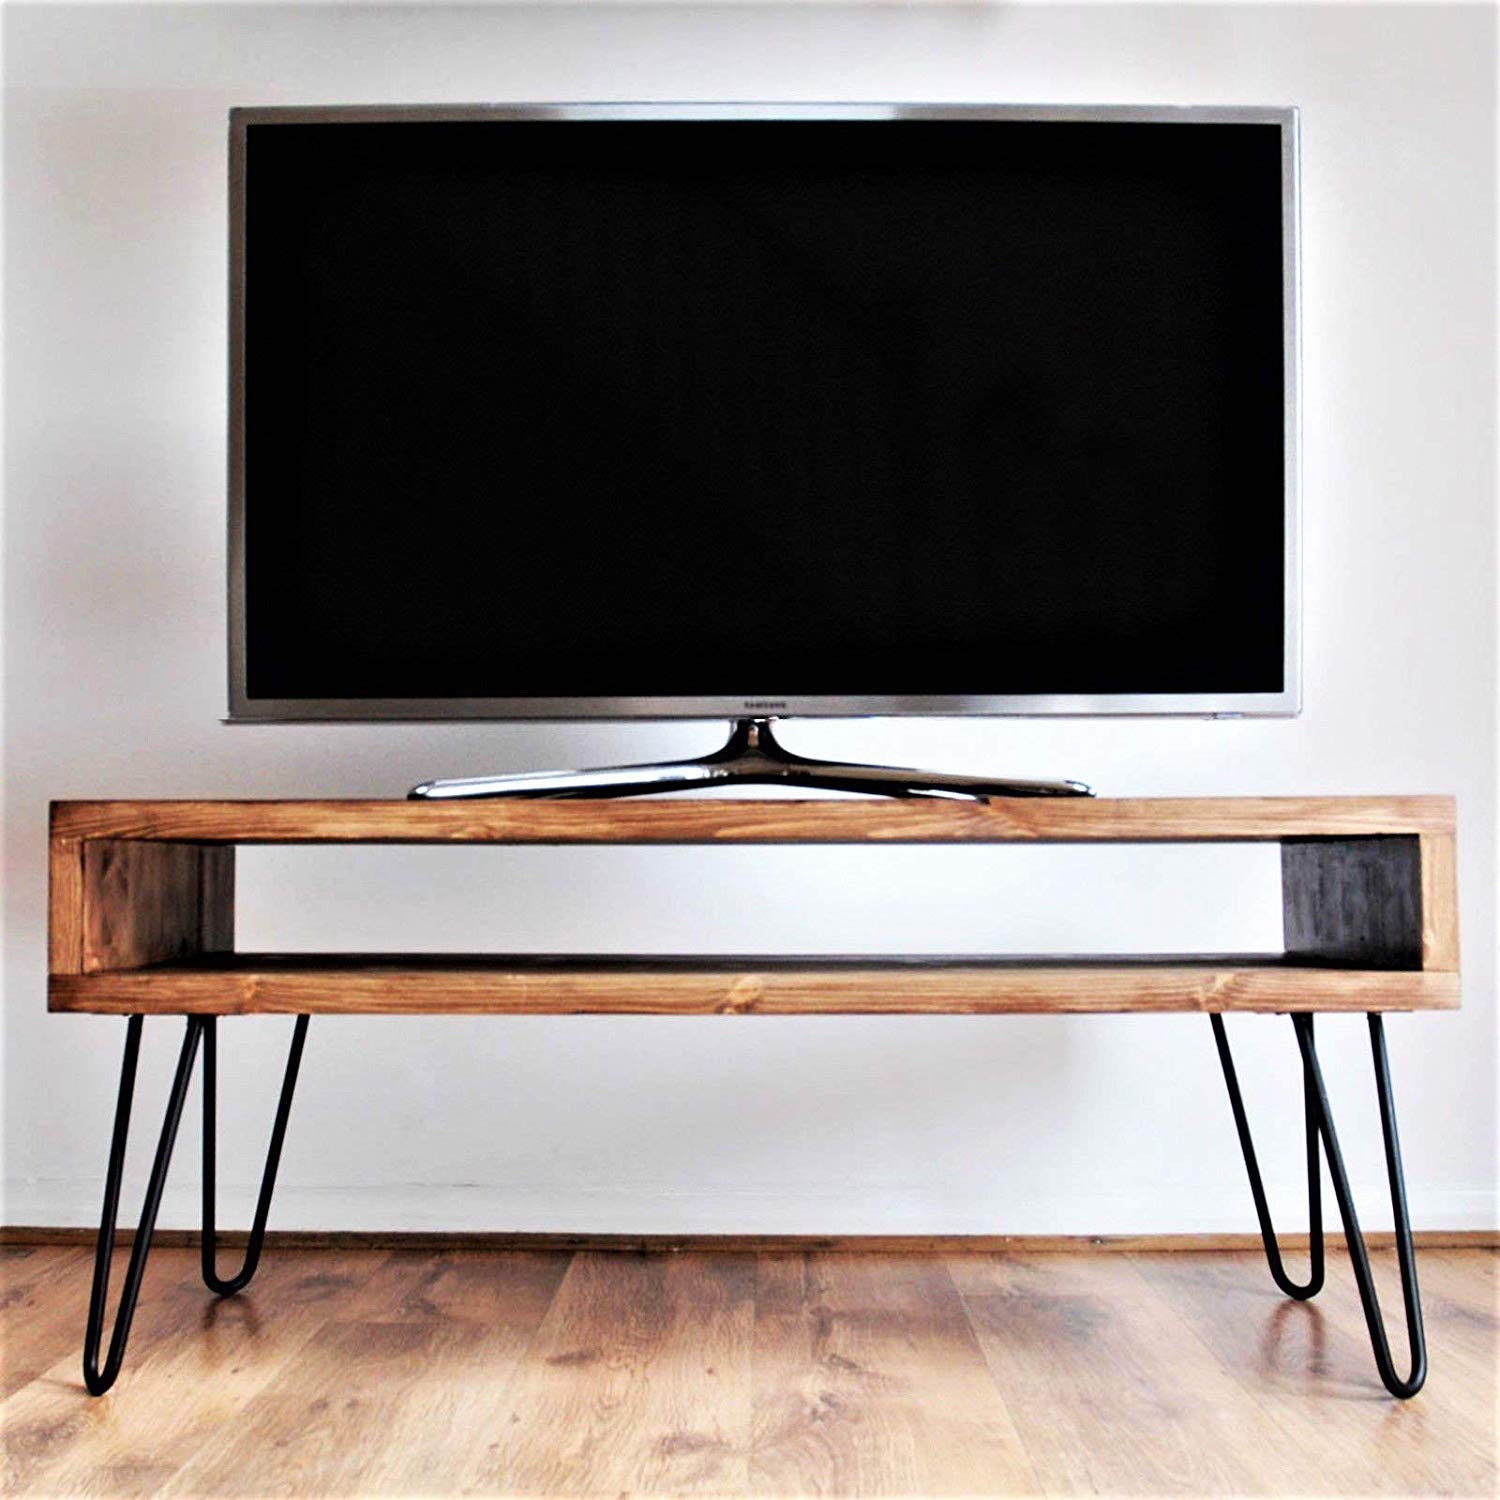 Here’s another simple TV stand design for your next DIY project. In this project you need some solid wood planks, and four hairpin table legs. That’s all. Once completed, you have a solid minimalist TV stand, full with 50s vibes, in your living room.
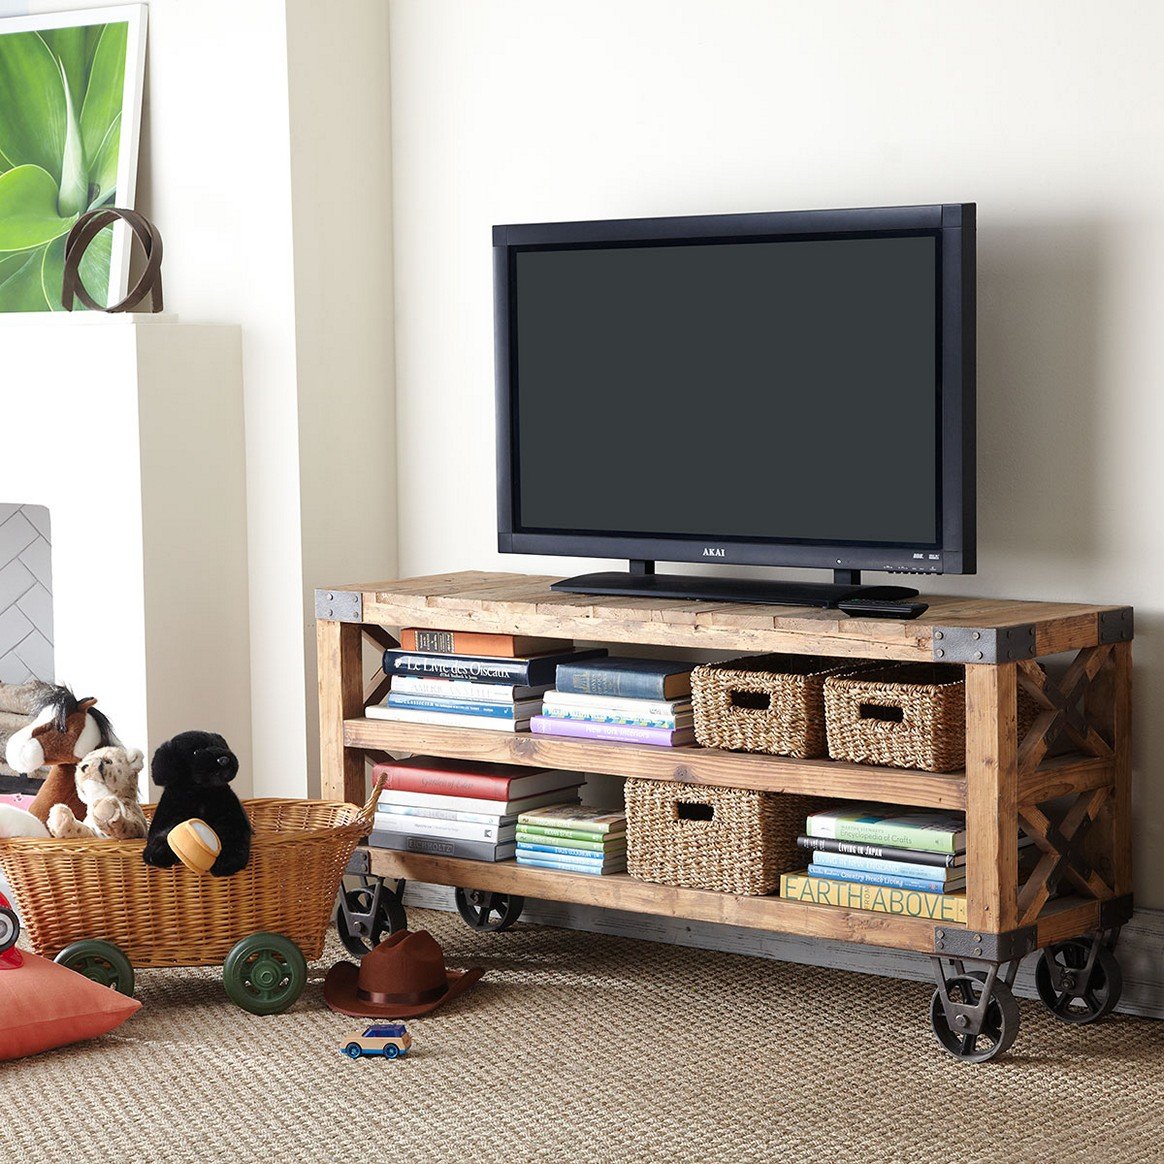 A problem of a furniture is that it often difficult to move. So you have to be sure of the placement before setting it in a room –or you have to move it again and again in an arduous process.
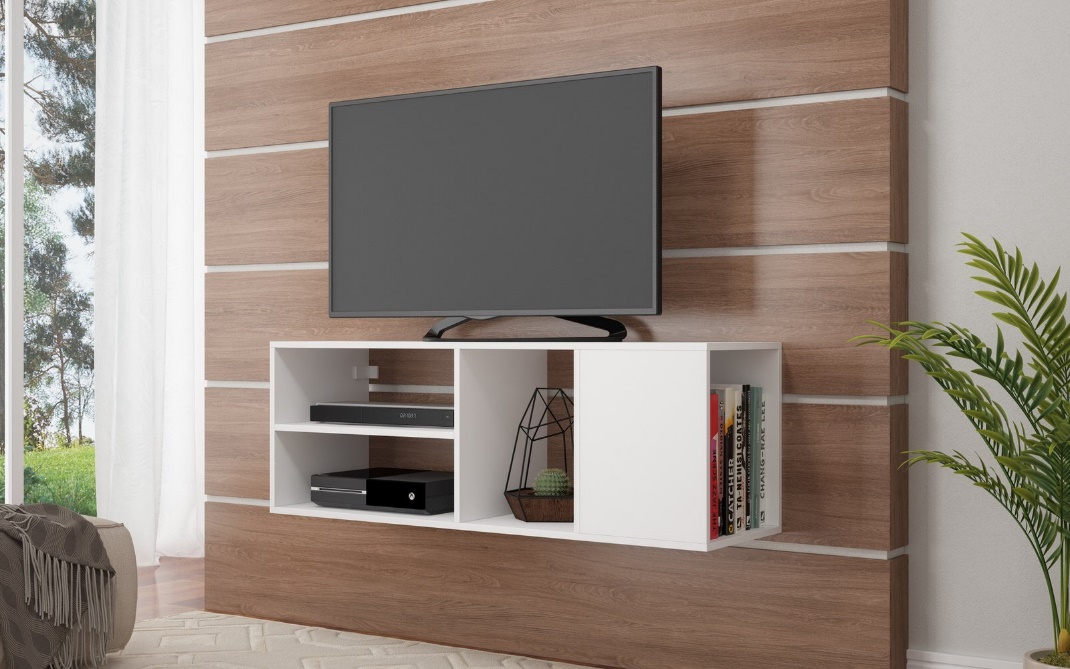 Another floating TV stand? Yes, sure. And now it comes with enough storage system for your stuff. This DIY TV stand also looks lovely in your minimalist living room. You can make it with plywood or solid wood. Whatever materials you choose, it always combines well with the wood paneling.
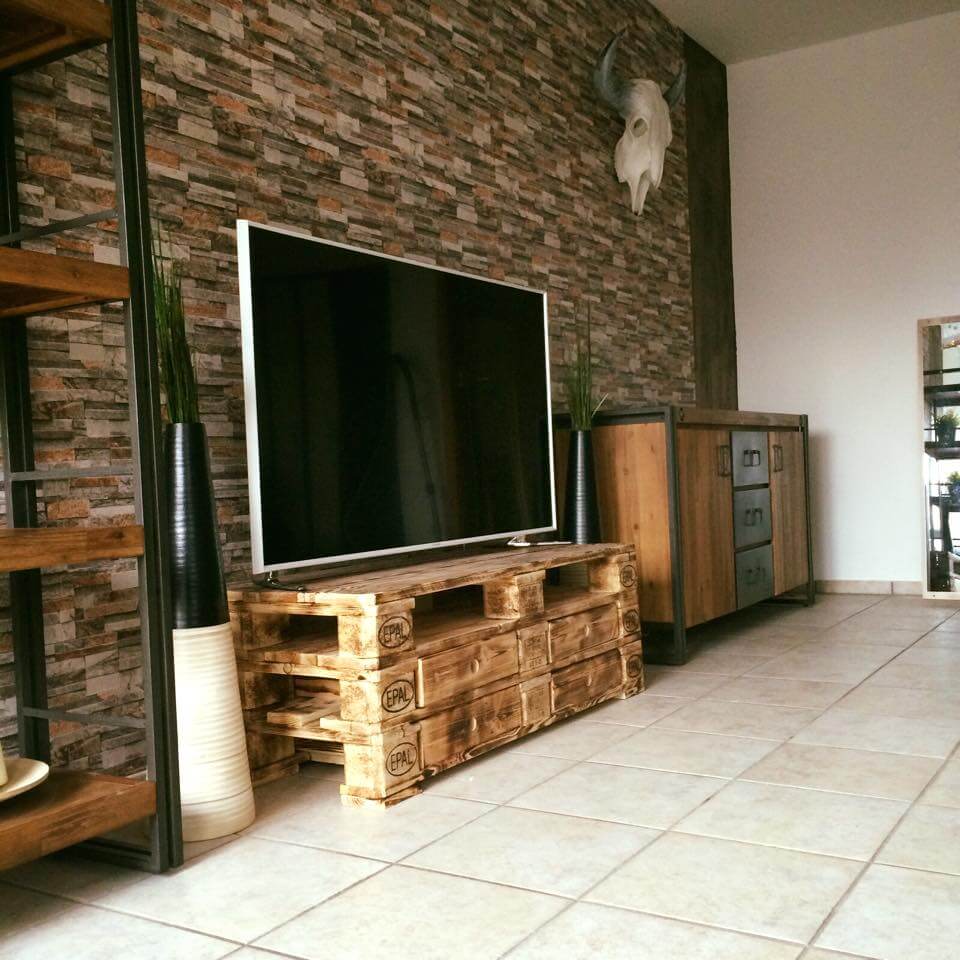 With a little imagination, you can turn a pile of wood pallets into a charming TV stand. And here’s the example for you. You still have the rugged look of a wood pallet, but the stand design able to smooth it and emphasis its raw beauty.
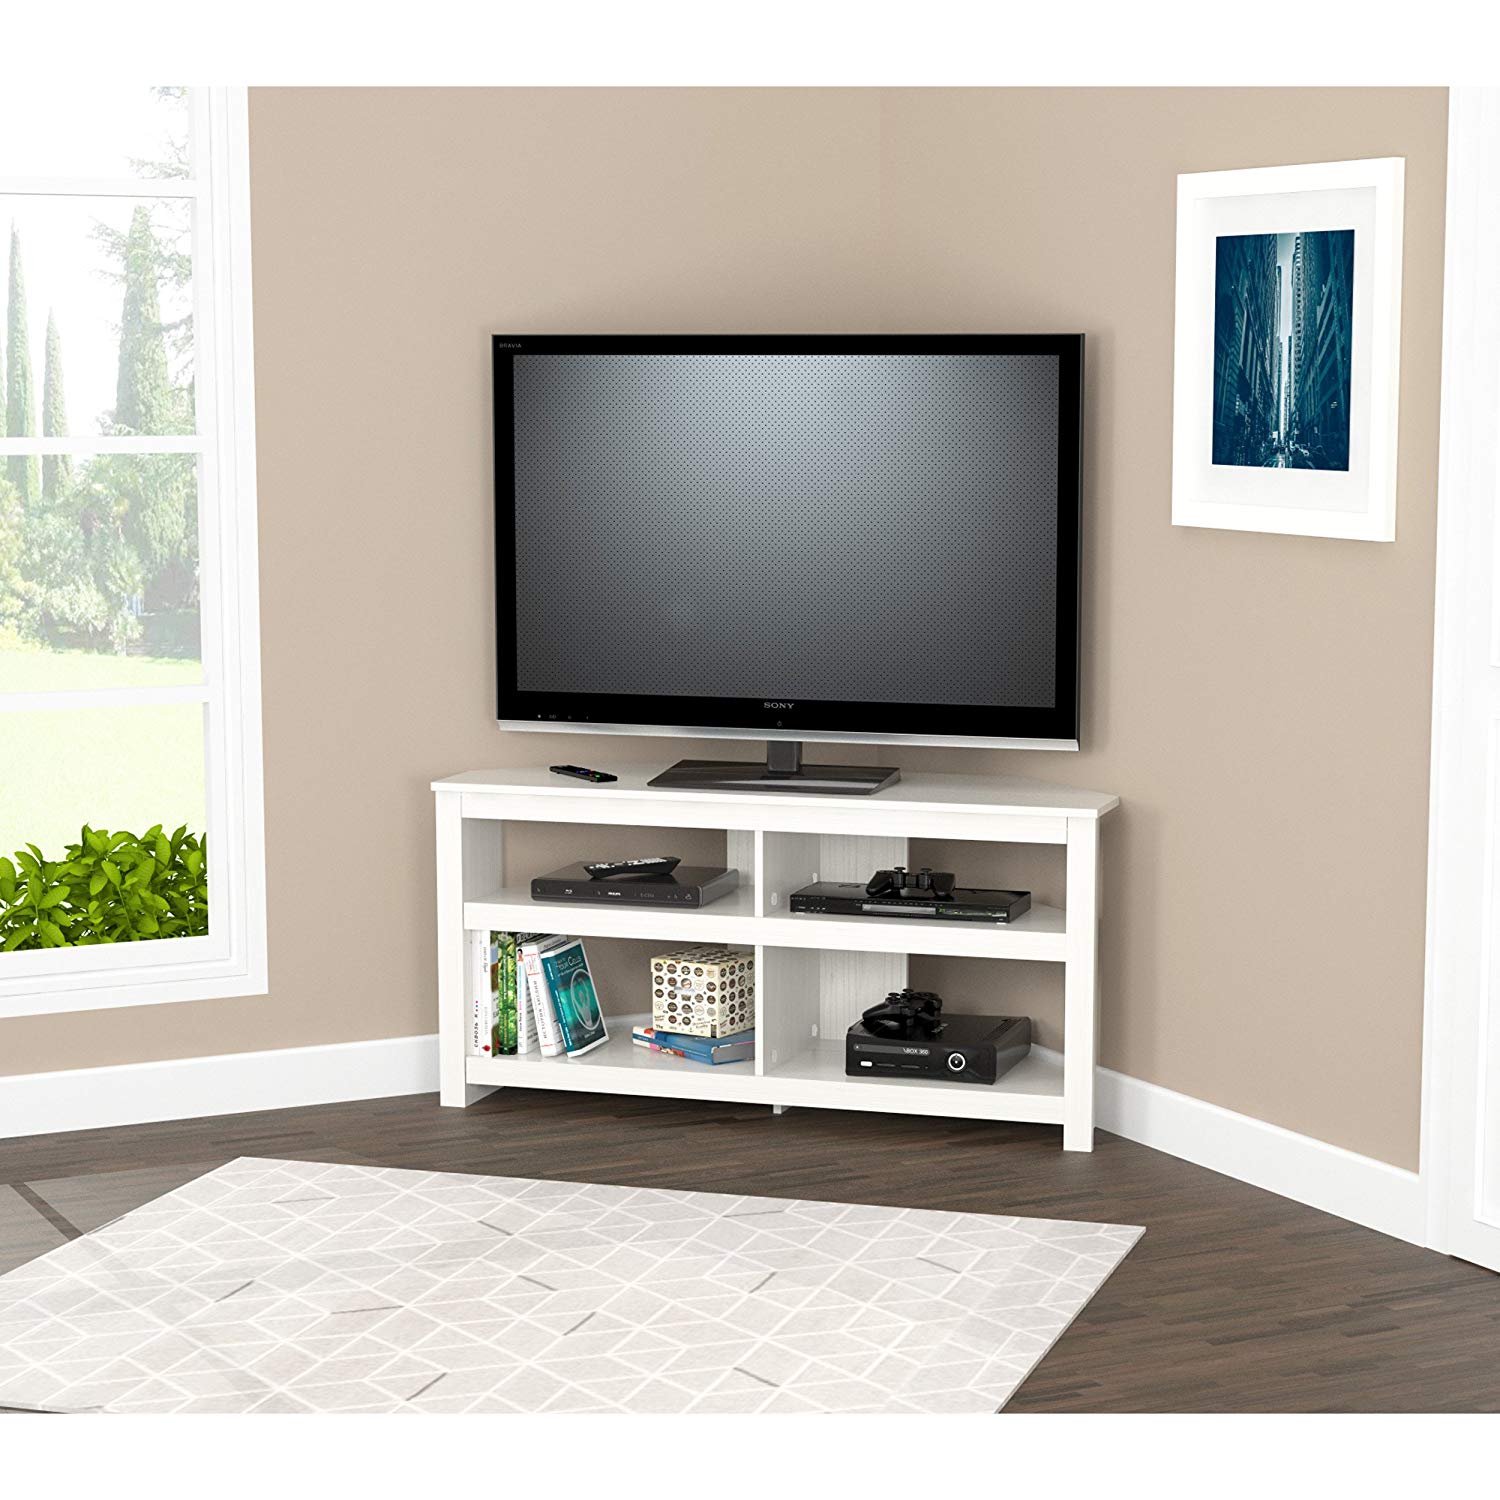 You have met at least two corner TV stands. All are of floating types. Now you get the regular one, this elegant small TV stand.
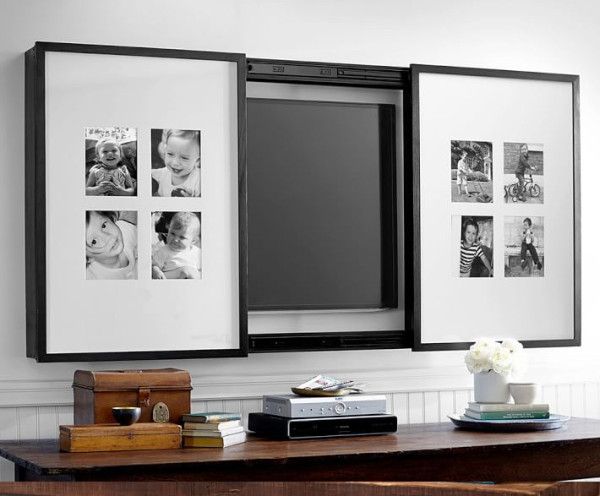 If you don’t want any distraction from technological advancement (like TV) all the time, put the TV in this TV stand. This stand is perfect haven for your TV, it also can hid the TV from your eyes when not in use.
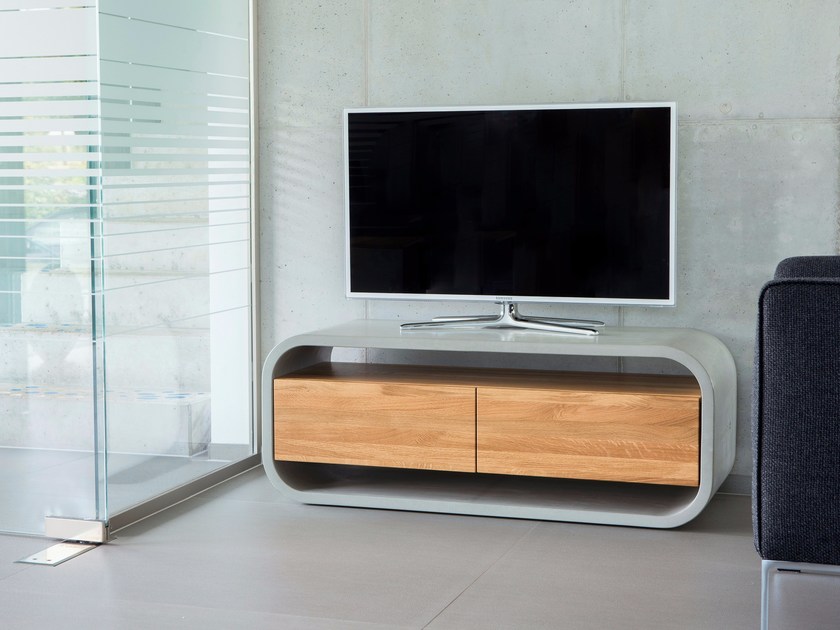 Now concrete is not only for your wall, floor, or roof. Concrete has become a staple of interior designer. The grey curvy TV stand in the example is also of concrete. The engineering technology advancements now enable you to have slim and easy-to-manipulate concrete. On of the result is this concrete stand. To add the warm vibes, a wood block is inserted into it.
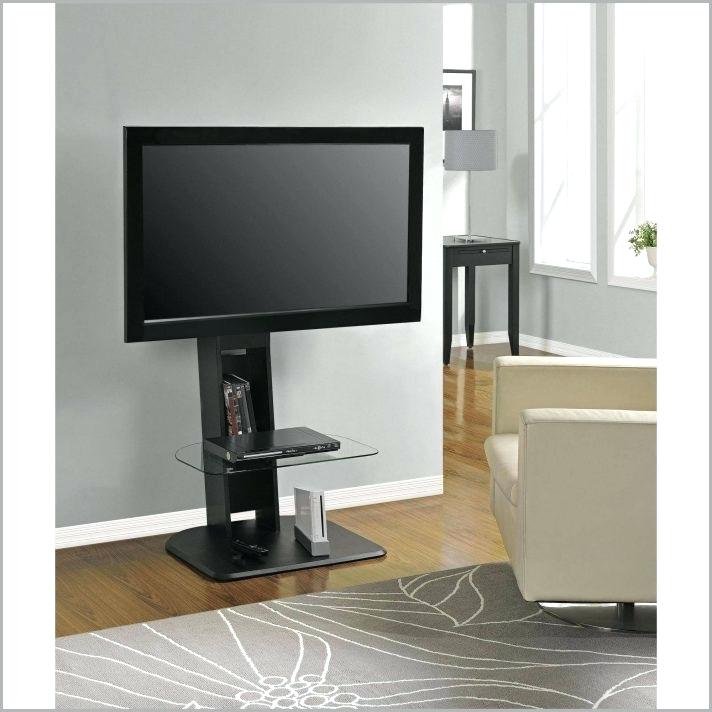 For your bedroom, you have several alternative of TV stands. You can have a retractable stand, a wall stand, a dresser TV stand, or just a standalone slim TV stand like this picture.
 This TV stand is your other alternative of the previous bedroom stand. This time you have a solid TV stand with dresser in a chic modern style.
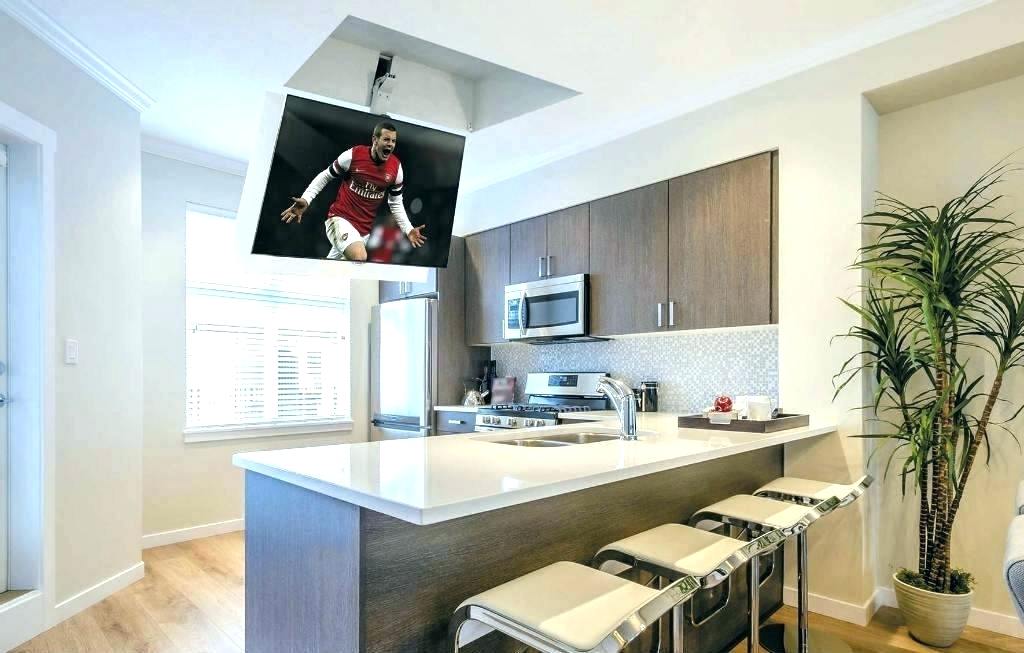 As alternative of a TV stand, you have a TV mount. This mount is particularly useful if you want to have special feature about how your TV appear to you. In this example, you meet a retractable TV mount, set on the ceiling.
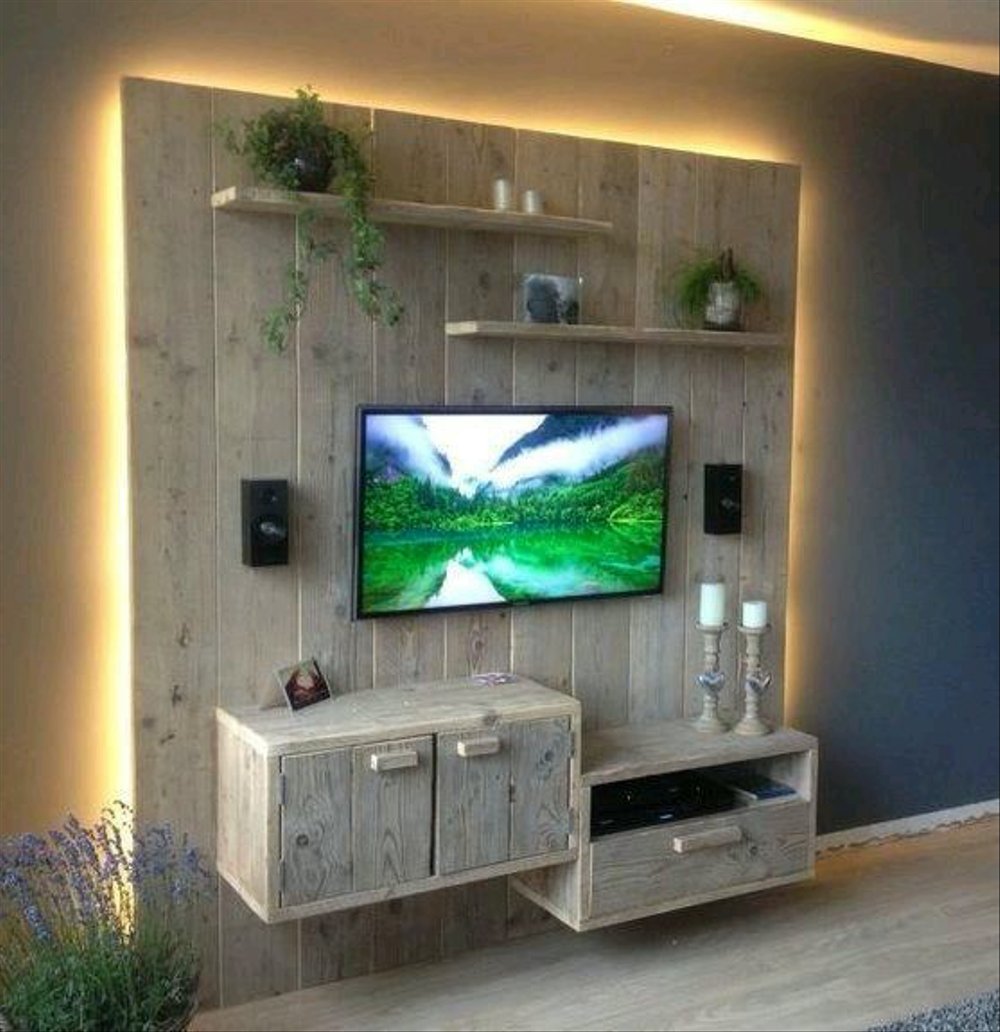 Lighting is a major factor in an interior design project. It gives the room its soul. A good lighting also helps boosting your positive mood. For the reason, you may find several type of interior lighting, being the ambient light as one of them.
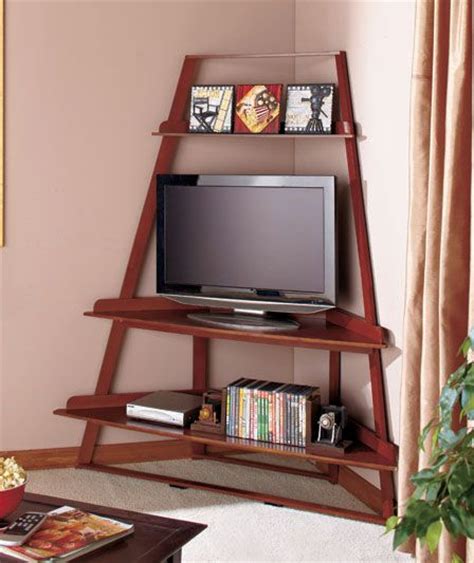 This corner style won’t hinder you from seeing most of the corner area, so it won’t makes a room (especially small room) feels cramped or hectic. The key is its light design, which is featured with cascading style of light wood structures. In this design, each levels serve as shelves.
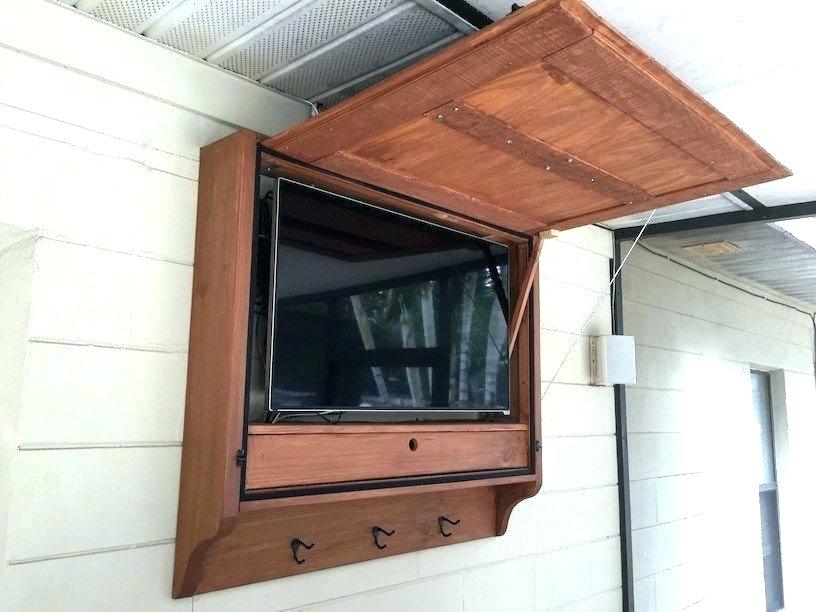 For the patio, deck, or garden, this outdoor TV sand design is yours. The design includes a robust cover to protect the TV from the elements. This design also has other function, as cloth hanger. Seeing the simple construction, we sure you can make it yourself in your free time. And now, you have no reason to not watching TV while doing activities outside.